
There are many tutorials and courses available to get started with Swift development. The issue with many online resources is that they're focused on a specific topic, ignoring essential aspects of Swift development. What teachers often forget is that developers new to a language, a framework, or a technology, are very receptive to new information. This includes best practices, but, unfortunately, it also means less good practices or even bad habits.
In this tutorial, I'd like to walk you through the steps I take to set up a brand new project in Xcode. By following the steps laid out in this tutorial, you set yourself up for a successful project. Let it sink in and tweak it to your own needs and preferences.
Step 1: Setting Up the Project
I understand that it can be useful to experiment from time to time, but I always use the Single View App template for new projects. It gives me an application delegate, a view controller, and a storyboard. I don't need anything else when I'm starting a new project.
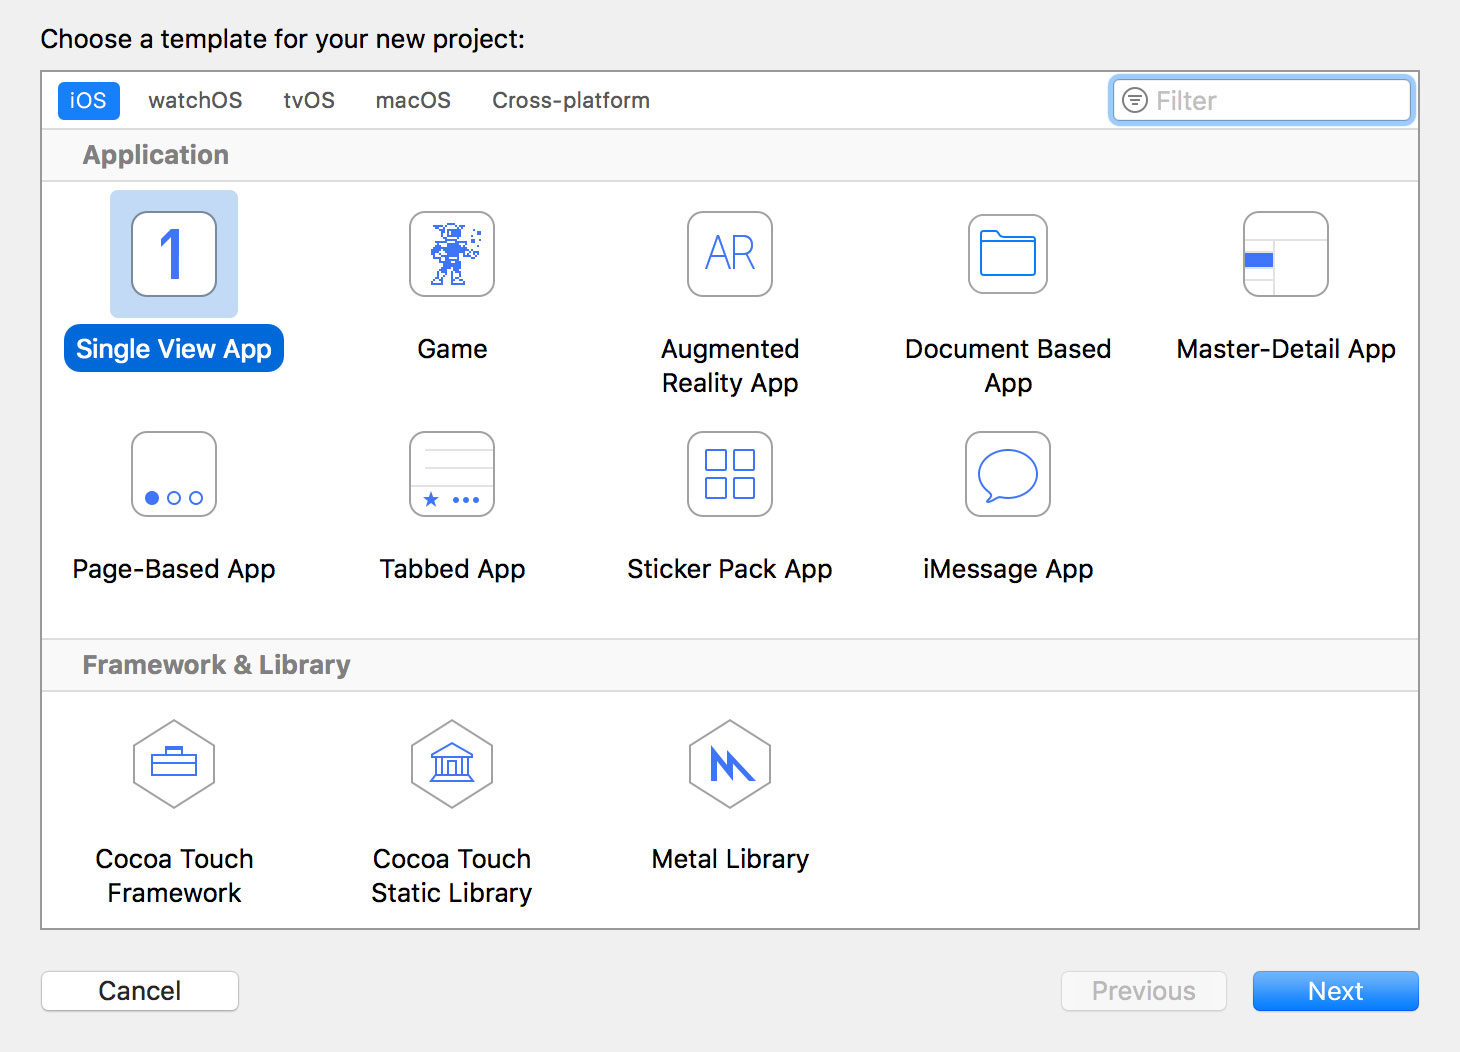
Give the project a sensible name and check Include Unit Tests and Include UI Tests. I never check Use Core Data for production projects. I don't like the boilerplate code of the Core Data template.

While it may seem convenient to check Create Git repository on my Mac, I don't recommend this. Why is that? The project first needs a bit of housekeeping before I'm ready for my first commit, Xcode doesn't automatically add a .gitignore file, and I don't like Xcode's first commit message. The latter is obviously a nitpicky detail.

Step 2: Organizing the Project
I always start by cleaning up the project. This simply means putting the application delegate in a separate group, organizing the view controllers, and making sure no files live at the root of the project. Small projects don't have the problem of becoming cluttered, but large projects do, and very quickly at that.
This is the project Xcode has created for us.

And this is the project after adding some structure.

Step 3: Adding a README.md
Even if you're working in a team of one, it can be very helpful to document your project and it's something I strongly recommend. If you've ever browsed GitHub, then you probably know that putting a file named README.md at the root of the project is a good first step. Markdown is a wonderful markup language and it's ideal for this purpose. This is the README.md file I usually start with.
# Project Name

### Author
Bart Jacobs

### Description
Lorem ipsum dolor sit amet, consectetur adipiscing elit. Curabitur ac dolor justo, ac tempus leo. Etiam pulvinar eros at lectus sollicitudin scelerisque. Aliquam erat volutpat. Suspendisse eu eros non elit blandit suscipit. Morbi scelerisque euismod tempus.

### Dependencies
- Unbox
- RxSwift
- RxCocoa
- Reveal
I recommend putting more effort into the project's documentation if you're working in a team. Including a short guide that helps new team members up to speed can save everyone time and frustration.
Step 4: Build and Run
Before I put the project under source control, I make sure it builds and runs without warnings and errors. After updating the project's structure, it sometimes happens that Xcode can no longer find some of the files I moved. We need to fix this before putting the project under source control. You should only make a commit if the project builds successfully, free of warnings and errors.
Step 5: Adding a .gitignore
We also need to add a .gitignore file. If you're unfamiliar with Git and the purpose of a .gitignore file, then I recommend reading more about this fantastic version control system.
The .gitignore file at the root of the project defines which files need to be kept under source control and which files can be ignored. This is what the .gitignore file of most of my projects looks like.
#########################
# **.gitignore** file for Xcode4 / OS X Source projects
#
# NB: if you are storing "built" products, this WILL NOT WORK,
#   and you should use a different **.gitignore** (or none at all)
# This file is for SOURCE projects, where there are many extra
#   files that we want to exclude
#
# For updates, see: http://stackoverflow.com/questions/49478/git-ignore-file-for-xcode-projects
#########################

#####
# OS X temporary files that should never be committed

.DS_Store
*.swp
profile


####
# Xcode temporary files that should never be committed
#
# NB: NIB/XIB files still exist even on Storyboard projects, so we want this...

*~.nib


####
# Xcode build files -
#
# NB: slash on the end, so we only remove the FOLDER, not any files that were badly named "DerivedData"

DerivedData/

# NB: slash on the end, so we only remove the FOLDER, not any files that were badly named "build"

build/


#####
# Xcode private settings (window sizes, bookmarks, breakpoints, custom executables, smart groups)
#
# This is complicated:
#
# SOMETIMES you need to put this file in version control.
# Apple designed it poorly - if you use "custom executables", they are
#  saved in this file.
# 99% of projects do NOT use those, so they do NOT want to version control this file.
#  ..but if you're in the 1%, comment out the line "*.pbxuser"

*.pbxuser
*.mode1v3
*.mode2v3
*.perspectivev3
#    NB: also, whitelist the default ones, some projects need to use these
!default.pbxuser
!default.mode1v3
!default.mode2v3
!default.perspectivev3


####
# Xcode 4 - semi-personal settings, often included in workspaces
#
# You can safely ignore the xcuserdata files - but do NOT ignore the files next to them
#

xcuserdata

####
# XCode 4 workspaces - more detailed
#
# Workspaces are important! They are a core feature of Xcode - don't exclude them :)
#
# Workspace layout is quite spammy. For reference:
#
# (root)/
#   (project-name).xcodeproj/
#     project.pbxproj
#     project.xcworkspace/
#       contents.xcworkspacedata
#       xcuserdata/
#         (your name)/xcuserdatad/
#     xcuserdata/
#       (your name)/xcuserdatad/
#
#
#
# Xcode 4 workspaces - SHARED
#
# This is UNDOCUMENTED (google: "developer.apple.com xcshareddata" - 0 results
# But if you're going to kill personal workspaces, at least keep the shared ones...
#
#
!xcshareddata

####
# XCode 4 build-schemes
#
# PRIVATE ones are stored inside xcuserdata
!xcschemes

####
# Xcode 4 - Deprecated classes
#
# Allegedly, if you manually "deprecate" your classes, they get moved here.
#
# We're using source-control, so this is a "feature" that we do not want!

*.moved-aside

# CocoaPods
/Pods
As you can see it includes references to Xcode 4, which shows you how long I've been using this .gitignore file. It's changed a bit over the years, but it continues to work well for me. While most of the contents are easy to understand, there are a few details that are worth pointing out.
At the bottom, you can see a reference to CocoaPods, the dependency manager of my choice. The /Pods entry means that I ignore the entire Pods directory. This is a personal choice with its pros and cons. I've never run into the cons, which is why I've stuck with this option. The CocoaPods website recommends to put the Pods directory under source control, but it also emphasizes that it's up to you to make that decision.
While ignoring the Pods directory is fine and up to you to decide, you should never ignore Podfile.lock or, if you're using Carthage, Cartfile.lock. As the extension of the file implies, a lock file locks the current configuration. What does that mean?
A project's Podfile or Cartfile describes the project's dependencies, optionally specifying the version of each dependency. The project's Podfile.lock or Cartfile.lock locks the current configuration, including the version that's being used by the project.
Putting lock files under source control is especially important if you're working in a team or rely on a build server for distributing builds. When a team member or build server checks out the repository and installs the project's dependencies by running pod install or carthage bootstrap, you want to make sure the correct version of each dependency is installed.
The .gitignore file also defines that I ignore any personal preferences and settings. You don't want to put personal information under source control. This is even more important if you're working in a team. Avoid cluttering the repository with the preferences of every team member that worked on the project.
To be clear, I didn't create this .gitignore file from scratch. I don't recall where I picked it up, but it's important to be critical of the things you pick up from other developers. Make sure you understand every line of the .gitignore file you use in your projects.
Step 6: Putting the Project Under Source Control
The most popular version control system in the Cocoa and Swift communities is Git. It's a wonderful piece of software with many features and it's easy to get started with. When I wrote my first lines of code many moons ago, I didn't know about source control and discovering Git was a true revelation. It was one of those aha moments.
It's surprising to see that there are still developers that don't use any type of source control. Don't be embarrassed if that's you. But take a moment to learn the basics of Git, or any other version control system, and take your work seriously. You don't want to lose any work by not using source control.
The steps I take to put the project under source control are always the same. Take a look at the following commands. This is all it takes to get started with Git.
git init
git add .
git commit -m "Project setup"
Step 7: Pushing the Project to GitHub
I very much enjoy using GitHub and, to make sure my work is safe, I create a private repository and push the project to GitHub. You can use other solutions as well, such as Bitbucket or GitLab. Once you've created the repository on GitHub, you add it as a remote and push the repository.
git remote add origin <URL>
git push origin master
Step 8: Optional Steps
You can take it a few steps further and, if you're working in a company, that may be necessary. These steps usually include adding a Gemfile, setting up continuous integration, or creating a project in a management tool. These steps are optional, though.
Automation
There are several tools for automating the creation of a new Xcode project. One of the more popular command line tools is Liftoff, developed and maintained by the folks at thoughtbot. These types of developer tools can be useful if you're working in a medium to large team. Liftoff has many features for configuring Xcode projects with a handful of commands. It ensures the projects your team creates stick to a set of guidelines you define.
While these command line tools are interesting and have their place, keep in mind that they are a dependency of your workflow. Xcode evolves and changes every year. That also means the developer tools you use on top of Xcode also need to be updated. If you're working in a small team or a team of one, then automating the creation of new projects is usually not worth the risk.