The analytics library we built in this series is easy to use thanks to its intuitive API. The call site is no longer littered with string literals and the API the analytics library exposes is type safe. We don't stop here, though. I promised you that the analytics library would be testable. Let's focus on that aspect in the next few episodes.
Testability as a Feature
If you know that you need to unit test the code you write, you automatically write better code. That is my experience and I'm sure I'm not alone. Investing time and resources in unit testing improves the overall quality of the product you build. A well-designed library should be easy to unit test, that is, testability should be a feature.
I know and understand that unit testing isn't always a top priority for many developers and companies, but that is a missed opportunity in my view. There is a good reason I cover unit testing in most of the series I publish on Cocoacasts. This series is no exception. If you are new to unit testing, then give it a try by following along with me. If your goal is to become a better developer, then unit testing is an inextricable part of that journey.
Adding a Test Target
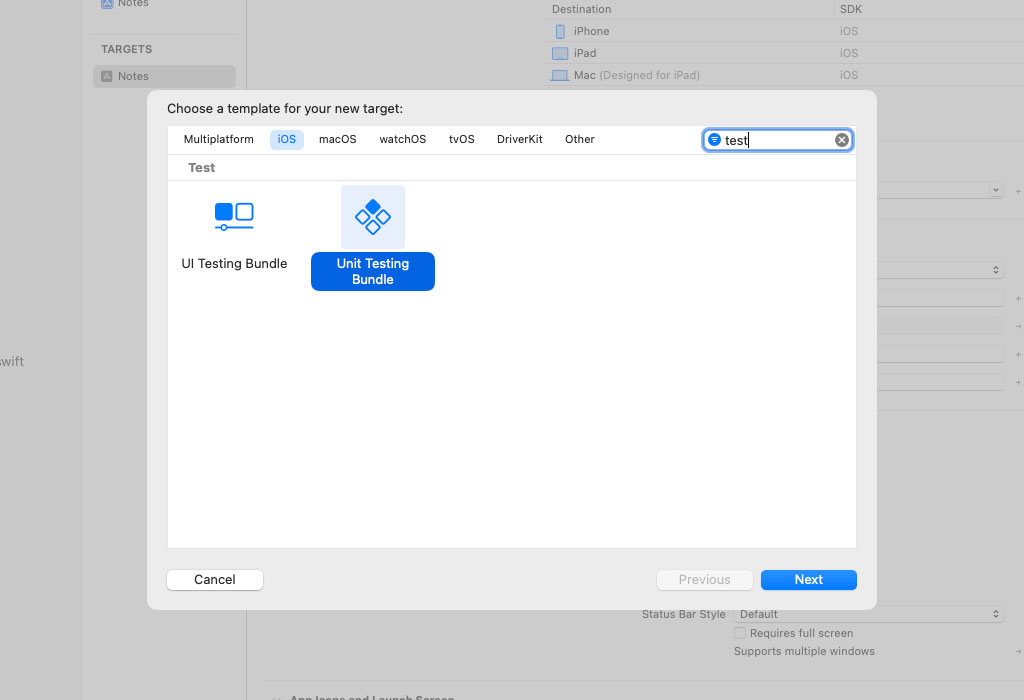
Before we can write unit tests, we need to add a target. Open the Project Navigator on the left and select the Notes project. Click the + button at the bottom of the list of targets. Choose Unit Testing Bundle from the iOS > Test section.
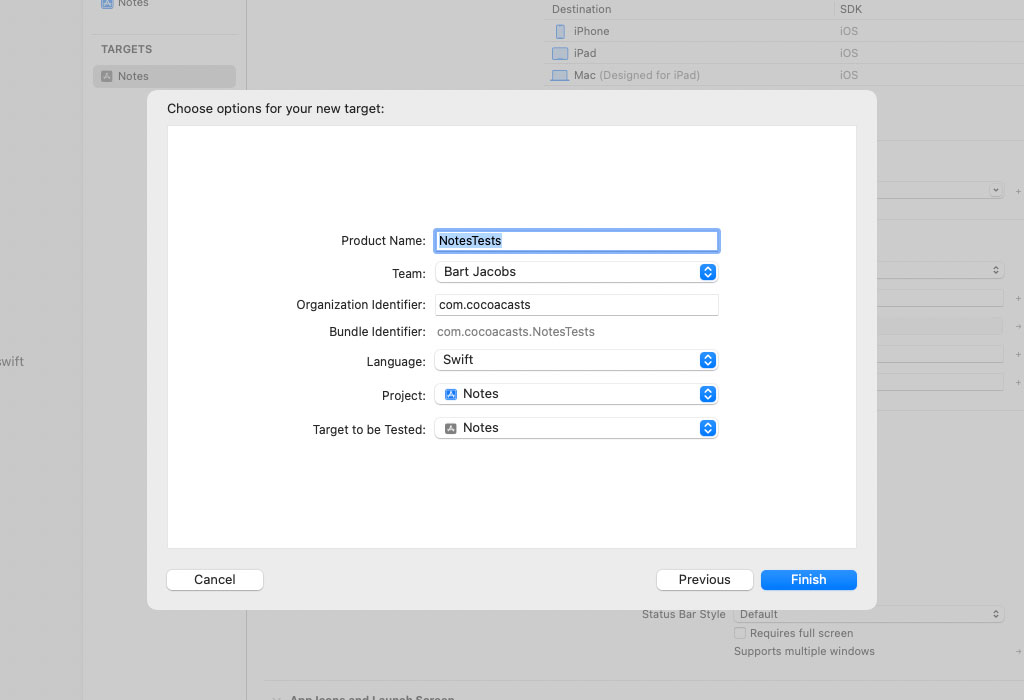
Set Product Name to NotesTests, and make sure Project and Target to be Tested are set to Notes.
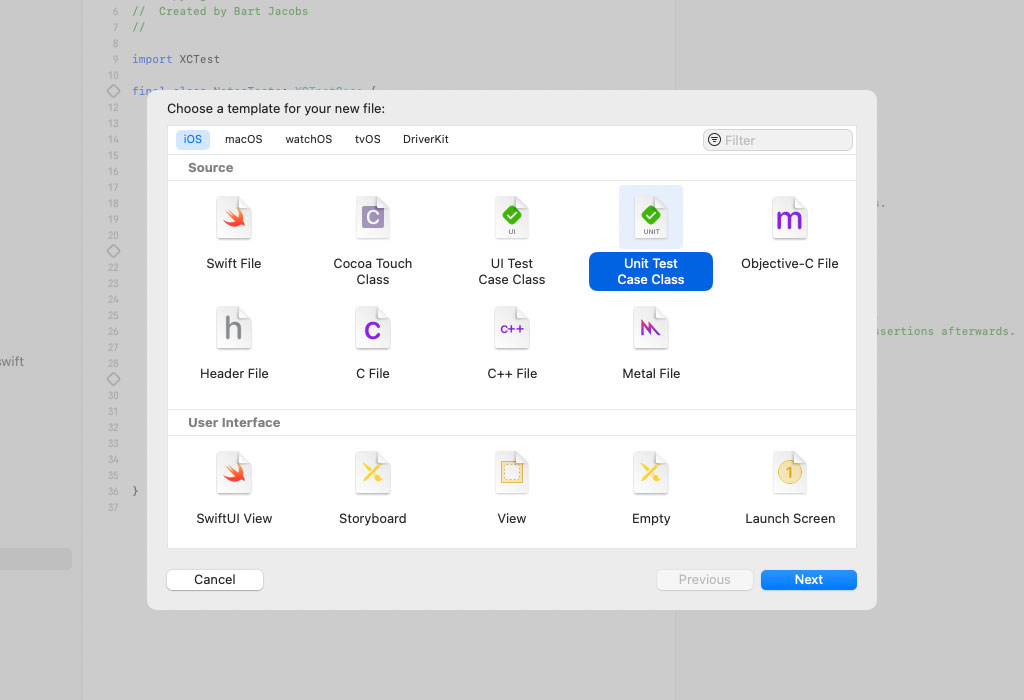
Xcode added a group with name NotesTests that contains the unit tests we are about to write. The group contains a file with name NotesTests.swift. It contains a few unit tests to help you get started. We won't be using it, though. Add a Swift file to the NotesTests group by choosing the Unit Test Case Class template from the iOS > Source section.
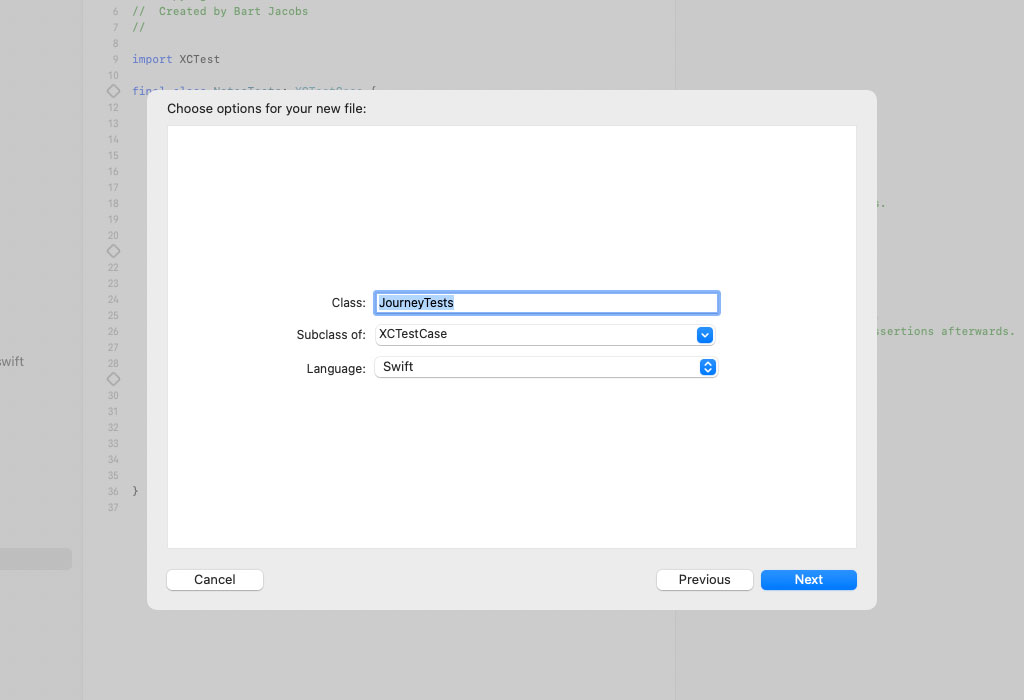
Name the class JourneyTests. Note that the class we are about to create is a subclass of XCTestCase class. Make sure to add the Swift file to the NotesTests target.
Before we continue, remove NotesTests.swift from the NotesTests group. Open JourneyTests.swift. Add an import statement for the Notes target and prefix the import statement with the testable attribute. The testable attribute ensures we have access to internal entities from within the test target.
import XCTest
@testable import Notes

final class JourneyTests: XCTestCase {

	...

}
Enabling Code Coverage
Before we write the first unit test for Journey, I want to enable code coverage. While code coverage isn't perfect, it can help you spot gaps in your test suite and that is how we use code coverage in this series. Let me show you how it works.
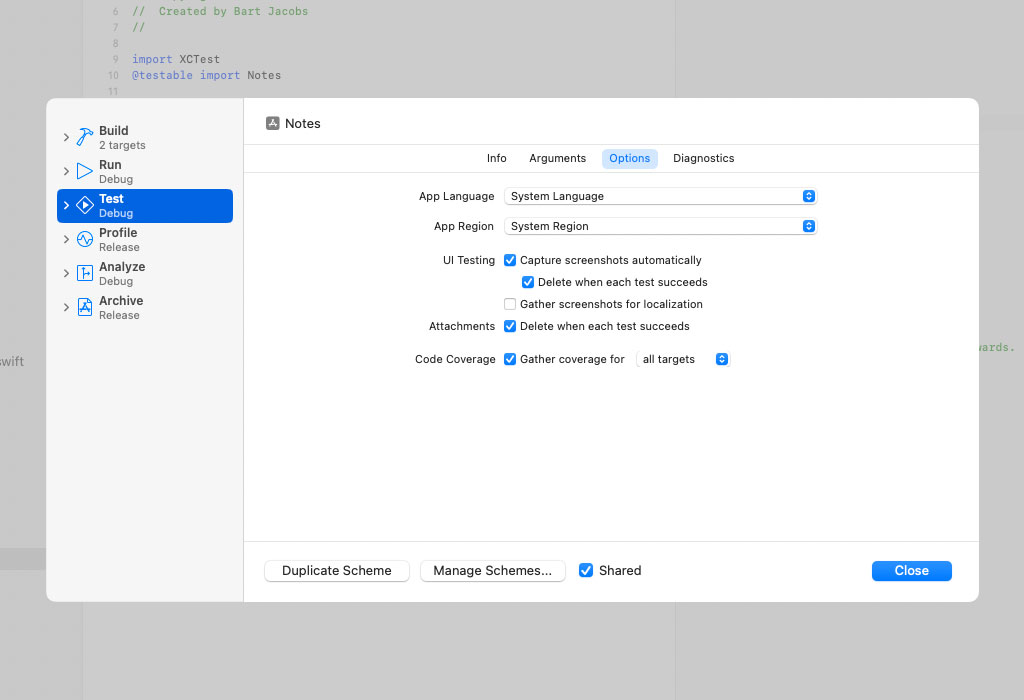
Select the Notes scheme at the top and choose Edit Scheme... from the menu. Select the Test tab on the left and check the Code Coverage checkbox on the right. Make sure it reads Gather coverage for all targets. That is fine for a simple project like Notes.
That is the only change we need to make to instruct Xcode to collect coverage data. To display the coverage data, we need to make a small change in the source editor. Open JourneyTests.swift. Press Option and click Journey.swift top open Journey.swift in the assistant editor on the right.
I like this setup for writing unit tests because Xcode shows me which unit tests I need to write. To visualize code coverage in the source editor, click the Editor Options button in the top right and choose Code Coverage. By enabling code coverage in the source editor, a gutter appears on the right. Let me show you how it works.
Run the test suite by choosing Test from Xcode's Product menu. A few things happen. Xcode runs the test suite and it gathers coverage data. When the test suite finishes, Xcode displays the coverage data in the gutter on the right of the assistant editor that displays Journey.swift. You should see mostly red, which means we have work to do.
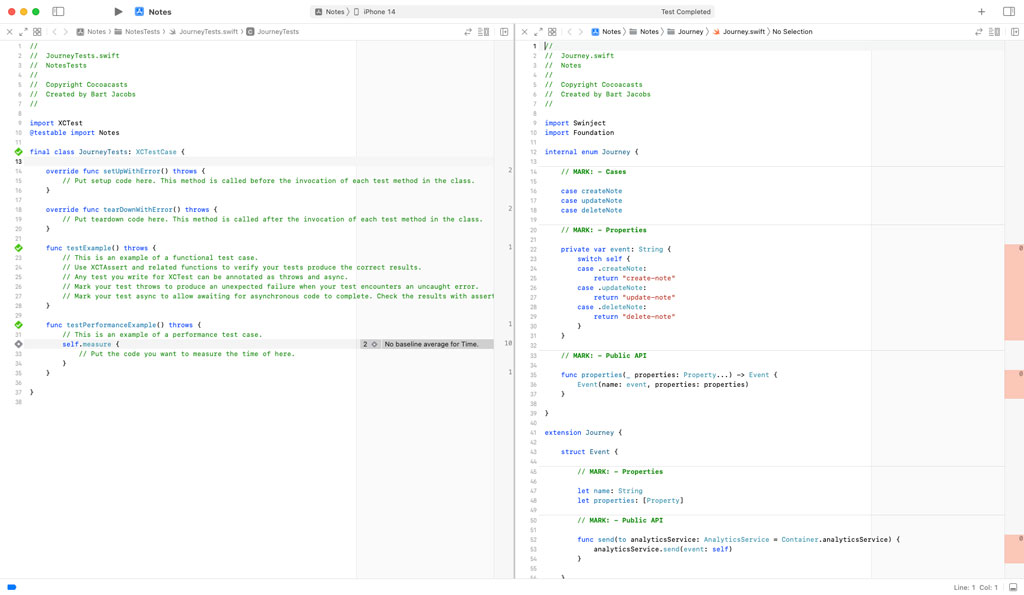
The gutter on the right displays the number of times a code path was executed while the test suite was run. Xcode highlights code paths that weren't executed in red. Code paths that were executed are highlighted in green. Code coverage isn't only useful for measuring how well your test suite covers your code, it is also useful for spotting gaps in your test suite. I find the integration in the source editor very useful.
Creating a Mock Analytics Service
The first unit test we need to write tests the computed event property of the Journey enum. Even though the computed event property is declared privately, we can unit test it just fine. Developers are sometimes tempted to expose implementation details for the sake of unit testing. For example, we could declare the computed event property internally to make it easier to unit test.
That isn't something I recommend, though. You shouldn't compromise the API you built to make unit testing easier. Let me show you how easy it is to write a unit test for the computed event property despite it being private to the Journey enum.
To unit test Journey, we need an environment in which we can send and capture events. This isn't difficult thanks to the foundation we laid earlier in this series. We send an event by invoking the send(to:) method of the Event struct, passing in an object that conforms to the AnalyticsService protocol. Let's do that.
Add a Swift file to the NotesTests group and name it MockAnalyticsService.swift. Add an import statement for the Notes target and prefix the import statement with the testable attribute. Declare a final class with name MockAnalyticsService that conforms to the AnalyticsService protocol.
import Foundation
@testable import Notes

internal final class MockAnalyticsService: AnalyticsService {

}
To conform to the AnalyticsService protocol, the class needs to implement the send(to:) method.
import Foundation
@testable import Notes

internal final class MockAnalyticsService: AnalyticsService {

    // MARK: - Analytics Service

    func send(event: Journey.Event) {

    }

}
We need the ability to ask the mock analytics service which events it was asked to send. Declare a variable property with name events. The property is of type [Journey.Event] and its initial value is an empty array. We declare its setter privately.
import Foundation
@testable import Notes

internal final class MockAnalyticsService: AnalyticsService {

    // MARK: - Properties

    private(set) var events: [Journey.Event] = []

    // MARK: - Analytics Service

    func send(event: Journey.Event) {

    }

}
In the send(to:) method, the mock analytics service appends the Event object to the array of events. That's it.
import Foundation
@testable import Notes

internal final class MockAnalyticsService: AnalyticsService {

    // MARK: - Properties

    private(set) var events: [Journey.Event] = []

    // MARK: - Analytics Service

    func send(event: Journey.Event) {
        events.append(event)
    }

}
Writing the First Unit Test
With the mock analytics service in place, we can write the first unit test. Open JourneyTests.swift and remove the implementation of the JourneyTests class. Declare a method with name testEventNames(). I typically make test methods throwing by default although that isn't required for this example.
import XCTest
@testable import Notes

internal final class JourneyTests: XCTestCase {

    // MARK: - Tests for Event Names

    func testEventNames() throws {

	}

}
We first create an instance of the MockAnalyticsService class. We then create a Journey object and invoke the properties(_:) method to create an Event object. The Event struct exposes the send(to:) method and it is that method that accepts an AnalyticsService object. We pass a reference to the mock analytics service to the send(to:) method.
func testEventNames() throws {
    let analyticsService = MockAnalyticsService()

    Journey.createNote
        .properties()
        .send(to: analyticsService)
}
To unit test the computed event property, we access the array of events the mock analytics service was asked to send through its events property. We assert that the analytics service received one event. We also assert that the name of the first event is equal to create-note.
func testEventNames() throws {
    let analyticsService = MockAnalyticsService()

    Journey.createNote
        .properties()
        .send(to: analyticsService)

    let events = analyticsService.events

    XCTAssertEqual(events.count, 1)
    XCTAssertEqual(events.first?.name, "create-note")
}
Run the test suite to make sure the unit test we wrote passes. Take a look at the gutter on the right of the assistant editor. Notice that it shows a bit of green, confirming that we successfully unit tested the computed event property.

What's Next?
We still have some work ahead of us, but I hope this example showed you that writing unit tests isn't difficult. If you find it difficult or tedious to write unit tests, then the code you are unit testing might be the problem. You may need to rethink how the code is structured and what you can do to make it more testable. In the next episode, we continue writing unit tests for Journey.