
PaintCode is a great macOS application for drawing shapes and converting them to code. I have been using PaintCode for several years and it has saved me countless hours and a lot of frustration. The buttons in Samsara, for example, shown in the screenshot below, are drawn in code using PaintCode.

In this tutorial, I show you how easy it is to import an SVG (Scalable Vector Graphics) image into PaintCode and export it as code, ready to use in your application.
But Why?
Why would you want to draw shapes in code? Why is that better than using images? Depending on the complexity of the shape, drawing shapes in code is mostly faster than loading the image from the application bundle and drawing it onto the screen.
Another benefit is flexibility. It is easy to make changes to icons that are drawn in code. Changing the color or the size of an icon is no rocket science. And PaintCode helps you with this.
Last but not least, the size of the application bundle decreases quite a bit. You don't need to include images at various resolutions in the bundle of your application. And a shape drawn in code looks great on any device, regardless of the screen's resolution. This means that assets drawn in code are automatically future-proof.
Glyphish
Glyphish has been around for many years and I frequently use Joseph Wain's icons. The most recent editions of Glyphish also include an SVG version of each icon. This makes it very easy to import icons into PaintCode and turn them into code.

PaintCode
You can download a free trial of PaintCode from the PixelCut website. I am going to show you how to convert an SVG image into a drawable shape. Open PaintCode and create a new document by choosing New from the File menu. Drag and drop the SVG image onto the canvas.

Because we imported an SVG image, the components of the shape are shown in the inspector on the right. The generated code to draw the shape is visible at the bottom.
PaintCode is a powerful drawing application. If you want, you can use it to create the assets for your application. I am not a great designer, which is why I use third party icons that I convert to code.
Set the source code editor at the bottom to iOS > Swift, copy the code, and fire up Xcode.

Xcode
Create a new project based on the Single View Application template and create a UIView subclass. Name the subclass CoffeeView and make sure to set Language to Swift.

Open CoffeeView.swift and paste the code you copied from PaintCode into the draw(_:) method. One problem is immediately obvious. PaintCode currently doesn't support Swift 2.3 and Swift 3. PixelCut has announced that support for Swift 2.3 and Swift 3 is coming this month.

The Core Graphics API underwent several substantial changes in Swift 3. Fortunately, it is easy to update the code to Swift 3. This is what it looks like when you are finished.
override func draw(_ rect: CGRect) {
    //// Color Declarations
    let strokeColor = UIColor(red: 0.000, green: 0.000, blue: 0.000, alpha: 1.000)

    //// Glyphish-9-/-50x50-Outlined
    //// 50x50-Outlined
    //// 1339-coffee
    //// Stroke-1 Drawing
    let stroke1Path = UIBezierPath()
    stroke1Path.move(to: (CGPoint(x: 47, y: 64)))
    stroke1Path.addLine(to: CGPoint(x: 27, y: 64))
    stroke1Path.addCurve(to: CGPoint(x: 23, y: 60), controlPoint1: CGPoint(x: 24.79, y: 64), controlPoint2: CGPoint(x: 23, y: 62.21))
    stroke1Path.addLine(to: CGPoint(x: 23, y: 36))
    stroke1Path.addLine(to: CGPoint(x: 51, y: 36))
    stroke1Path.addLine(to: CGPoint(x: 51, y: 60))
    stroke1Path.addCurve(to: CGPoint(x: 47, y: 64), controlPoint1: CGPoint(x: 51, y: 62.21), controlPoint2: CGPoint(x: 49.21, y: 64))
    stroke1Path.addLine(to: CGPoint(x: 47, y: 64))
    stroke1Path.close()
    stroke1Path.miterLimit = 4

    stroke1Path.lineCapStyle = .round

    stroke1Path.lineJoinStyle = .round

    stroke1Path.usesEvenOddFillRule = true

    strokeColor.setStroke()
    stroke1Path.lineWidth = 2
    stroke1Path.stroke()


    //// Stroke-3 Drawing
    let stroke3Path = UIBezierPath()
    stroke3Path.move(to: (CGPoint(x: 51, y: 40)))
    stroke3Path.addLine(to: CGPoint(x: 23, y: 40))
    stroke3Path.miterLimit = 4;

    stroke3Path.lineCapStyle = .round

    stroke3Path.lineJoinStyle = .round

    stroke3Path.usesEvenOddFillRule = true

    strokeColor.setStroke()
    stroke3Path.lineWidth = 2
    stroke3Path.stroke()


    //// Stroke-5 Drawing
    let stroke5Path = UIBezierPath()
    stroke5Path.move(to: (CGPoint(x: 33, y: 16)))
    stroke5Path.addLine(to: CGPoint(x: 34, y: 19.6))
    stroke5Path.addLine(to: CGPoint(x: 32, y: 24.4))
    stroke5Path.addLine(to: CGPoint(x: 33, y: 28))
    stroke5Path.miterLimit = 4;

    stroke5Path.lineCapStyle = .round

    stroke5Path.lineJoinStyle = .round

    stroke5Path.usesEvenOddFillRule = true

    strokeColor.setStroke()
    stroke5Path.lineWidth = 2
    stroke5Path.stroke()


    //// Stroke-7 Drawing
    let stroke7Path = UIBezierPath()
    stroke7Path.move(to: CGPoint(x: 41, y: 20))
    stroke7Path.addLine(to: CGPoint(x: 42, y: 23.6))
    stroke7Path.addLine(to: CGPoint(x: 40, y: 28.4))
    stroke7Path.addLine(to: CGPoint(x: 41, y: 32))
    stroke7Path.miterLimit = 4;

    stroke7Path.lineCapStyle = .round

    stroke7Path.lineJoinStyle = .round

    stroke7Path.usesEvenOddFillRule = true

    strokeColor.setStroke()
    stroke7Path.lineWidth = 2
    stroke7Path.stroke()


    //// Stroke-9 Drawing
    let stroke9Path = UIBezierPath()
    stroke9Path.move(to: CGPoint(x: 51, y: 38.08))
    stroke9Path.addCurve(to: CGPoint(x: 57, y: 45), controlPoint1: CGPoint(x: 54.4, y: 38.56), controlPoint2: CGPoint(x: 57, y: 41.47))
    stroke9Path.addCurve(to: CGPoint(x: 51, y: 51.92), controlPoint1: CGPoint(x: 57, y: 48.53), controlPoint2: CGPoint(x: 54.39, y: 51.45))
    stroke9Path.miterLimit = 4;

    stroke9Path.lineCapStyle = .round

    stroke9Path.lineJoinStyle = .round

    stroke9Path.usesEvenOddFillRule = true

    strokeColor.setStroke()
    stroke9Path.lineWidth = 2
    stroke9Path.stroke()
}
That is quite a bit of code. The upside is that you don't need to worry about it moving forward.
Storyboard
Open Main.storyboard and add a view to the View Controller Scene. Add the necessary constraints to the view and set Class to CoffeeView in the Identity Inspector on the right.
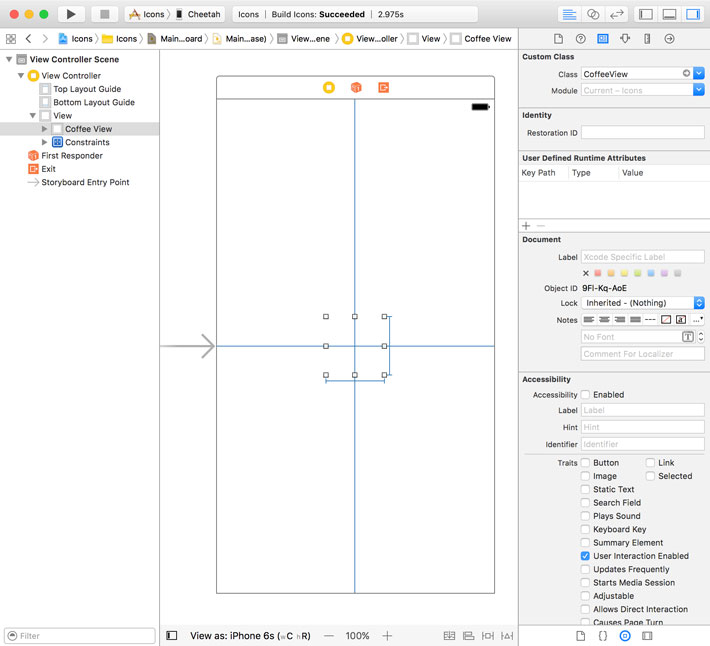
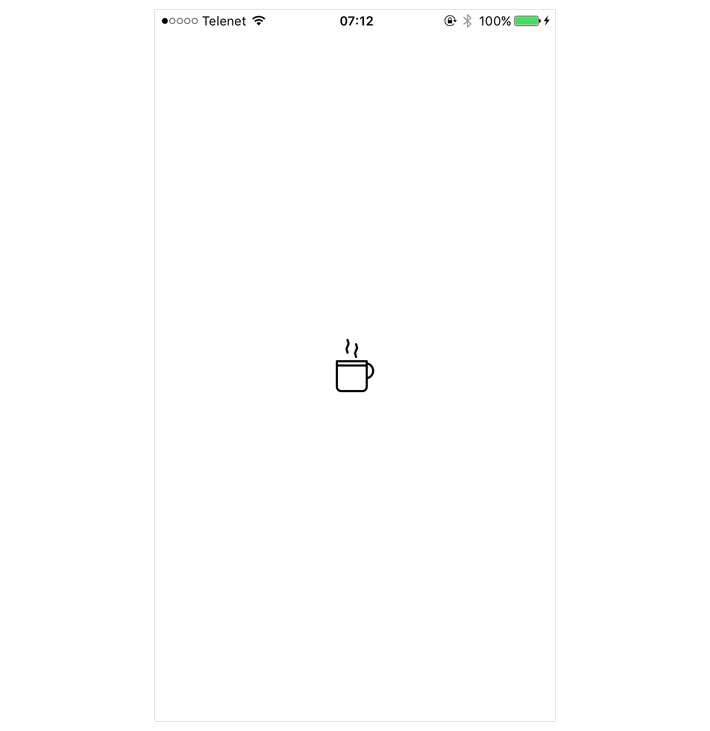
Run the application in the simulator or on a physical device to see the result.
Scratching the Surface
I want to emphasize that this tutorial only scratches the surface of what PaintCode can do for you. For example, you can use frames to make shapes dynamic, you can integrate PaintCode with Sketch, and you can export what you create in PaintCode into a style kit. PaintCode is a very powerful application that saves you a lot of time. Give it a try and let me know what you think.