We successfully converted the horizontal purchase flow to a vertical purchase flow in the previous episode. The BuyCoordinator and VerticalBuyCoordinator classes have quite a bit in common. In this episode, we add the ability to the BuyCoordinator class to manage both flows by merging the VerticalBuyCoordinator class into the BuyCoordinator class.
Creating a Base Class
We could create a base class from which the BuyCoordinator and the VerticalBuyCoordinator classes inherit. If the horizontal and vertical flows differ substantially, then that's a reasonable option and possibly the best option. In this example, however, I prefer to use a single Coordinator subclass to manage the purchase flow.
Refactoring BuyCoordinator
Open BuyCoordinator.swift on the left and VerticalBuyCoordinator.swift in the assistant editor on the right. Several objects are required for both a horizontal and a vertical purchase flow. The buy coordinator needs access to the photo the user is intending to buy and it also needs a reference to a navigation controller to show the sign in and buy view controllers. We define the photo and navigationController properties as private, constant properties.
import UIKit

class BuyCoordinator: Coordinator {

    // MARK: - Properties

    private let photo: Photo

    // MARK: -

    private let navigationController: UINavigationController

    ...

}
The initial view controller is only required to manage the horizontal purchase flow and the presenting view controller is only required to manage the vertical purchase flow. We define the initialViewController and presentingViewController properties as private, variable properties of type UIViewController?. By defining initialViewController and presentingViewController as variable properties, these properties automatically default to nil if they aren't set during initialization.
import UIKit

class BuyCoordinator: Coordinator {

    // MARK: - Properties

    private let photo: Photo

    // MARK: -

    private let navigationController: UINavigationController

    // MARK: -

    private var initialViewController: UIViewController?

    // MARK: -

    private var presentingViewController: UIViewController?

    ...

}
Initializing a Buy Coordinator
We define a separate initializer for the horizontal and vertical purchase flows. This implies that the object initializing the buy coordinator decides how the purchase flow is presented. Remember from the previous episode that the parent coordinator doesn't need to know what type of flow a child coordinator manages. This is still true. The parent coordinator isn't aware of the type of flow the buy coordinator manages. That said, the buy coordinator needs to know what type of flow it is expected to manage. That information is implicitly included in the initializer.
We can keep the initializer of the BuyCoordinator class as is. We move the initializer of the VerticalBuyCoordinator class to the BuyCoordinator class.
// MARK: - Initialization

init(navigationController: UINavigationController, photo: Photo) {
    // Set Navigation Controller
    self.navigationController = navigationController

    // Set Photo
    self.photo = photo

    // Set Initial View Controller
    self.initialViewController = navigationController.viewControllers.last

    super.init()
}

init(presentingViewController: UIViewController, photo: Photo) {
    // Set Presenting View Controller
    self.presentingViewController = presentingViewController

    // Set Photo
    self.photo = photo

    // Initialize Navigation Controller
    self.navigationController = UINavigationController()

    super.init()

    // Configure Navigation Controller
    navigationController.delegate = self
}
Starting the Coordinator
Starting the buy coordinator is simple. We copy the start method of the VerticalBuyCoordinator class to the BuyCoordinator class. Because the presentingViewController property is of type UIViewController?, we use optional chaining to invoke the present(_:animated:completion:) method on the presenting view controller.
// MARK: - Overrides

override func start() {
    if UserDefaults.isSignedIn {
        buyPhoto(photo)
    } else {
        showSignIn()
    }

    // Present Navigation Controller
    presentingViewController?.present(navigationController, animated: true)
}
The elegance of this implementation is that the navigation controller is only presented modally if the buy coordinator keeps a reference to a presenting view controller.
Finishing the Coordinator
We also need to make a small change to the finish() method. Remember from the previous episodes that the else clause of the finish() method should never be executed. This means that the else clause isn't strictly necessary and we can replace it. In the else clause, we invoke the dismiss(_:animated:completion:) method on the presenting view controller and invoke the didFinish handler.
// MARK: - Private API

private func finish() {
    // Reset Navigation Controller
    if let viewController = initialViewController {
        // Pop to Initial Root View Controller
        navigationController.popToViewController(viewController, animated: true)
    } else {
        // Dismiss Navigation Controller
        presentingViewController?.dismiss(animated: true)

        // Invoke Handler
        didFinish?(self)
    }
}
Initiating the Purchase Flow
That's it. These are the only changes we need to make. Remove the VerticalBuyCoordinator class from the project. We no longer need it. Open AppCoordinator.swift and navigate to the buyPhoto(_:) method.
Let's test the horizontal purchase flow first. Create an instance of the BuyCoordinator class by invoking the init(navigationController:photo:) initializer, passing in the coordinator's navigation controller and the photo the user is intending to buy. Build and run the application to test the horizontal purchase flow.
private func buyPhoto(_ photo: Photo) {
    // Initialize Buy Coordinator
    let buyCoordinator = BuyCoordinator(navigationController: navigationController, photo: photo)

    // Push Buy Coordinator
    pushCoordinator(buyCoordinator)
}
Make sure the user is signed out. Select a photo in the table view of the photos view controller and tap the Buy button in the top right to initiate the purchase flow. The purchase flow is presented as a horizontal purchase flow. Sign in and tap the Buy button to complete the purchase. The horizontal purchase flow works fine.
Revisit the buyPhoto(_:) method in AppCoordinator.swift. Create an instance of the BuyCoordinator class by invoking the init(presentingViewController:photo:) initializer, passing in the coordinator's navigation controller and the photo the user is intending to buy. Notice that the arguments we pass to the initializers are identical. Build and run the application to test the vertical purchase flow.
private func buyPhoto(_ photo: Photo) {
    // Initialize Buy Coordinator
    let buyCoordinator = BuyCoordinator(presentingViewController: navigationController, photo: photo)

    // Push Buy Coordinator
    pushCoordinator(buyCoordinator)
}
Make sure the user is signed out. Select a photo in the table view of the photos view controller and tap the Buy button in the top right to initiate the purchase flow. This time the purchase flow is presented as a vertical purchase flow. Sign in and tap the Buy button to complete the purchase. The vertical purchase flow works as expected.
Using Both Flows
I'd like to end this episode by illustrating how powerful the coordinator pattern can be in a project. Let's add a Buy button to each table view cell of the photos view controller. If the user taps the Buy button of a table view cell, the vertical purchase flow is presented. If the user taps the Buy button of the photo view controller, the horizontal purchase flow is presented.
Open PhotoTableViewCell.swift and define an outlet, buyButton, of type UIButton. We use a didSet property observer to configure the button. We set the title to Buy and add the table view cell as the target object for the buy(_:) action method.
import UIKit

class PhotoTableViewCell: UITableViewCell {

    // MARK: - Static Properties

    static var reuseIdentifier: String {
        return String(describing: self)
    }

    // MARK: - Properties

    @IBOutlet private var titleLabel: UILabel!

    // MARK: -

    @IBOutlet private var thumbnailImageView: UIImageView!

    // MARK: -

    @IBOutlet var activityIndicatorView: UIActivityIndicatorView!

    // MARK: -

    @IBOutlet private var buyButton: UIButton! {
        didSet {
            // Configure Buy Button
            buyButton.setTitle("Buy", for: .normal)

            // Add Target/Action
            buyButton.addTarget(self, action: #selector(buy(_:)), for: .touchUpInside)
        }
    }

    ...

}
Before we implement the buy(_:) method, we define a handler with name didBuy. The didBuy property is of an optional type, a closure that accepts no arguments.
import UIKit

class PhotoTableViewCell: UITableViewCell {

    // MARK: - Static Properties

    static var reuseIdentifier: String {
        return String(describing: self)
    }

    // MARK: - Properties

    var didBuy: (() -> Void)?

    // MARK: -

    @IBOutlet private var titleLabel: UILabel!

    // MARK: -

    @IBOutlet private var thumbnailImageView: UIImageView!

    // MARK: -

    @IBOutlet var activityIndicatorView: UIActivityIndicatorView!

    // MARK: -

    @IBOutlet private var buyButton: UIButton! {
        didSet {
            // Configure Buy Button
            buyButton.setTitle("Buy", for: .normal)

            // Add Target/Action
            buyButton.addTarget(self, action: #selector(buy(_:)), for: .touchUpInside)
        }
    }

    ...

}
The implementation of the buy(_:) method is trivial. We invoke the didBuy handler to notify the object that installed the handler. How that works becomes clear in a moment.
// MARK: - Actions

@objc private func buy(_ sender: UIButton) {
    didBuy?()
}
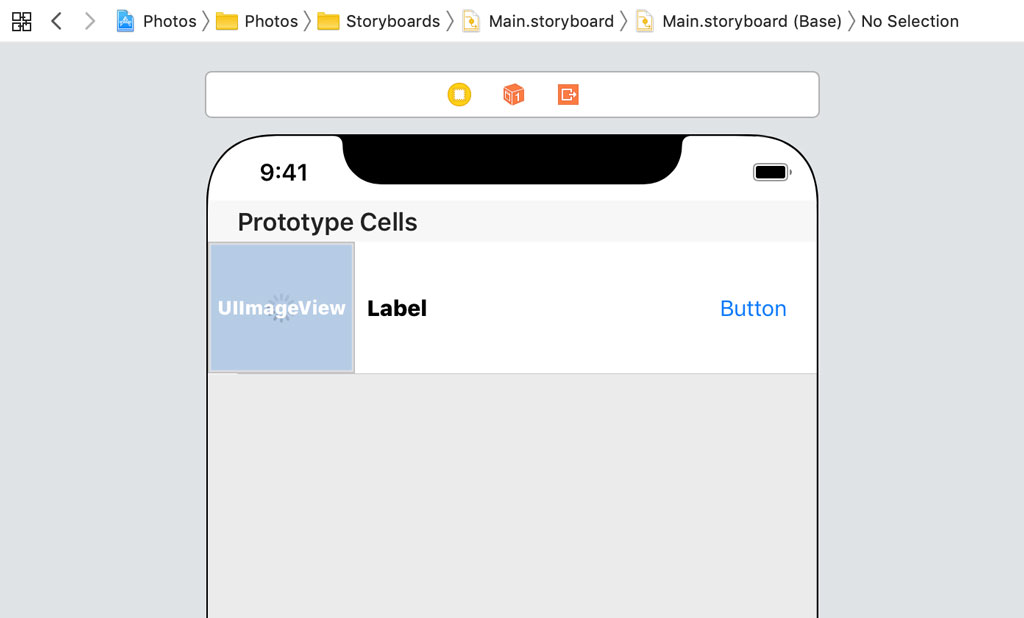
Open Main.storyboard and navigate to the Photos View Controller scene. Remove the trailing constraint of the label and add a button to the photo table view cell. Define a leading and a trailing constraint for the button and center it vertically in its superview. Select the label and set its horizontal content hugging priority to 250 in the Size Inspector on the right. Select the button and set its horizontal content hugging priority to 251 in the Size Inspector. Select the photo table view cell in the document outline on the left and connect the buyButton outlet in the Connections Inspector to the button we added to the table view cell.
Open PhotosViewController.swift and define a property with name didBuyPhoto. The property is of an optional type, a closure that accepts a Photo instance as its only argument.
import UIKit

class PhotosViewController: UIViewController, Storyboardable {

    // MARK: - Properties

    @IBOutlet var tableView: UITableView! {
        didSet {
            // Configure Table View
            tableView.delegate = self
            tableView.dataSource = self
        }
    }

    // MARK: -

    var didSignIn: (() -> Void)?

    // MARK: -

    var didBuyPhoto: ((Photo) -> Void)?
    var didSelectPhoto: ((Photo) -> Void)?

    ...

}
We install the didBuy handler of the PhotoTableViewCell class in the tableView(_:cellForRowAt:) method. In the closure we assign to the didBuy property of the table view cell, we invoke the didBuyPhoto handler, passing in the Photo instance.
func tableView(_ tableView: UITableView, cellForRowAt indexPath: IndexPath) -> UITableViewCell {
    guard let cell = tableView.dequeueReusableCell(withIdentifier: PhotoTableViewCell.reuseIdentifier, for: indexPath) as? PhotoTableViewCell else {
        fatalError("Unable to Dequeue Photo Table View Cell")
    }

    // Fetch Photo
    let photo = dataSource[indexPath.row]

    // Configure Cell
    cell.configure(title: photo.title, url: photo.url)

    // Install Handler
    cell.didBuy = { [weak self] in
        self?.didBuyPhoto?(photo)
    }

    return cell
}
The button shouldn't be visible if the user already purchased the photo the table view cell is displaying. We need to make a small change to the configure(title:url:) method of the PhotoTableViewCell class. Open PhotoTableViewCell.swift and navigate to the configure(title:url:) method. We define a third parameter, didBuyPhoto, of type Bool. We use the value stored in didBuyPhoto to show or hide the buy button.
// MARK: - Public API

func configure(title: String, url: URL?, didBuyPhoto: Bool) {
    // Configure Title Label
    titleLabel.text = title

    // Show/Hide Buy Button
    buyButton.isHidden = didBuyPhoto

    // Animate Activity Indicator View
    activityIndicatorView.startAnimating()

    ...
}
Revisit the tableView(_:cellForRowAt:) method in PhotosViewController.swift and update the configure(title:url:didBuyPhoto:) method. The identifiers of the photos the user has bought are stored in the user defaults database. The photos view controller asks the UserDefaults class if the user bought the photo that is displayed by the table view cell by invoking the didBuy(_:) class method.
func tableView(_ tableView: UITableView, cellForRowAt indexPath: IndexPath) -> UITableViewCell {
    guard let cell = tableView.dequeueReusableCell(withIdentifier: PhotoTableViewCell.reuseIdentifier, for: indexPath) as? PhotoTableViewCell else {
        fatalError("Unable to Dequeue Photo Table View Cell")
    }

    // Fetch Photo
    let photo = dataSource[indexPath.row]

    // Configure Cell
    cell.configure(title: photo.title, url: photo.url, didBuyPhoto: UserDefaults.didBuy(photo))

    // Install Handler
    cell.didBuy = { [weak self] in
        self?.didBuyPhoto?(photo)
    }

    return cell
}
Initiating the Vertical Purchase Flow
Before we can test the implementation, we need to install the didBuyPhoto handler in the application coordinator. Open AppCoordinator.swift. Remember that the application coordinator doesn't need to know what type of purchase flow the user initiates. To avoid code duplication and to keep the implementation clean, I prefer to expose this information to the application coordinator. Let me show you what I have in mind.
Define a private enum with name PurchaseFlowType. The enum defines two cases, horizontal and vertical.
import UIKit
import Foundation

class AppCoordinator: Coordinator {

    // MARK: - Types

    private enum PurchaseFlowType {

        case horizontal
        case vertical

    }

    // MARK: - Properties

    ...

}
Navigate to the buyPhoto(_:) method and define a second parameter, purchaseFlowType, of type PurchaseFlowType. The purchaseFlowType parameter determines which initializer is invoked to initialize the BuyCoordinator instance.
private func buyPhoto(_ photo: Photo, purchaseFlowType: PurchaseFlowType) {
    // Helpers
    let buyCoordinator: BuyCoordinator

    switch purchaseFlowType {
    case .horizontal:
        buyCoordinator = BuyCoordinator(navigationController: navigationController, photo: photo)
    case .vertical:
        buyCoordinator = BuyCoordinator(presentingViewController: navigationController, photo: photo)
    }

    // Push Buy Coordinator
    pushCoordinator(buyCoordinator)
}
Navigate to the showPhoto(_:) method and update the buyPhoto(_:) invocation in the didBuyPhoto handler of the photo view controller. We pass horizontal as the second argument.
private func showPhoto(_ photo: Photo) {
    // Initialize Photo View Controller
    let photoViewController = PhotoViewController.instantiate()

    // Configure Photo View Controller
    photoViewController.photo = photo

    // Install Handlers
    photoViewController.didBuyPhoto = { [weak self] (photo) in
        self?.buyPhoto(photo, purchaseFlowType: .horizontal)
    }

    // Push Photo View Controller Onto Navigation Stack
    navigationController.pushViewController(photoViewController, animated: true)
}
We're almost there. Navigate to the showPhotos() method to install the didBuyPhoto handler. In the closure we assign to the didBuyPhoto handler, we invoke the buyPhoto(_:purchaseFlowType:) method, passing in vertical as the second argument.
private func showPhotos() {
    // Initialize Photos View Controller
    let photosViewController = PhotosViewController.instantiate()

    // Install Handlers
    photosViewController.didSignIn = { [weak self] in
        self?.showSignIn()
    }

    photosViewController.didSelectPhoto = { [weak self] (photo) in
        self?.showPhoto(photo)
    }

    photosViewController.didBuyPhoto = { [weak self] (photo) in
        self?.buyPhoto(photo, purchaseFlowType: .vertical)
    }

    // Push Photos View Controller Onto Navigation Stack
    navigationController.pushViewController(photosViewController, animated: true)
}
We need to make one more change. The table view needs to be updated after the user bought a photo. We keep it simple and update the visible table view cells in the updateView() method. We ask the table view for the index paths of the visible rows and pass them to the reloadRows(at:with:) method of the table view.
private func updateView() {
    if UserDefaults.isSignedIn {
        // Add Bar Button Item
        navigationItem.rightBarButtonItem = UIBarButtonItem(title: "Sign Out", style: .plain, target: self, action: #selector(signOut(_:)))
    } else {
        // Add Bar Button Item
        navigationItem.rightBarButtonItem = UIBarButtonItem(title: "Sign In", style: .plain, target: self, action: #selector(signIn(_:)))
    }

    if let indexPaths = tableView.indexPathsForVisibleRows {
        // Update Table View
        tableView.reloadRows(at: indexPaths, with: .none)
    }
}
This isn't a sophisticated solution, but it works fine for this example. Build and run the application to test the changes we made. Tap the Buy button of a table view cell to initiate the vertical purchase flow. That looks good. Tap Cancel to cancel the purchase flow.
Select a photo in the table view and tap the Buy button in the top right to initiate the horizontal purchase flow. That works fine too.
What's Next?
The current implementation isn't complex and yet we can now present the purchase flow from anywhere in the application. The buy coordinator makes sure the user is signed in before they make a purchase. We also added the ability to present the purchase flow as a horizontal or a vertical flow. I hope this example has illustrated the flexibility and possibilities of the coordinator pattern.