Let's apply what we learned in the previous episodes to the week view controller. The week view controller currently configures the cells of its table view. That is something we want to change. The refactoring of the week view controller involves four steps:
- We create a view model for each table view cell.
- The
WeekViewModelstruct generates a view model for each table view cell. - We define a protocol to which the view models for the table view cells conform.
- The
WeatherDayTableViewCellclass has the ability to configure itself using a view model.
Creating a View Model
We first create a view model. Create a file in the View Models group of the Weather View Controllers group and name it WeatherDayViewModel.swift.
Replace the import statement for Foundation with an import statement for UIKit and define the WeatherDayViewModel struct.
WeatherDayViewModel.swift
import UIKit

struct WeatherDayViewModel {

}
The view model manages a WeatherDayData object. We define a property, weatherDayData, of type WeatherDayData.
WeatherDayViewModel.swift
import UIKit

struct WeatherDayViewModel {

    // MARK: - Properties

    let weatherDayData: WeatherDayData

}
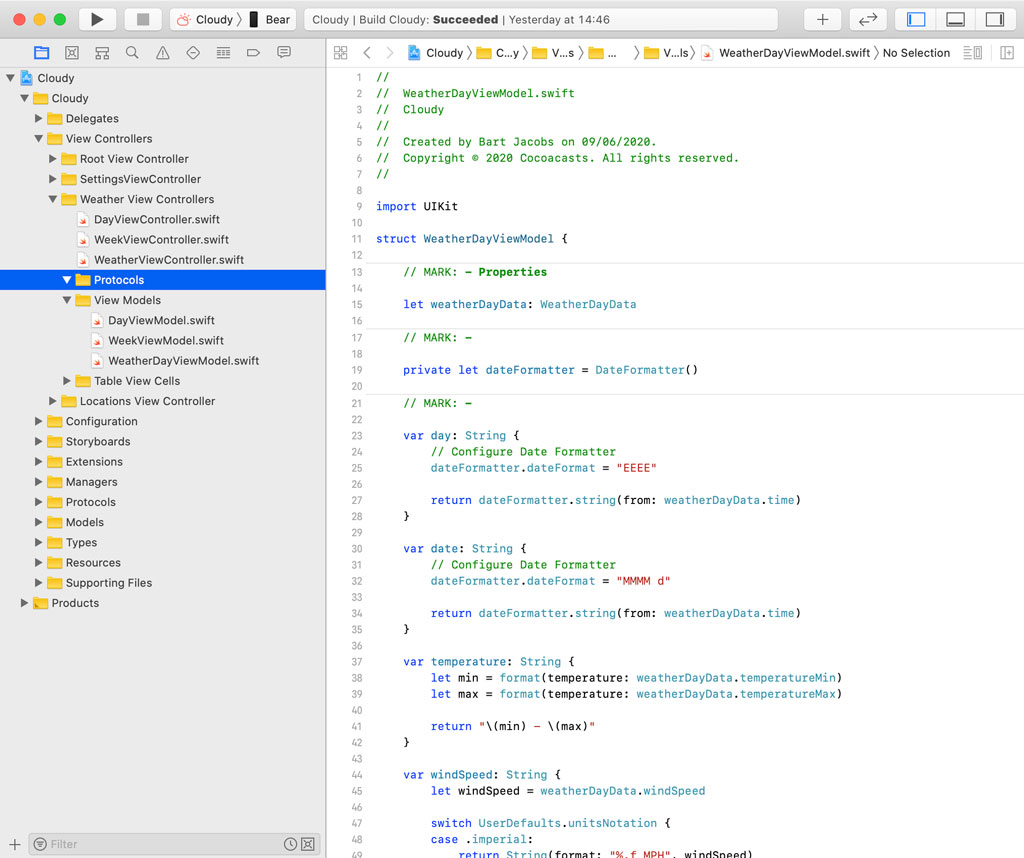
We can migrate most of the code from the WeekViewModel struct to the WeatherDayViewModel struct. The most important differences are that we use computed properties and no longer need to fetch a model from an array of models. This is what the WeatherDayViewModel struct looks like.
WeatherDayViewModel.swift
import UIKit

struct WeatherDayViewModel {

    // MARK: - Properties

    let weatherDayData: WeatherDayData

    // MARK: -

    private let dateFormatter = DateFormatter()

    // MARK: -

    var day: String {
        // Configure Date Formatter
        dateFormatter.dateFormat = "EEEE"

        return dateFormatter.string(from: weatherDayData.time)
    }

    var date: String {
        // Configure Date Formatter
        dateFormatter.dateFormat = "MMMM d"

        return dateFormatter.string(from: weatherDayData.time)
    }

    var temperature: String {
        let min = format(temperature: weatherDayData.temperatureMin)
        let max = format(temperature: weatherDayData.temperatureMax)

        return "\(min) - \(max)"
    }

    var windSpeed: String {
        let windSpeed = weatherDayData.windSpeed

        switch UserDefaults.unitsNotation {
        case .imperial:
            return String(format: "%.f MPH", windSpeed)
        case .metric:
            return String(format: "%.f KPH", windSpeed.toKPH)
        }
    }

    var image: UIImage? {
        UIImage.imageForIcon(with: weatherDayData.icon)
    }

    // MARK: - Helper Methods

    private func format(temperature: Double) -> String {
        switch UserDefaults.temperatureNotation {
        case .fahrenheit:
            return String(format: "%.0f °F", temperature)
        case .celsius:
            return String(format: "%.0f °C", temperature.toCelcius)
        }
    }

}
This should look familiar. We now have a view model that we can use to populate a WeatherDayTableViewCell instance.
Refactoring the Week View Model
In the next step, we drastically refactor the WeekViewModel struct. Everything needs to go with the exception of the weatherData, numberOfSections, and numberOfDays properties.
WeekViewModel.swift
import UIKit

struct WeekViewModel {

    // MARK: - Properties

    let weatherData: [WeatherDayData]

    // MARK: - Public API

    var numberOfSections: Int {
        1
    }

    var numberOfDays: Int {
        weatherData.count
    }

}
Because the week view view model is now responsible for providing a view model for each table view cell of the week view controller, we need to implement a new method, viewModel(for:). The viewModel(for:) method accepts an index as its only argument. The index corresponds with a row in the table view of the week view controller. The viewModel(for:) method returns a WeatherDayViewModel object.
WeekViewModel.swift
func viewModel(for index: Int) -> WeatherDayViewModel {
    WeatherDayViewModel(weatherDayData: weatherData[index])
}
In the viewModel(for:) method, we fetch the WeatherDayData object that corresponds with the value of index and use it to create a WeatherDayViewModel object.
Creating a Protocol
We could pass the WeatherDayViewModel object to the table view cell, but, as I explained earlier in this series, I prefer to use a protocol to define an interface the table view cell can use to configure itself. Remember that this adds a layer of abstraction between the view and view model layers.
Create a new group in the Weather View Controllers group and name it Protocols.
Create a file for the protocol and name it WeatherDayPresentable.swift.
Replace the import statement for Foundation with an import statement for UIKit and define the WeatherDayPresentable protocol.
WeatherDayPresentable.swift
import UIKit

protocol WeatherDayPresentable {

}
The WeatherDayPresentable protocol defines five properties:
dayof typeStringdateof typeString,imageof typeUIImage?windSpeedof typeStringtemperatureof typeString
WeatherDayPresentable.swift
import UIKit

protocol WeatherDayPresentable {

    // MARK: - Properties

    var day: String { get }
    var date: String { get }
    var image: UIImage? { get }
    var windSpeed: String { get }
    var temperature: String { get }

}
We need to make sure that the WeatherDayTableViewCell class knows how to configure itself using a WeatherDayViewModel object. To accomplish that, the view model needs to adopt the WeatherDayPresentable protocol. This is very easy.
Open WeatherDayViewModel.swift and create an extension for the WeatherDayViewModel struct at the bottom. We use the extension to conform the WeatherDayViewModel struct to the WeatherDayPresentable protocol.
WeatherDayViewModel.swift
import UIKit

struct WeatherDayViewModel {
    ...
}

extension WeatherDayViewModel: WeatherDayPresentable {

}
Because the WeatherDayViewModel struct implicitly conforms to the WeatherDayPresentable protocol, that is all we need to do.
Updating the Weather Day Table View Cell
Last but not least, we need to implement a new method in the WeatherDayTableViewCell class. Open WeatherDayTableViewCell.swift and define a method with name configure(with:). The configure(with:) method accepts an object that conforms to the WeatherDayPresentable protocol as its only argument. In the body, we configure the subviews of the table view cell, using the WeatherDayPresentable object. This should look familiar by now.
WeatherDayTableViewCell.swift
// MARK: - Public API

func configure(with presentable: WeatherDayPresentable) {
    // Configure Icon Image View
    iconImageView.image = presentable.image

    // Configure Labels
    dayLabel.text = presentable.day
    dateLabel.text = presentable.date
    windSpeedLabel.text = presentable.windSpeed
    temperatureLabel.text = presentable.temperature
}
Updating the Week View Controller
The last piece of the puzzle is updating the tableView(_:cellForRowAt:) method of the week view controller. We ask the view model of the week view controller to create a view model for a given index by invoking the viewModel(for:) method. If we receive a view model, we pass it to the configure(with:) method of the weather day table view cell. The weather day table view cell takes care of the rest.
WeekViewController.swift
func tableView(_ tableView: UITableView, cellForRowAt indexPath: IndexPath) -> UITableViewCell {
    guard let cell = tableView.dequeueReusableCell(withIdentifier: WeatherDayTableViewCell.reuseIdentifier, for: indexPath) as? WeatherDayTableViewCell else {
        fatalError("Unable to Dequeue Weather Day Table View Cell")
    }

    if let viewModel = viewModel?.viewModel(for: indexPath.row) {
        // Configure Cell
        cell.configure(with: viewModel)
    }

    return cell
}
The implementation of the UITableViewDataSource protocol has undergone a dramatic transformation. The week view controller is unaware of the data the weather API returns to the application. It uses a view model to populate its table view and that is all it does, apart from responding to events, such as updating the user interface when it receives a new view model.
What's Next?
I hope that the past few episodes have convinced you of the benefits of the Model-View-ViewModel pattern. Not only does it result in a clear separation of responsibilities, the testability of the project has improved substantially. And that is something we look at in the next episodes.