Writing Unit Tests
It's time to write the first unit test for the Note class. The first unit test we write tests the updatedAtAsDate computed property of the Note class. Remember that we only unit test the custom behavior we added to the Note class. We name the unit test testUpdatedAtAsDate().
NoteTests.swift
// MARK: - Tests for Updated At & Created At

func testUpdatedAtAsDate() {

}
Let's consider the goal of the unit test. What do we want to unit test? The updatedAtAsDate computed property ensures we don't need to deal with optionals. It always returns a Date instance, even if, for some reason, the updatedAt property doesn't have a value. Remember that the updatedAt property is of type Date?. I explain why that is in Core Data Fundamentals. The updatedAtAsDate computed property is nothing more than a convenience method we added in Core Data Fundamentals.
Note.swift
import Foundation

extension Note {

    // MARK: - Dates

    var updatedAtAsDate: Date {
        return updatedAt ?? Date()
    }

    ...

}
The unit test is short and straightforward. We create a Date instance, which we use to set the updatedAt property of the Note instance we test in the unit test.
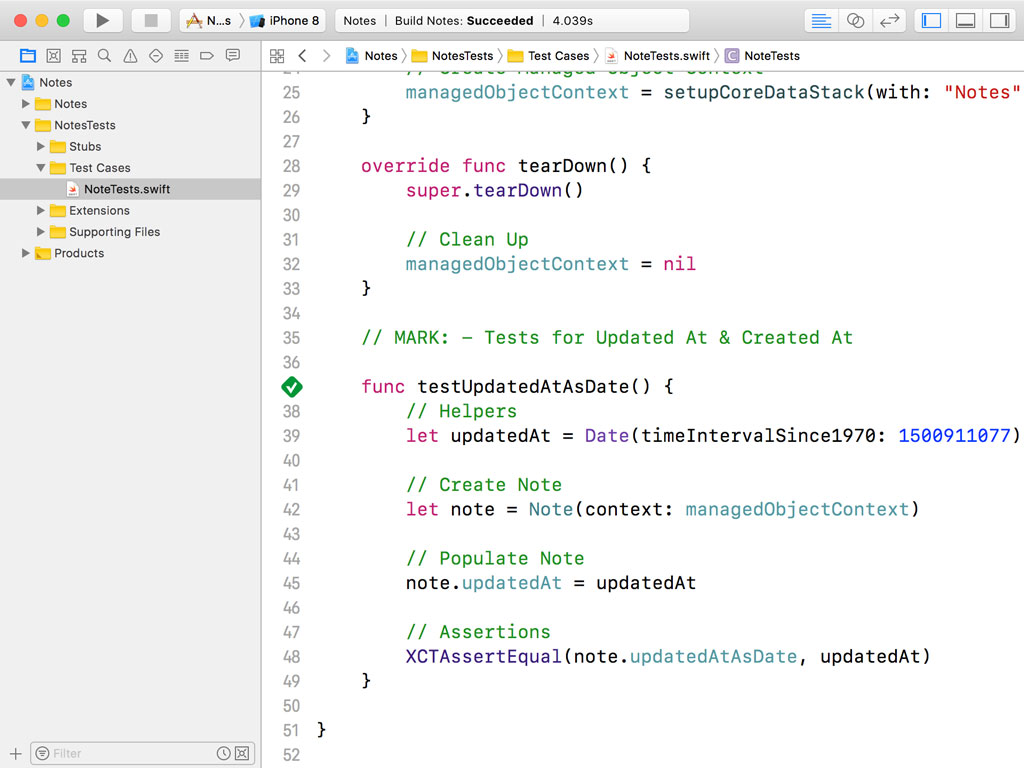
NoteTests.swift
func testUpdatedAtAsDate() {
    // Helpers
    let updatedAt = Date(timeIntervalSince1970: 1500911077)
}
We create a Note instance and set the value of its updatedAt property to the Date instance we created a moment ago. We insert the Note instance into the managed object context of the Core Data stack. Remember that every managed object needs to be associated with a managed object context.
NoteTests.swift
func testUpdatedAtAsDate() {
    // Helpers
    let updatedAt = Date(timeIntervalSince1970: 1500911077)

    // Create Note
    let note = Note(context: managedObjectContext)

    // Populate Note
    note.updatedAt = updatedAt
}
To unit test the updatedAtAsDate computed property, we assert that the value returned by the updatedAtAsDate property is equal to the value stored in the updatedAt variable we created at the top of the unit test.
NoteTests.swift
func testUpdatedAtAsDate() {
    // Helpers
    let updatedAt = Date(timeIntervalSince1970: 1500911077)

    // Create Note
    let note = Note(context: managedObjectContext)

    // Populate Note
    note.updatedAt = updatedAt

    // Assertions
    XCTAssertEqual(note.updatedAtAsDate, updatedAt)
}
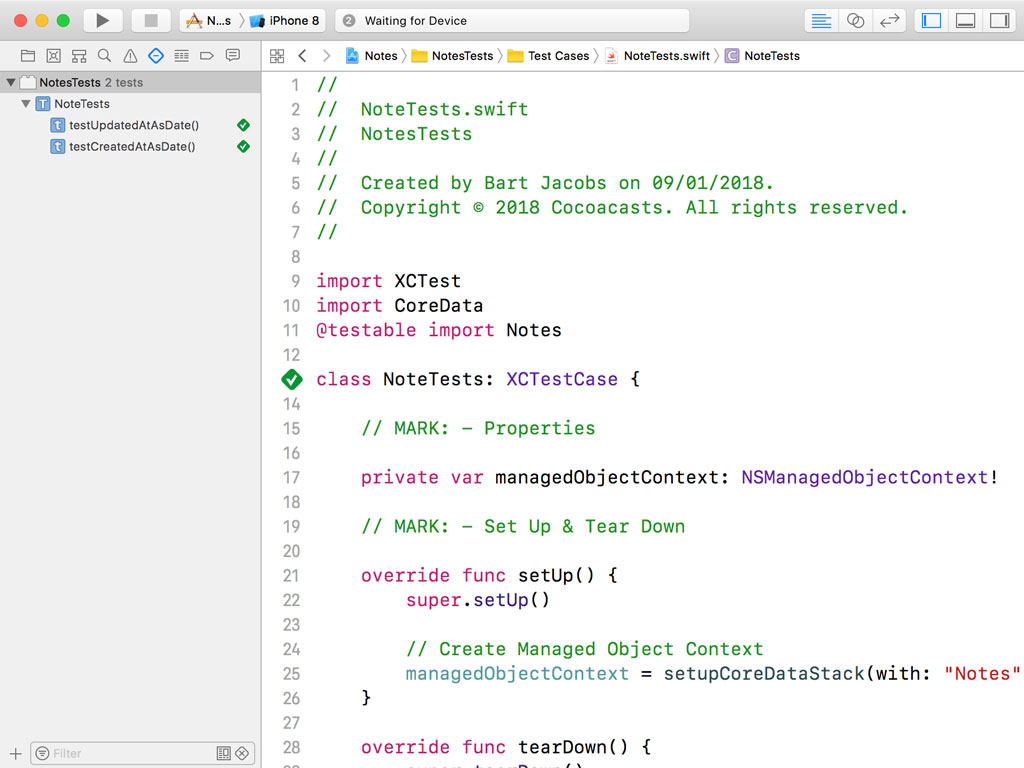
That's it. Run the test suite by pressing Command + U or by choosing Test from Xcode's Product menu. The unit test should pass without issues.
More Unit Tests
With the first unit test in place, writing the remaining unit tests isn't that hard. Let's write a unit test for the createdAtAsDate computed property of the Note class. The implementation looks surprisingly similar.
NoteTests.swift
func testCreatedAtAsDate() {
    // Helpers
    let createdAt = Date(timeIntervalSince1970: 1500911077)

    // Create Note
    let note = Note(context: managedObjectContext)

    // Populate Note
    note.createdAt = createdAt

    // Assertions
    XCTAssertEqual(note.createdAtAsDate, createdAt)
}
Run the test suite one more time to make sure the unit tests pass without hiccups.
The first unit tests were easy to implement. Let's take it up a notch and write a unit test for the alphabetizedTags computed property of the Note class. This is a bit more challenging. We define a new method and name it testAlphabetizedTags().
NoteTests.swift
// MARK: - Tests for Alphabetized Tags

func testAlphabetizedTags() {

}
Remember from Core Data Fundamentals that the Note class has a tags relationship. The issue is that Core Data relationships are defined as unordered sets. To add the ability to ask a note for an alphabetized array of its tags, we implemented the alphabetizedTags computed property. This is what the implementation looks like.
Note.swift
// MARK: - Tags

var alphabetizedTags: [Tag]? {
    guard let tags = tags as? Set<Tag> else {
        return nil
    }

    return tags.sorted(by: {
        guard let tag0 = $0.name else { return true }
        guard let tag1 = $1.name else { return true }
        return tag0 < tag1
    })
}
To unit test the alphabetizedTags computed property, we need a Note instance with several tags. Let's see how this works. We first create two helper constants, tagsAsStrings, an array of tags as String instances, and alphabetizedTagsAsStrings, an alphabetized array of tags as String instances.
NoteTests.swift
func testAlphabetizedTags() {
    // Helpers
    let tagsAsStrings = ["Gamma", "Alpha", "Beta"]
    let alphabetizedTagsAsStrings = ["Alpha", "Beta", "Gamma"]
}
We need to create a Note instance with several tags. We could create the Note instance in the unit test method, but I prefer to create a helper method that we can reuse in other unit tests. This is what the signature of the helper method should look like.
NoteTests.swift
// MARK: - Helper Methods

private func createNote(`in` managedObjectContext: NSManagedObjectContext, with tags: [String]?) -> Note {

}
We pass in the managed object context for the note and an array of String instances, which is used to create the tags of the note. The implementation isn't difficult if you have a basic understanding of Core Data. We create a Note instance, using the managed object context, and we create a Tag instance for each element of the tags array.
NoteTests.swift
// MARK: - Helper Methods

private func createNote(`in` managedObjectContext: NSManagedObjectContext, with tags: [String]?) -> Note {
    // Create Note
    let note = Note(context: managedObjectContext)

    if let tags = tags {
        for name in tags {
            // Create Tag
            let tag = Tag(context: managedObjectContext)

            // Populate Tag
            tag.name = name

            // Populate Note
            note.addToTags(tag)
        }
    }

    return note
}
The createNote(in:with:) helper method makes it trivial to create a Note instance with zero or more tags.
NoteTests.swift
func testAlphabetizedTags() {
    // Helpers
    let tagsAsStrings = ["Gamma", "Alpha", "Beta"]
    let alphabetizedTagsAsStrings = ["Alpha", "Beta", "Gamma"]

    // Create Note
    let note = createNote(in: managedObjectContext, with: tagsAsStrings)
}
It's time to unit test the alphabetizedTags computed property. We ask the note for an alphabetized array of its tags and store the value in a constant, tags. We assert that tags isn't equal to nil and that the number of elements in the tags constant is equal to the number of elements in the alphabetizedTagsAsStrings array.
NoteTests.swift
func testAlphabetizedTags() {
    // Helpers
    let tagsAsStrings = ["Gamma", "Alpha", "Beta"]
    let alphabetizedTagsAsStrings = ["Alpha", "Beta", "Gamma"]

    // Create Note
    let note = createNote(in: managedObjectContext, with: tagsAsStrings)

    // Invoke Method to Test
    let tags = note.alphabetizedTags

    // Assertions
    XCTAssertNotNil(tags)
    XCTAssertEqual(tags!.count, alphabetizedTagsAsStrings.count)
}
That's a good start, but we also need to verify that the elements of the tags array are sorted alphabetically. We assert this by looping over the contents of the tags array and comparing the values with the values stored in the alphabetizedTagsAsStrings array, the helper constant we defined earlier.
NoteTests.swift
func testAlphabetizedTags() {
    // Helpers
    let tagsAsStrings = ["Gamma", "Alpha", "Beta"]
    let alphabetizedTagsAsStrings = ["Alpha", "Beta", "Gamma"]

    // Create Note
    let note = createNote(in: managedObjectContext, with: tagsAsStrings)

    // Invoke Method to Test
    let tags = note.alphabetizedTags

    // Assertions
    XCTAssertNotNil(tags)
    XCTAssertEqual(tags!.count, alphabetizedTagsAsStrings.count)

    for (index, tag) in tags!.enumerated() {
        XCTAssertEqual(tag.name, alphabetizedTagsAsStrings[index])
    }
}
That's it. Run the unit test by clicking the diamond in the gutter on the left to make sure it passes.
The implementation of the unit test for the alphabetizedTagsAsString computed property of the Note class is similar. Pause the video for a moment and give it a try. You can find the solution below.
NoteTests.swift
// MARK: - Tests for Alphabetized Tags as String

func testAlphabetizedTagsAsString() {
    // Helpers
    let tagsAsStrings = ["Gamma", "Alpha", "Beta"]
    let alphabetizedTagsAsString = "Alpha, Beta, Gamma"

    // Create Note
    let note = createNote(in: managedObjectContext, with: tagsAsStrings)

    // Invoke Method to Test
    let tagsAsString = note.alphabetizedTagsAsString

    // Assertions
    XCTAssertNotNil(tagsAsString)
    XCTAssertEqual(tagsAsString, alphabetizedTagsAsString)
}
Enabling Code Coverage
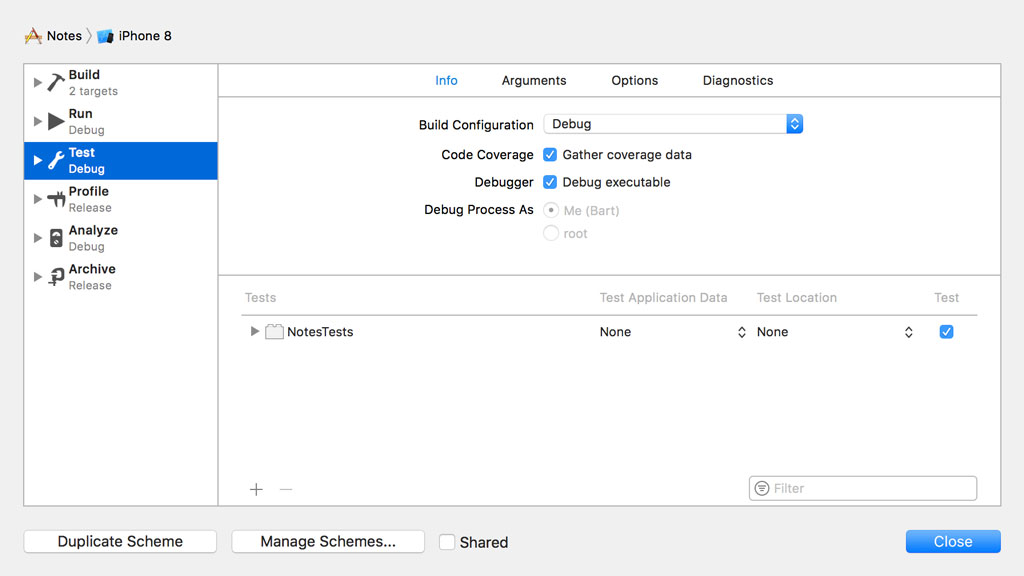
Before you run the test suite, I want to show you how to enable code coverage in Xcode. Even though code coverage isn't perfect, it can help you spot holes in your test suite.
Click the active scheme in Xcode's toolbar and choose Edit Scheme.... Choose Test from the left and check the checkbox Gather coverage data on the right.
Press Command + U to run the test suite and make sure every unit test passes. Open Note.swift to see the results.
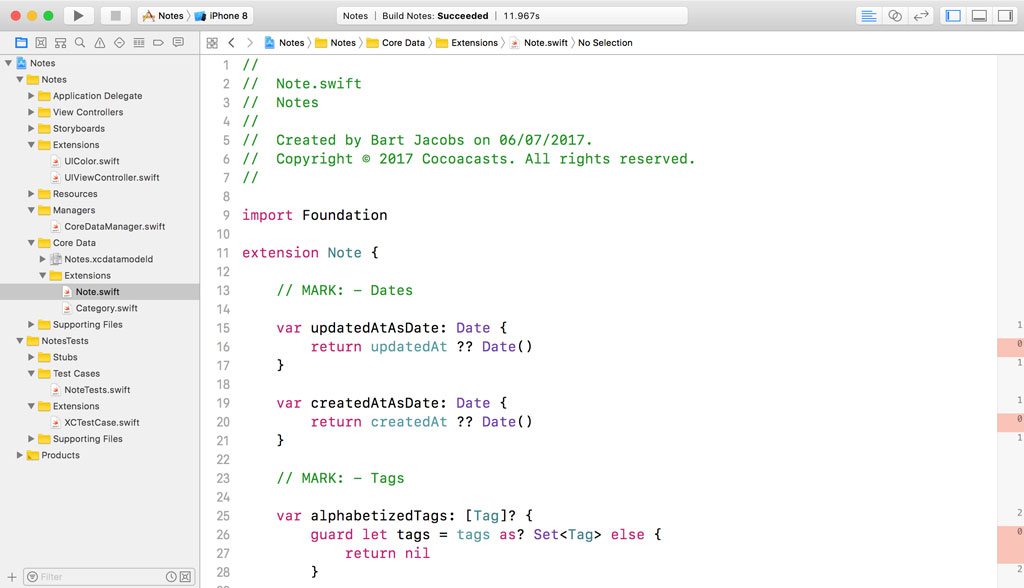
The gutter on the right of the source editor shows us which code paths aren't covered by unit tests. This is interesting. Even though we wrote a unit test for every computed property of the Note class, Xcode shows us we missed a few edge cases. We fix that in the next episode.