In this episode, we focus on the forecast view, a subview or child view of the location view. The forecast view displays the temperature for each day of the weather forecast. Let's add a few more details to the items of the vertical grid.
Extending the View Model
The items of the vertical grid of the forecast view should display the day of the week, the date, a textual summary of the forecast, a visual summary of the forecast, the wind speed, and the low and high temperature for the day. Open ForecastCellViewModel.swift.
To display the day of the week and the date, the view model needs to have access to a Date object. Declare a private, constant property, forecastDate, of type Date. Because we declare the date property privately, we need to define an initializer that accepts a Date object.
import Foundation

struct ForecastCellViewModel: Identifiable {

    // MARK: - Properties

    private let forecastDate: Date

    // MARK: -

    var id: UUID {
        UUID()
    }

    var temperature: String {
        let temperature = Int.random(in: 50...80)
        return "\(temperature) °F"
    }

    // MARK: - Initialization

    init(forecastDate: Date) {
        self.forecastDate = forecastDate
    }

}
To display the day of the week, we need to format the date stored in the forecastDate property. Declare a private, constant property with name dateFormatter. We create a DateFormatter instance and store a reference to the date formatter in the dateFormatter property.
import Foundation

struct ForecastCellViewModel: Identifiable {

    // MARK: - Properties

    private let forecastDate: Date

    // MARK: -

    private let dateFormatter = DateFormatter()

	...

}
It's important to note that we carefully control the API the view model exposes to its view. It doesn't expose the forecastDate property. It exposes the forecast date through two computed properties, day and date. Both properties are of type String. In the body of the computed day property, we set the date formatter's dateFormat property. To convert the forecast date to a string, we invoke the string(from:) method on the date formatter. We capitalize the result of the conversion and return the formatted date.
var day: String {
    dateFormatter.dateFormat = "EEEE"
    return dateFormatter.string(from: forecastDate).capitalized
}
The implementation of the computed date property is identical with the exception of the date format of the date formatter.
var date: String {
    dateFormatter.dateFormat = "MMMM d"
    return dateFormatter.string(from: forecastDate).capitalized
}
The next computed property we implement returns the textual summary of the forecast. We name it summary and it is of type String. We return a string literal for now.
var summary: String {
    "Clear"
}
To display the visual summary of the forecast, we implement a computed property with name imageName and it is of type String. We return a string literal for now.
var imageName: String {
    "sun.max"
}
The next computed property we implement returns the formatted wind speed. We name it windSpeed and it is of type String. We copy the implementation of the computed temperature property as a starting point. We change the name of the local temperature constant to windSpeed, update the range we pass to the random(in:) method, and change the unit of the string the computed property returns.
var windSpeed: String {
    let windSpeed = Int.random(in: 0...30)
    return "\(windSpeed) mi/h"
}
A forecast cell displays the low and high temperature for the day. Rename the computed temperature property to lowTemperature and update the closed range we pass to the random(in:) method. Copy the computed lowTemperature property, rename the copy to highTemperature, and update the closed range we pass to the random(in:) method.
var lowTemperature: String {
    let temperature = Int.random(in: 50...70)
    return "\(temperature) °F"
}

var highTemperature: String {
    let temperature = Int.random(in: 70...90)
    return "\(temperature) °F"
}
Updating the View
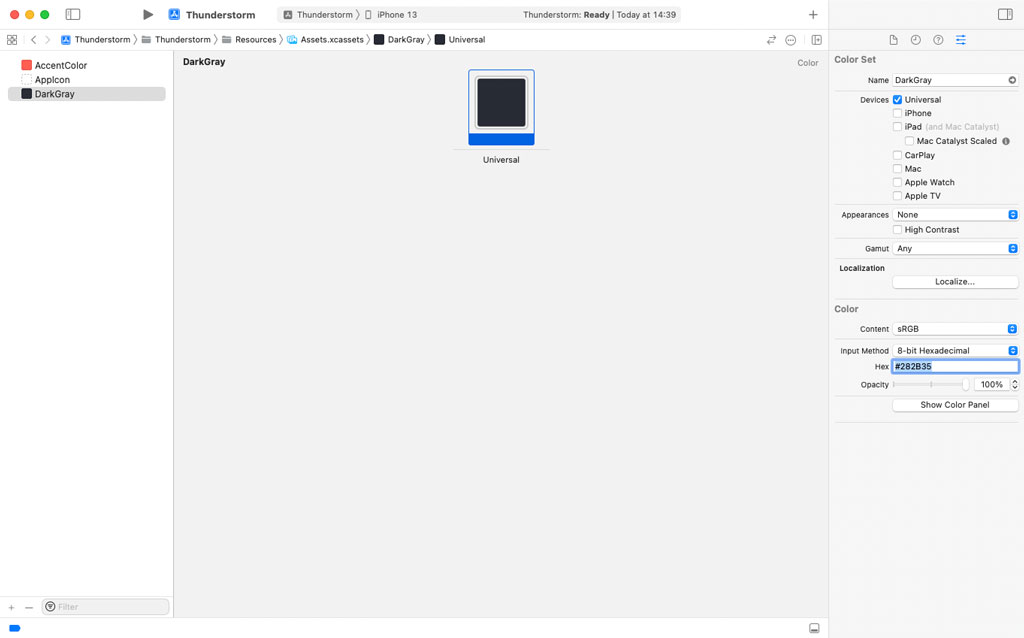
Before we update the ForecastCell struct, we define a color in the asset catalog. Open the asset catalog and add a color set. Name the color set DarkGray. With the color set selected, open the Attributes Inspector on the right and set Appearances to None. We won't focus on dark mode support in this series. Select the Universal tile in the editor and set Hex to a dark gray color.
Add a Swift file to the Resources group and name it Colors.swift. Add import statement for UIKit and SwiftUI. We define two extensions, one for UIColor and one for Color. In the extension for UIColor, we declare a static variable property with name darkGray of type UIColor. In the body of the computed property, we create a UIColor instance. We pass the name of the color set we defined in the asset catalog to the initializer. Notice that we force unwrap the result of the initialization. This is one of the few scenarios in which I use the exclamation mark to force unwrap a value. If we define a color set in the asset catalog, then the initialization of the UIColor instance shouldn't fail.
In the extension for Color, we declare a static variable property with name darkGray of type Color. In the body of the computed property, we create a Color object. We pass a UIColor instance to the initializer, using the static darkGray property we defined in the extension for UIColor.
import UIKit
import SwiftUI

extension UIColor {

    static var darkGray: UIColor {
        .init(named: "DarkGray")!
    }

}

extension Color {

    static var darkGray: Color {
        .init(uiColor: .darkGray)
    }

}
Open ForecastCell.swift. Before we update the computed body property of the ForecastCell struct, we pass a Date object to the initializer of the ForecastCellViewModel struct in the static previews property of the ForecastCell_Previews struct.
struct ForecastCell_Previews: PreviewProvider {
    static var previews: some View {
        ForecastCell(viewModel: .init(forecastDate: Date()))
    }
}
We do the same in the ForecastViewModel struct. Open ForecastViewModel.swift and pass a Date object to the initializer of the ForecastCellViewModel struct in the computed forecastCellViewModels property.
import Foundation

struct ForecastViewModel {

    // MARK: - Properties

    var forecastCellViewModels: [ForecastCellViewModel] {
        (0..<10).map { _ in ForecastCellViewModel(forecastDate: Date()) }
    }

}
Revisit ForecastCell.swift. Let's update the computed body property of the ForecastCell struct. Replace the Text view with an HStack. The HStack contains a VStack with a leading alignment, a Spacer view, and a VStack with a trailing alignment.
var body: some View {
    HStack {
        VStack(alignment: .leading) {

        }

        Spacer()

        VStack(alignment: .trailing) {

        }
    }
}
Let's focus on the VStack with the leading alignment first. The VStack contains three Text views. The first Text view displays the day of the week, the second Text view displays the date, and the third Text view displays the textual summary of the forecast. We add a Spacer view between the second and the third Text view.
VStack(alignment: .leading) {
    Text(viewModel.day)
    Text(viewModel.date)

    Spacer()

    Text(viewModel.summary)
}
We apply a few view modifiers to the Text views. We set the font of the first Text view to title and its foreground color to the application's accent color. We set the font of the second and the third Text view to body and their foreground color to dark gray, the color we defined in the asset catalog earlier in this episode.
VStack(alignment: .leading) {
    Text(viewModel.day)
        .font(.title)
        .foregroundColor(.accentColor)

    Text(viewModel.date)
        .font(.body)
        .foregroundColor(.darkGray)

    Spacer()

    Text(viewModel.summary)
        .font(.body)
        .foregroundColor(.darkGray)
}
Because the second and the third Text view have the same style, we can wrap them in a group and apply the style to the group.
VStack(alignment: .leading) {
    Text(viewModel.day)
        .font(.title)
        .foregroundColor(.accentColor)

    Group {
        Text(viewModel.date)
        Spacer()
        Text(viewModel.summary)
    }
    .font(.body)
    .foregroundColor(.darkGray)
}
Let's populate the VStack with the trailing alignment next. The VStack displays an Image view at the top. The system name for the image is provided by the view model. We need to adjust the size of the image view with a few view modifiers. We make the Image view resizable and set its aspect ratio to fit. We fix the width of the Image view to 40.0 points and set its foreground color to dark gray.
VStack(alignment: .trailing) {
    Image(systemName: viewModel.imageName)
        .resizable()
        .aspectRatio(contentMode: .fit)
        .frame(width: 40.0)
        .foregroundColor(.darkGray)
}
We add a Spacer view to the VStack, followed by a Text view that displays the wind speed. We set the Text view's font to body and its foreground color to dark gray.
VStack(alignment: .trailing) {
    Image(systemName: viewModel.imageName)
        .resizable()
        .aspectRatio(contentMode: .fit)
        .frame(width: 40.0)
        .foregroundColor(.darkGray)

    Spacer()

    Text(viewModel.windSpeed)
        .font(.body)
        .foregroundColor(.darkGray)
}
The low and high temperature for the day are displayed in an HStack. The HStack contains three Text views. The first Text view displays the low temperature, the second Text view displays a dash, and the third Text view displays the high temperature. We set the font of the Text views to body and their foreground color to dark gray by applying view modifiers to the HStack.
VStack(alignment: .trailing) {
    Image(systemName: viewModel.imageName)
        .resizable()
        .aspectRatio(contentMode: .fit)
        .frame(width: 40.0)
        .foregroundColor(.darkGray)

    Spacer()

    Text(viewModel.windSpeed)
        .font(.body)
        .foregroundColor(.darkGray)

    HStack {
        Text(viewModel.lowTemperature)
        Text("-")
        Text(viewModel.highTemperature)
    }
    .font(.body)
    .foregroundColor(.darkGray)
}
Creating View Models
Before we can preview the result, we need to update the implementation of the ForecastViewModel struct. Remember that the initializer of the ForecastCellViewModel struct accepts a Date object as its only argument. We need to revisit the implementation of the computed forecastCellViewModels property.
In the closure that is passed to the map(_:) method, we create a Date object and pass it to the initializer of the ForecastCellViewModel struct. The closure of the map(_:) method accepts an element of the range as its only argument. We can use that to create a range of dates. First, we create a time interval that is equivalent to one day or 24 hours multiplied by the number that is passed to the closure. Second, we create a Date object by adding the timeinterval to the current date and time. Third, we pass the Date object to the initializer of the ForecastCellViewModel struct and return the view model from the closure.
import Foundation

struct ForecastViewModel {

    // MARK: - Properties

    var forecastCellViewModels: [ForecastCellViewModel] {
        (0..<10).map { day in
            let increment = TimeInterval(day) * 24.0 * 3600.0
            let forecastDate = Date().addingTimeInterval(increment)
            return ForecastCellViewModel(forecastDate: forecastDate)
        }
    }

}
Open LocationView.swift and inspect the preview in the canvas. The forecast view displays a forecast for the next ten days.

What's Next?
I hope you can appreciate how clean and straightforward the code of the ForecastCell struct is. This is the direct result of the Model-View-ViewModel pattern. The view model is responsible for converting the raw data to something the view can display. The importance of this task becomes even more evident when the application fetches weather data from a remote service later in this series.