In this episode, we adopt the coordinator pattern. I won't cover the details of the coordinator pattern in this episode, though. Coordinators are covered in detail in Mastering Navigation With Coordinators.
Remember that the user interface of the application is composed of a tab bar controller with two tabs, feed and library. I discuss tab bar controllers and coordinators in Mastering Navigation With Coordinators, but there's one implementation detail that is new, view controller containment. The root view controller of the application window is an instance of the RootViewController class. The tab bar controller is a child of the RootViewController instance. How do view controller containment and the coordinator pattern fit together? I answer that question in this episode. We have a lot of ground to cover. Let's get started.
Creating a Foundation
We leverage what we learned in Mastering Navigation With Coordinators. We create a group, Coordinators, and add the Coordinator class from Mastering Navigation With Coordinators to it. Remember that the Coordinator class is the base class every coordinator inherits from.
import UIKit

class Coordinator: NSObject, UINavigationControllerDelegate {

    // MARK: - Properties

    var didFinish: ((Coordinator) -> Void)?

    // MARK: -

    var childCoordinators: [Coordinator] = []

    // MARK: - Methods

    func start() {}

    // MARK: -

    func navigationController(_ navigationController: UINavigationController, willShow viewController: UIViewController, animated: Bool) {}
    func navigationController(_ navigationController: UINavigationController, didShow viewController: UIViewController, animated: Bool) {}

    // MARK: -

    func pushCoordinator(_ coordinator: Coordinator) {
        // Install Handler
        coordinator.didFinish = { [weak self] (coordinator) in
            self?.popCoordinator(coordinator)
        }

        // Start Coordinator
        coordinator.start()

        // Append to Child Coordinators
        childCoordinators.append(coordinator)
    }

    func popCoordinator(_ coordinator: Coordinator) {
        // Remove Coordinator From Child Coordinators
        if let index = childCoordinators.firstIndex(where: { $0 === coordinator }) {
            childCoordinators.remove(at: index)
        }
    }

}
We create another group, Protocols, and add the Storyboardable protocol from Mastering Navigation With Coordinators to it. The Storyboardable protocol makes it trivial to instantiate view controllers from a storyboard.
import UIKit

protocol Storyboardable {

    // MARK: - Properties

    static var storyboardName: String { get }
    static var storyboardBundle: Bundle { get }

    // MARK: -

    static var storyboardIdentifier: String { get }

    // MARK: - Methods

    static func instantiate() -> Self

}

extension Storyboardable where Self: UIViewController {

    // MARK: - Properties

    static var storyboardName: String {
        return "Main"
    }

    static var storyboardBundle: Bundle {
        return .main
    }

    // MARK: -

    static var storyboardIdentifier: String {
        return String(describing: self)
    }

    // MARK: - Methods

    static func instantiate() -> Self {
        guard let viewController = UIStoryboard(name: storyboardName, bundle: storyboardBundle).instantiateViewController(withIdentifier: storyboardIdentifier) as? Self else {
            fatalError("Unable to Instantiate View Controller With Storyboard Identifier \(storyboardIdentifier)")
        }

        return viewController
    }

}
Conforming to the Storyboardable Protocol
The view controllers of the project need to conform to the Storyboardable protocol. This is easy. Open RootViewController.swift and conform the RootViewController class to the Storyboardable protocol. Because the root view controller is located in Root.storyboard, we need to implement the storyboardName static computed property of the Storyboardable protocol. The computed property returns Root, the name of the storyboard.
import UIKit

class RootViewController: UIViewController, Storyboardable {

    // MARK: - Storyboardable

    static var storyboardName: String {
        return "Root"
    }

    ...

}
Open Root.storyboard, select the Root View Controller scene, and open the Identity Inspector on the right. Set Storyboard ID to RootViewController. A RootViewController instance can now be instantiated by invoking the instantiate() method.
The steps for the FeedViewController and LibraryViewController classes are similar. Open FeedViewController.swift and conform the FeedViewController class to the Storyboardable protocol. The feed view controller is located in a separate storyboard, Feed.storyboard, which means we need to implement the storyboardName static computed property of the Storyboardable protocol. The computed property returns Feed.
import UIKit

class FeedViewController: UIViewController, Storyboardable {

    // MARK: - Storyboardable

    static var storyboardName: String {
        return "Feed"
    }

    // MARK: - Initialization

    required init?(coder aDecoder: NSCoder) {
        super.init(coder: aDecoder)

        // Set Title
        title = "Feed"
    }

}
Open Feed.storyboard, select the Feed View Controller scene, and open the Identity Inspector on the right. Set Storyboard ID to FeedViewController. That's it.
Open LibraryViewController.swift and conform the LibraryViewController class to the Storyboardable protocol. We implement the storyboardName static computed property of the Storyboardable protocol. The computed property returns Library.
import UIKit

class LibraryViewController: UIViewController, Storyboardable {

    // MARK: - Storyboardable

    static var storyboardName: String {
        return "Library"
    }

    // MARK: - Initialization

    required init?(coder aDecoder: NSCoder) {
        super.init(coder: aDecoder)

        // Set Title
        title = "Library"
    }

}
Open Library.storyboard, select the Library View Controller scene, and open the Identity Inspector on the right. Set Storyboard ID to LibraryViewController.
Creating and Implementing the Application Coordinator
The application coordinator starts the application. It is responsible for creating and configuring the root view controller of the application window. Create a group, Application Coordinator, in the Coordinators group and add a file with name AppCoordinator.swift. Add an import statement for the UIKit framework and define a Coordinator subclass with name AppCoordinator.
import UIKit

class AppCoordinator: Coordinator {

}
We define a lazy, variable property with name rootViewController. We instantiate an instance of the RootViewController class and store a reference to the instance in the rootViewController property.
import UIKit

class AppCoordinator: Coordinator {

    // MARK: - Properties

    lazy var rootViewController = RootViewController.instantiate()

}
Let's put the AppCoordinator class to use in the application delegate. Open AppDelegate.swift. We define a private, constant property with name appCoordinator. We instantiate an instance of the AppCoordinator class and store a reference to the instance in the appCoordinator property.
import UIKit
import Fabric
import Crashlytics

@UIApplicationMain
class AppDelegate: UIResponder, UIApplicationDelegate {

    // MARK: - Properties

    var window: UIWindow?

    // MARK: -

    private let appCoordinator = AppCoordinator()

    ...

}
In application(_:didFinishLaunchingWithOptions:), we create a UIWindow instance and store a reference to it in the window property of the application delegate. We ask the application coordinator for a reference to the root view controller and update the rootViewController property of the application window. We invoke makeKeyAndVisible() on the UIWindow instance and start the application coordinator. We cover these steps in detail in Mastering Navigation With Coordinators.
// MARK: - Application Life Cycle

func application(_ application: UIApplication, didFinishLaunchingWithOptions launchOptions: [UIApplication.LaunchOptionsKey: Any]?) -> Bool {
    // Setup Logging
    Logger.setup()

    // Setup Fabric
    Fabric.with([Crashlytics.self])

    // Initialize Window
    window = UIWindow(frame: UIScreen.main.bounds)

    // Configure Window
    window?.rootViewController = appCoordinator.rootViewController

    // Make Key and Visible
    window?.makeKeyAndVisible()

    // Start Coordinator
    appCoordinator.start()

    return true
}
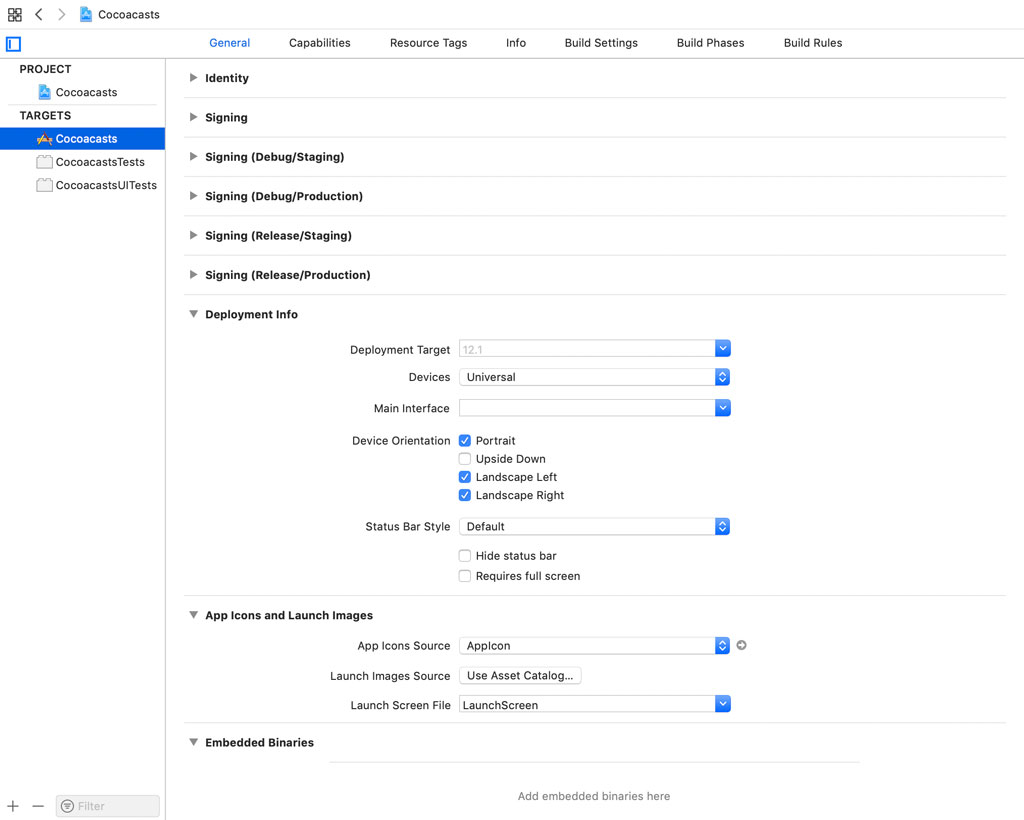
Select the project in the Project Navigator on the left and click the Cocoacasts target from the list of targets. Select General at the top and scroll to the Deployment Info section. Main Interface is currently set to Root.storyboard. This is no longer necessary because we manually create and configure the application window. Main Interface can be blank. This prevents the application from instantiating the root view controller twice.
Open the Storyboards group and remove Main.storyboard. We no longer need it. Before we build and run the application, we need to make a few changes to the RootViewController class. Remember that a view controller shouldn't be responsible for instantiating other view controllers. This means that we need to remove the viewController property. The root view controller shouldn't be instantiating the tab bar controller. We also comment out the setupChildViewControllers() method and remove any references to it.
import UIKit

class RootViewController: UIViewController, Storyboardable {

    // MARK: - Storyboardable

    static var storyboardName: String {
        return "Root"
    }

    // MARK: - View Life Cycle

    override func viewDidLoad() {
        super.viewDidLoad()
    }

    // MARK: - Helper Methods

    /*
    private func setupChildViewControllers() {
        // Add Child View Controller
        addChild(viewController)

        // Add Child View as Subview
        view.addSubview(viewController.view)

        // Configure Child View
        viewController.view.topAnchor.constraint(equalTo: view.topAnchor).isActive = true
        viewController.view.leftAnchor.constraint(equalTo: view.leftAnchor).isActive = true
        viewController.view.rightAnchor.constraint(equalTo: view.rightAnchor).isActive = true
        viewController.view.bottomAnchor.constraint(equalTo: view.bottomAnchor).isActive = true

        // Notify Child View Controller
        viewController.didMove(toParent: self)
    }
    */

}
Build and run the application to see what we have accomplished. The application no longer shows a tab bar controller. We fix that in a moment. It shows a red view, the view of the root view controller. This confirms that we're on the right path to adopt the coordinator pattern in the Cocoacasts project.
Adding a Tab Bar Controller
Revisit RootViewController.swift. By adopting the coordinator pattern, the root view controller should no longer be responsible for instantiating the tab bar controller. That's the responsibility of the coordinator.
Adding the tab bar controller as a child view controller of the root view controller remains the responsibility of the root view controller. It's important to understand that each object has a clearly defined responsibility. The coordinator instantiates the tab bar controller and the root view controller manages the tab bar controller. This is similar to how a tab bar controller manages an array of view controllers. Remember that a tab bar controller also makes use of view controller containment.
Open AppCoordinator.swift and declare a private, lazy, variable property, tabBarController, of type UITabBarController. We create the tab bar controller in a closure. We only initialize the UITabBarController instance for now. We configure it later in this episode.
// MARK: -

private lazy var tabBarController: UITabBarController = {
    // Initialize Tab Bar Controller
    let tabBarController = UITabBarController()

    return tabBarController
}()
We need to pass a reference to the tab bar controller to the root view controller. Open RootViewController.swift and declare a property, childViewController, of type UIViewController?. In a didSet property observer, we invoke a method, replace(viewController:with:). In this method, the old child view controller is removed and the new child view controller is added.
import UIKit

class RootViewController: UIViewController, Storyboardable {

    // MARK: - Storyboardable

    static var storyboardName: String {
        return "Root"
    }

    // MARK: - Properties

    var childViewController: UIViewController? {
        didSet {
            // Replace Child View Controller
            replace(viewController: oldValue, with: childViewController)
        }
    }

    ...

}
The implementation isn't difficult if you're familiar with view controller containment. Notice that both parameters of the replace(viewController:with:) method are of type UIViewController?.
// MARK: - Helper Methods

private func replace(viewController from: UIViewController?, with to: UIViewController?) {

}
We first remove the old child view controller. We safely unwrap the value stored in the from parameter. We remove the view controller's view from the view hierarchy and notify the child view controller that it's about to be removed from its parent by invoking the didMove(toParent:) method.
// MARK: - Helper Methods

private func replace(viewController from: UIViewController?, with to: UIViewController?) {
    if let viewController = from {
        // Remove Child View From Superview
        viewController.view.removeFromSuperview()

        // Notify Child View Controller
        viewController.didMove(toParent: nil)
    }
}
Adding the new child view controller is identical to the implementation of setupChildViewControllers(). We safely unwrap the value stored in the to parameter and add the view controller as a child view controller to the root view controller.
// MARK: - Helper Methods

private func replace(viewController from: UIViewController?, with to: UIViewController?) {
    if let viewController = from {
        // Remove Child View From Superview
        viewController.view.removeFromSuperview()

        // Notify Child View Controller
        viewController.didMove(toParent: nil)
    }

    if let viewController = to {
        // Add Child View Controller
        addChild(viewController)

        // Add Child View as Subview
        view.addSubview(viewController.view)

        // Configure Child View
        viewController.view.topAnchor.constraint(equalTo: view.topAnchor).isActive = true
        viewController.view.leftAnchor.constraint(equalTo: view.leftAnchor).isActive = true
        viewController.view.rightAnchor.constraint(equalTo: view.rightAnchor).isActive = true
        viewController.view.bottomAnchor.constraint(equalTo: view.bottomAnchor).isActive = true

        // Notify Child View Controller
        viewController.didMove(toParent: self)
    }
}
We can now remove the setupChildViewControllers() method.
import UIKit

class RootViewController: UIViewController, Storyboardable {

    // MARK: - Storyboardable

    static var storyboardName: String {
        return "Root"
    }

    // MARK: - Properties

    var childViewController: UIViewController? {
        didSet {
            // Replace Child View Controller
            replace(viewController: oldValue, with: childViewController)
        }
    }

    // MARK: - View Life Cycle

    override func viewDidLoad() {
        super.viewDidLoad()
    }

    // MARK: - Helper Methods

    private func replace(viewController from: UIViewController?, with to: UIViewController?) {
        if let viewController = from {
            // Remove Child View From Superview
            viewController.view.removeFromSuperview()

            // Notify Child View Controller
            viewController.didMove(toParent: nil)
        }

        if let viewController = to {
            // Add Child View Controller
            addChild(viewController)

            // Add Child View as Subview
            view.addSubview(viewController.view)

            // Configure Child View
            viewController.view.topAnchor.constraint(equalTo: view.topAnchor).isActive = true
            viewController.view.leftAnchor.constraint(equalTo: view.leftAnchor).isActive = true
            viewController.view.rightAnchor.constraint(equalTo: view.rightAnchor).isActive = true
            viewController.view.bottomAnchor.constraint(equalTo: view.bottomAnchor).isActive = true

            // Notify Child View Controller
            viewController.didMove(toParent: self)
        }
    }

}
Revisit AppCoordinator.swift and override the start() method. We assign the tab bar controller to the childViewController property of the root view controller. That's it.
// MARK: - Overrides

override func start() {
    // Set Child View Controller
    rootViewController.childViewController = tabBarController
}
Build and run the application to see the result. We still see a red view, but notice that there's a tab bar at the bottom. This confirms that the tab bar controller is the child view controller of the root view controller. The only step left is populating the tab bar controller.
Populating the Tab Bar Controller
We start by creating a child coordinator for each tab. Create a group in the Coordinators group with name Child Coordinators. Add a Swift file with name FeedCoordinator.swift. Add an import statement for the UIKitframework and define a Coordinator subclass with name FeedCoordinator.
import UIKit

class FeedCoordinator: Coordinator {

}
The implementation of the FeedCoordinator class is short. We start by defining a private, constant property, feedViewController. We create a FeedViewController instance and store a reference to it in the feedViewController property.
import UIKit

class FeedCoordinator: Coordinator {

    // MARK: - Properties

    private let feedViewController = FeedViewController.instantiate()

}
Remember from Mastering Navigation With Coordinators that we declare the feedViewController property privately because no other objects should have direct access to the FeedViewController instance. They don't need to know what type of view controller the feed coordinator manages.
To add the feed view controller as a child view controller to the tab bar controller, we need to expose it in some way, but no other objects need to know about the exact type of the view controller. The application coordinator needs a reference to a UIViewController instance. To make that possible, we declare a computed property, rootViewController, of type UIViewController. The computed property returns a reference to the FeedViewController instance.
import UIKit

class FeedCoordinator: Coordinator {

    // MARK: - Properties

    var rootViewController: UIViewController {
        return feedViewController
    }

    // MARK: -

    private let feedViewController = FeedViewController.instantiate()

}
We repeat these steps for the library view controller. Create a Swift file with name LibraryCoordinator.swift in the Child Coordinators group. Add an import statement for the UIKitframework and define a Coordinator subclass with name LibraryCoordinator.
import UIKit

class LibraryCoordinator: Coordinator {

}
We define a private, constant property, libraryViewController. We create a LibraryViewController instance and store a reference to it in the libraryViewController property.
import UIKit

class LibraryCoordinator: Coordinator {

    // MARK: - Properties

    private let libraryViewController = LibraryViewController.instantiate()

}
The library coordinator exposes the library view controller to other objects through its rootViewController property. The rootViewController property is of type UIViewController and it returns a reference to the LibraryViewController instance.
import UIKit

class LibraryCoordinator: Coordinator {

    // MARK: - Properties

    var rootViewController: UIViewController {
        return libraryViewController
    }

    // MARK: -

    private let libraryViewController = LibraryViewController.instantiate()

}
The last step is populating the tab bar controller. Open AppCoordinator.swift and navigate to the tabBarController property. We initialize instances of the FeedCoordinator and LibraryCoordinator classes. We pass the root view controllers of the feed and library coordinators to the tab bar controller by updating its viewControllers property. The application coordinator keeps a reference to the child coordinators by adding them to the array of child coordinators.
private lazy var tabBarController: UITabBarController = {
    // Initialize Tab Bar Controller
    let tabBarController = UITabBarController()

    // Initialize Child Coordinators
    let feedCoordinator = FeedCoordinator()
    let libraryCoordinator = LibraryCoordinator()

    // Update View Controllers
    tabBarController.viewControllers = [
        feedCoordinator.rootViewController,
        libraryCoordinator.rootViewController
    ]

    // Append to Child Coordinators
    childCoordinators.append(feedCoordinator)
    childCoordinators.append(libraryCoordinator)

    return tabBarController
}()
Each child coordinator needs to be started. In the start() method, we iterate through the array of child coordinators and invoke the start() method on each child coordinator.
// MARK: - Overrides

override func start() {
    // Set Child View Controller
    rootViewController.childViewController = tabBarController

    // Start Child Coordinators
    childCoordinators.forEach { (childCoordinator) in
        // Start Child Coordinator
        childCoordinator.start()
    }
}
Build and run the application to see the result. The application shows a tab bar controller with two tabs, feed and library. The application hasn't changed functionally, but we have successfully adopted the coordinator pattern. We now have a foundation that is easy to build upon.
What's Next?
View controller containment is compatible with the coordinator pattern as long as you keep the requirements of the coordinator pattern in mind. A view controller should never be responsible for the instantiation of another view controller. The tab bar controller is created by the application coordinator and given to the root view controller. The root view controller manages the tab bar controller.