Even though Xcode makes it simple to set up a project, there's more to it than choosing a template and clicking a few buttons. The workflow I use to set up a new project is straightforward and easy to follow. In this episode, I show you what it looks like.
Setting Up the Project
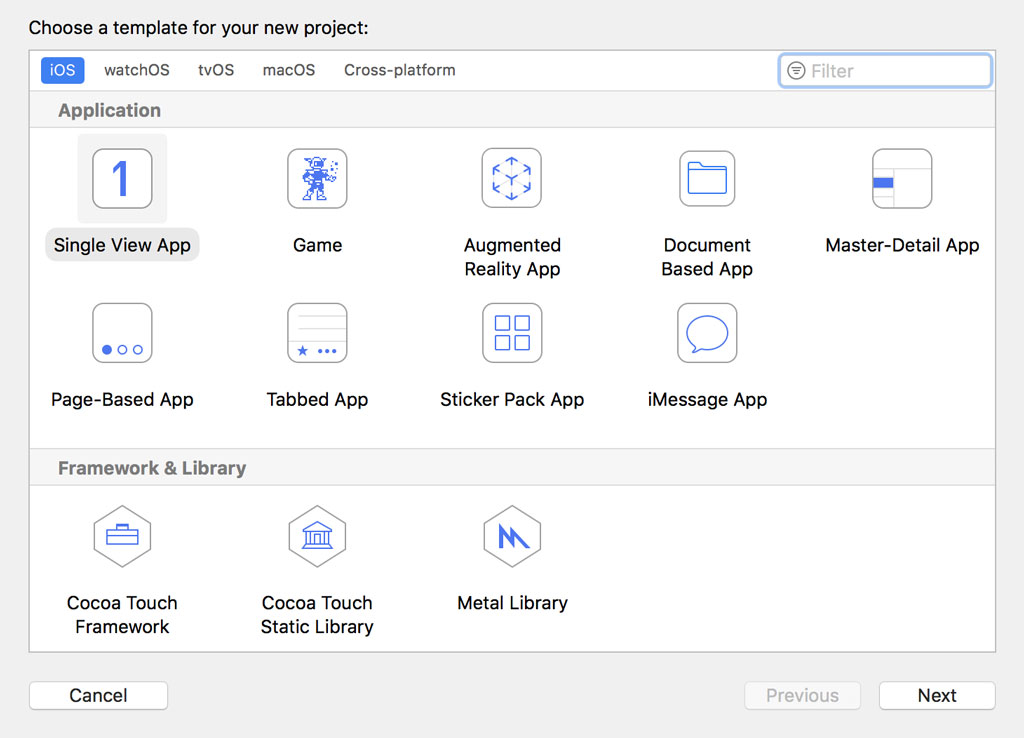
Fire up Xcode and create a new project by choosing the Single View App template from the iOS > Application section. I always start with the simplest possible template.
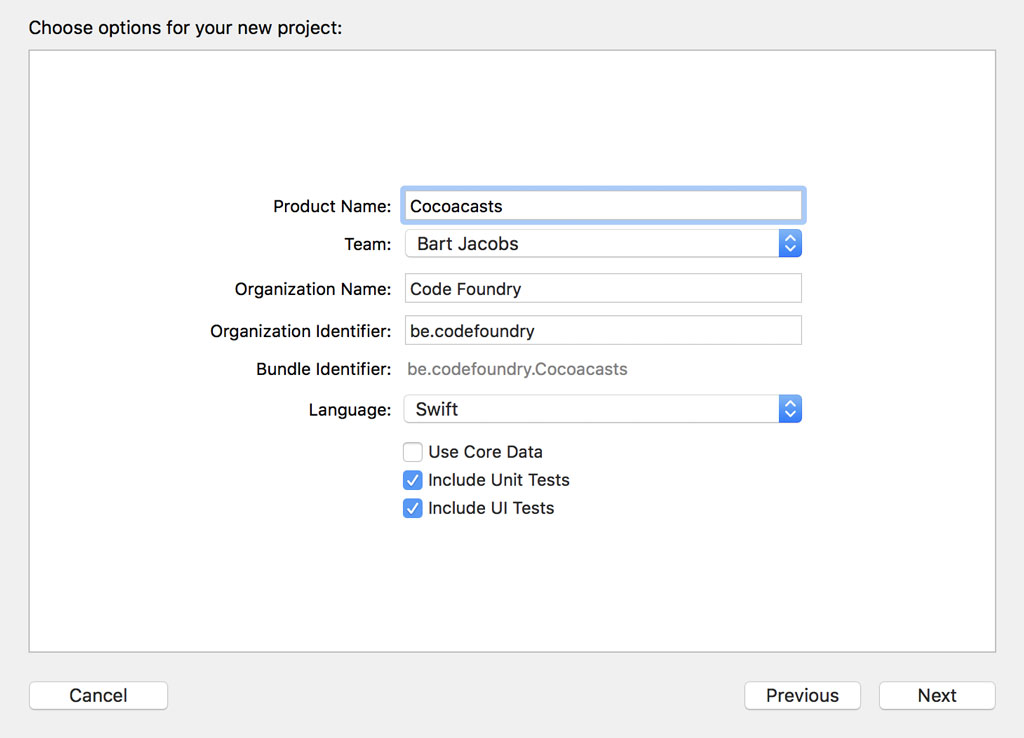
Name the project, select a team, and set the organization name and organization identifier. At the bottom, check the checkboxes labeled Include Unit Tests and Include UI Tests. Choose a location to save the project and click Create.
Updating the Project Structure
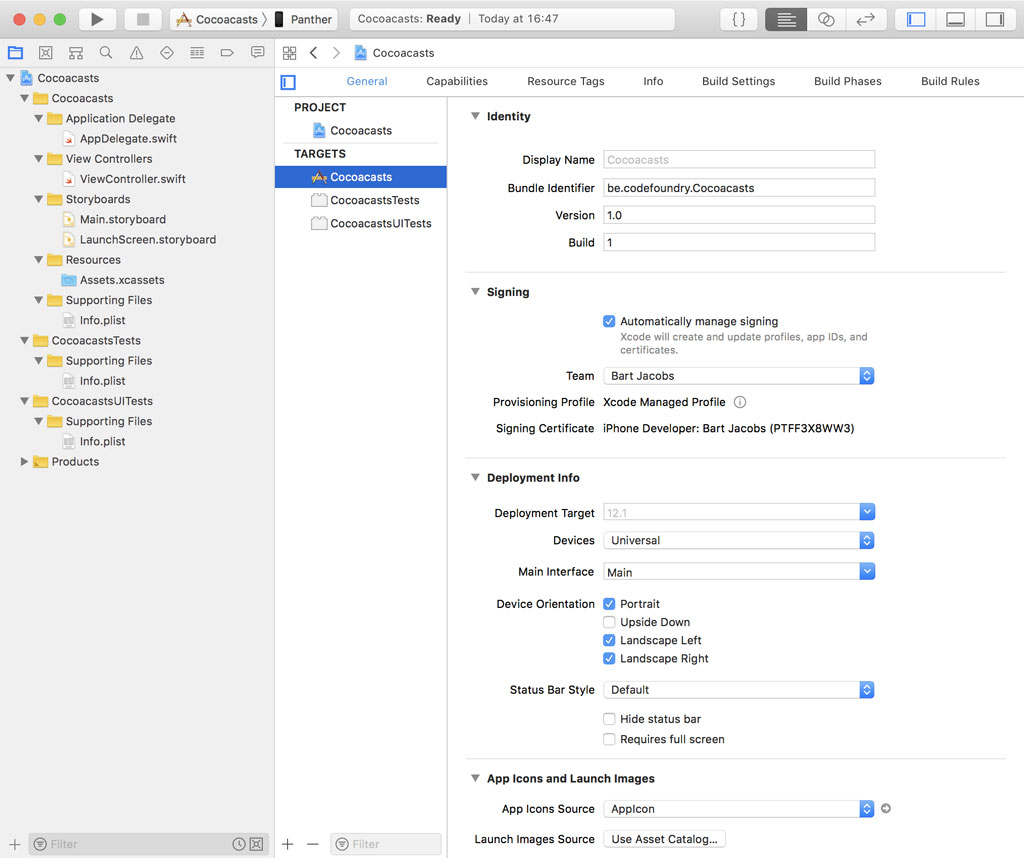
Before we continue, we add a bit of structure to the project. We create a handful of groups to organize the files of the project. We also remove the Swift files of the test targets. We won't be needing them.

Because we moved the Info.plist file into the Supporting Files group, we need to inform Xcode about its new location.
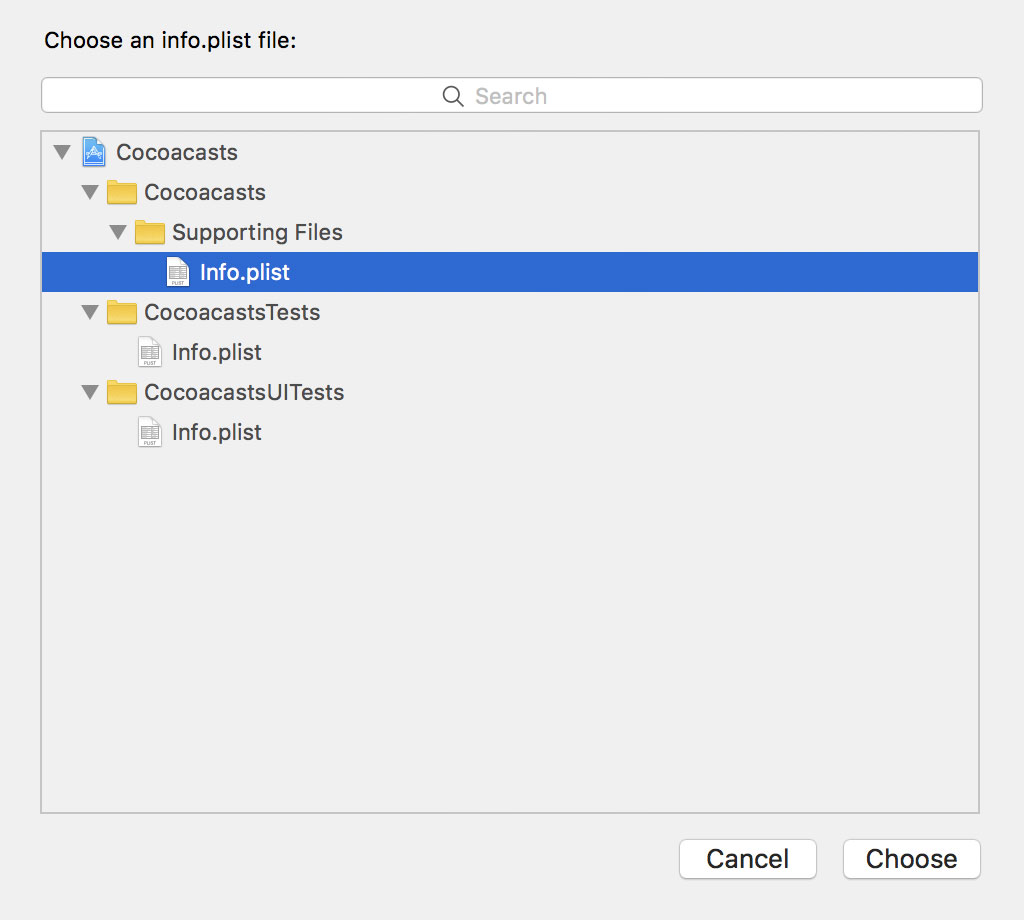
We also move the Info.plist file of each test target to a group named Supporting Files. I'm sure you agree that the project we end up with looks and feels more organized.
Managing Dependencies With Bundler
Every project I work on has a few third party dependencies and I manage those dependencies with CocoaPods. CocoaPods has been around for many years and it has saved me countless hours. A good alternative is Carthage.
Another popular tool I use is fastlane. The strength and focus of fastlane is automation. It helps developers automate a wide range of tasks, including deployment and code signing.
CocoaPods and fastlane are distributed as Ruby gems. The designated tool for managing the Ruby gems of a project is Bundler. CocoaPods was inspired by Bundler and there are a number of striking similarities. If you're familiar with CocoaPods, then using Bundler won't be difficult.
Make sure you have Ruby installed on your development machine. Like CocoaPods, we need to define the dependencies of the project in a file. For Bundler, that file is named Gemfile. Navigate to the root of the project and create a file with name Gemfile. Open the file in a text editor.
We define the source at the top, RubyGems in this example. RubyGems is a service for hosting Ruby libraries. Defining a source in a Gemfile is similar to how sources are defined in a Podfile if you use CocoaPods to manage dependencies.
source 'https://rubygems.org'
The next step is listing the dependencies of the project. For this project, that means CocoaPods and fastlane. It's up to you to decide which version fits your needs. I usually pick the latest version for new projects.
source 'https://rubygems.org'

gem 'cocoapods', '~> 1.6.1'
gem 'fastlane', '~> 2.117.1'
Installing the dependencies specified in the Gemfile is similar to installing dependencies with CocoaPods. Run bundle install to install the dependencies. Running bundle update updates the dependencies listed in the Gemfile. Bundler inspects the contents of the Gemfile and decides whether it's appropriate to update any of the project's dependencies.
bundle install
There's one important detail that is often overlooked. If you use a Gemfile, then you need to prefix commands with bundle exec if those commands are executed by any of the dependencies specified in the project's Gemfile. Why is that?
It's possible that you have multiple versions of CocoaPods or fastlane installed on your machine. This is fine, but it might result in problems if you're not careful. If you run a command without prefixing it with bundle exec, then the latest version of the dependency that is installed on your machine is used. The version that is used to execute the command may not be the version that you specified in the project's Gemfile. By prefixing a command with bundle exec, you can be sure that the command is executed using the version specified in the project's Gemfile.
I already mentioned that Bundler and CocoaPods have quite a bit in common. Run the ls command to list the files and folders in the current working directory. By running bundle install, Bundler has created a file named Gemfile.lock. This file is very similar to Podfile.lock, which is created and managed by CocoaPods. In Gemfile.lock, Bundler lists the dependencies that were installed, including the version of each dependency. CocoaPods uses the same strategy for managing the dependencies listed in the project's Podfile.
Setting Up CocoaPods
Because I plan to use several third party dependencies to create the client for Cocoacasts, the next step is setting up CocoaPods. This is easy. Open a terminal and navigate to the root of the project. Execute the pod init command to create a Podfile. Don't forget to prefix the command with bundle exec. Open the project's Podfile in a text editor.
# Uncomment the next line to define a global platform for your project
# platform :ios, '9.0'

target 'Cocoacasts' do
  # Comment the next line if you're not using Swift and don't want to use dynamic frameworks
  use_frameworks!

  # Pods for Cocoacasts

  target 'CocoacastsTests' do
    inherit! :search_paths
    # Pods for testing
  end

  target 'CocoacastsUITests' do
    inherit! :search_paths
    # Pods for testing
  end

end
We need to make a few changes. Remove the comments and set the deployment target for the Cocoacasts target to iOS 12.0. The application targets developers, which means it's fine to set an aggressive deployment target.
target 'Cocoacasts' do
  platform :ios, '12.0'
  use_frameworks!

  target 'CocoacastsTests' do
    inherit! :search_paths
  end

  target 'CocoacastsUITests' do
    inherit! :search_paths
  end
end
There are a few dependencies I use in almost every project. These include ReachabilitySwift, KeychainAccess, and Reveal-SDK. I also plan to use RxSwift and RxCocoa later.
target 'Cocoacasts' do
  platform :ios, '12.0'
  use_frameworks!

  # Wrappers
  pod 'KeychainAccess', '~> 3.1.2'
  pod 'ReachabilitySwift', '~> 4.3.0'

  # Development
  pod 'Reveal-SDK', configurations: ['Debug']

  target 'CocoacastsTests' do
    inherit! :search_paths
  end

  target 'CocoacastsUITests' do
    inherit! :search_paths
  end
end
Notice that Reveal-SDK is only included on the Debug build configuration. You should never ship an application that includes the Reveal SDK.
# Development
pod 'Reveal-SDK', :configurations => ['Debug']
Run the pod install command to install the project's dependencies.
bundle exec pod install
Adding a README.md
Adding a README.md to the project is useful for several reasons. It should at a minimum include information about the project and the steps that are required to set up the project on a new machine. Installation instructions are particularly useful if you're working in a team. Clear instructions make it straightforward for new team members to get up to speed.
You can also include other information, such as the dependencies of the project and license information. I also recommend including the steps that are required to run the test suite and deploy the project, especially if you take advantage of fastlane.
A README.md is absolutely essential for open source projects, but that's something I won't cover in this series.
Putting the Project Under Source Control
The project is ready to be put under source control. Because I use Git, the first step is adding a .gitignore file. The template I have been using for several years works fine for my needs. Create a file at the root of the project and name it .gitignore. Open the file in a text editor. This is the .gitignore file I use for every Cocoa project.
#########################
# .gitignore file for Xcode4 / OS X Source projects
#
# NB: if you are storing "built" products, this WILL NOT WORK,
#   and you should use a different .gitignore (or none at all)
# This file is for SOURCE projects, where there are many extra
#   files that we want to exclude
#
# For updates, see: http://stackoverflow.com/questions/49478/git-ignore-file-for-xcode-projects
#########################

#####
# OS X temporary files that should never be committed

.DS_Store
*.swp
profile


####
# Xcode temporary files that should never be committed
#
# NB: NIB/XIB files still exist even on Storyboard projects, so we want this...

*~.nib


####
# Xcode build files -
#
# NB: slash on the end, so we only remove the FOLDER, not any files that were badly named "DerivedData"

DerivedData/

# NB: slash on the end, so we only remove the FOLDER, not any files that were badly named "build"

build/


#####
# Xcode private settings (window sizes, bookmarks, breakpoints, custom executables, smart groups)
#
# This is complicated:
#
# SOMETIMES you need to put this file in version control.
# Apple designed it poorly - if you use "custom executables", they are
#  saved in this file.
# 99% of projects do NOT use those, so they do NOT want to version control this file.
#  ..but if you're in the 1%, comment out the line "*.pbxuser"

*.pbxuser
*.mode1v3
*.mode2v3
*.perspectivev3
#    NB: also, whitelist the default ones, some projects need to use these
!default.pbxuser
!default.mode1v3
!default.mode2v3
!default.perspectivev3


####
# Xcode 4 - semi-personal settings, often included in workspaces
#
# You can safely ignore the xcuserdata files - but do NOT ignore the files next to them
#

xcuserdata

####
# XCode 4 workspaces - more detailed
#
# Workspaces are important! They are a core feature of Xcode - don't exclude them :)
#
# Workspace layout is quite spammy. For reference:
#
# (root)/
#   (project-name).xcodeproj/
#     project.pbxproj
#     project.xcworkspace/
#       contents.xcworkspacedata
#       xcuserdata/
#         (your name)/xcuserdatad/
#     xcuserdata/
#       (your name)/xcuserdatad/
#
#
#
# Xcode 4 workspaces - SHARED
#
# This is UNDOCUMENTED (google: "developer.apple.com xcshareddata" - 0 results
# But if you're going to kill personal workspaces, at least keep the shared ones...
#
#
!xcshareddata

####
# XCode 4 build-schemes
#
# PRIVATE ones are stored inside xcuserdata
!xcschemes

####
# Xcode 4 - Deprecated classes
#
# Allegedly, if you manually "deprecate" your classes, they get moved here.
#
# We're using source-control, so this is a "feature" that we do not want!

*.moved-aside

# CocoaPods
/Pods
Notice that the Pods directory isn't put under source control. Because Podfile.lock and Gemfile.lock lock the exact versions of the dependencies of the project, it's essential that these files are kept under source control.
Save the changes, open a terminal, and navigate to the root of the project. Initialize an empty Git repository by executing the git init command.
git init
Add every file and folder that isn't ignored to the staging area by executing the git add . command. The period refers to the current directory, which means that the current directory and its contents are added to the staging area.
git add .
To commit the contents of the staging area, we execute the git commit command. We use the -m flag to pass a commit message to the command.
git commit -m “Project setup”
The working tree is clean at this point. You can verify this by executing the git status command.
git status
Adding a Remote
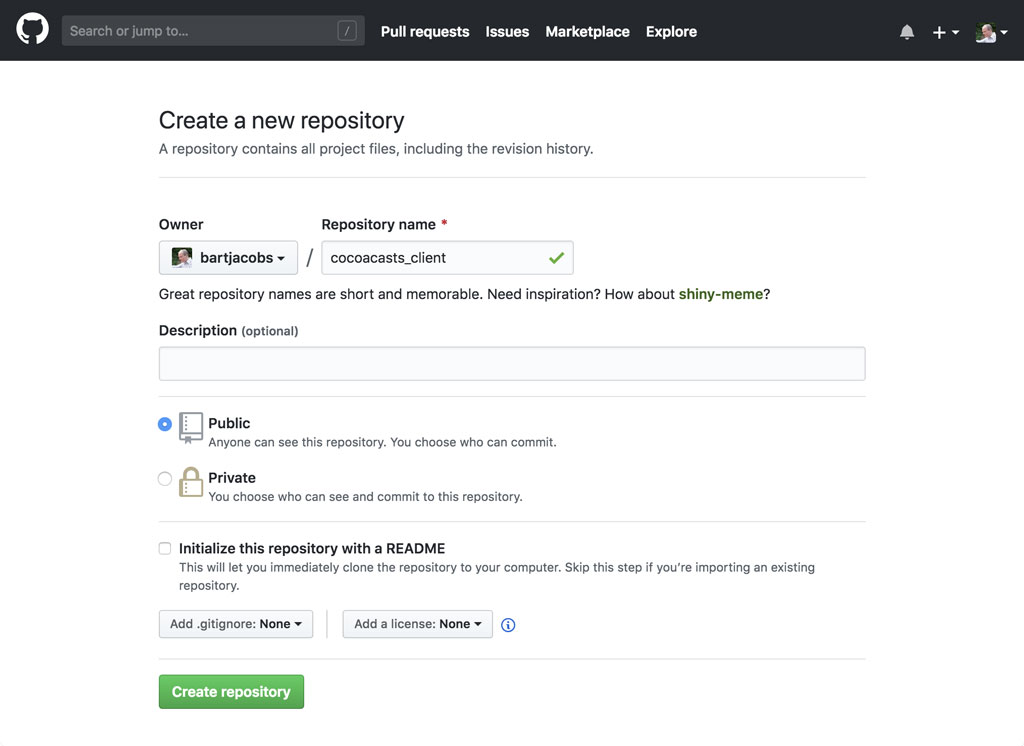
Later in this series, we make use of a continuous integration service. We lay the foundation for that integration by pushing the project to GitHub, but you can use whatever service you prefer. We first create a public repository on GitHub.
GitHub outlines the steps we need to take to push the project to GitHub. Copy the URL of the repository, open a terminal, and navigate to the root of the project.
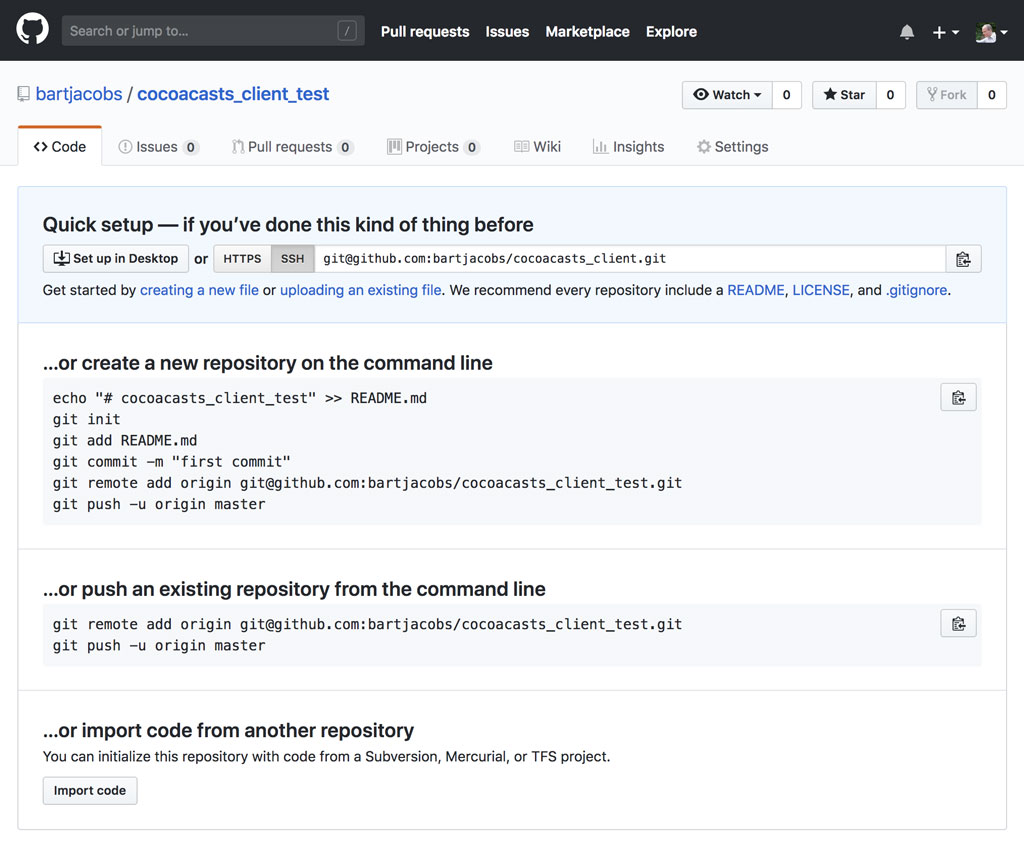
We add a remote with name origin and pass the URL of the repository as an argument.
git remote add origin git@github.com:bartjacobs/cocoacasts_client.git
To push the project to GitHub, we execute the git push command. We specify the remote, origin, and the branch that is pushed to the remote, master. The -u flag is optional, but it's a convenient option. It sets the upstream tracking branch. This means that the master branch tracks origin/master.
git push -u origin master
I use both the command line and Tower, a Git client for macOS. This is what the repository looks like in Tower.
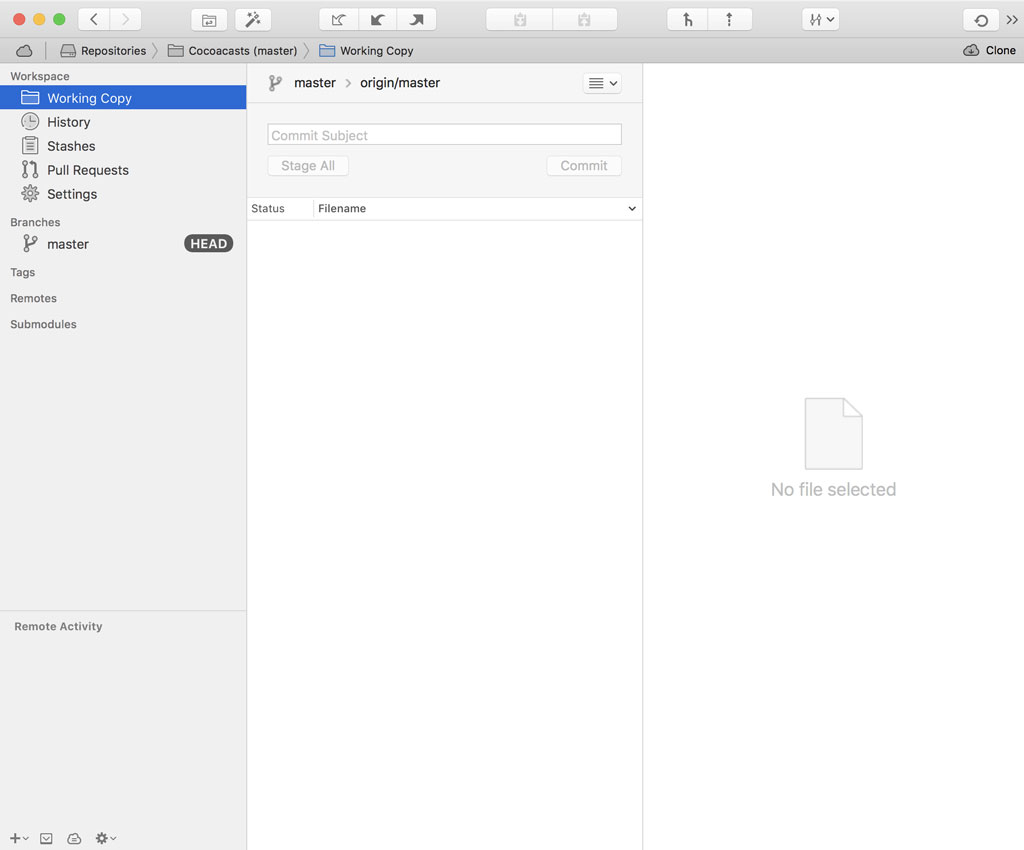
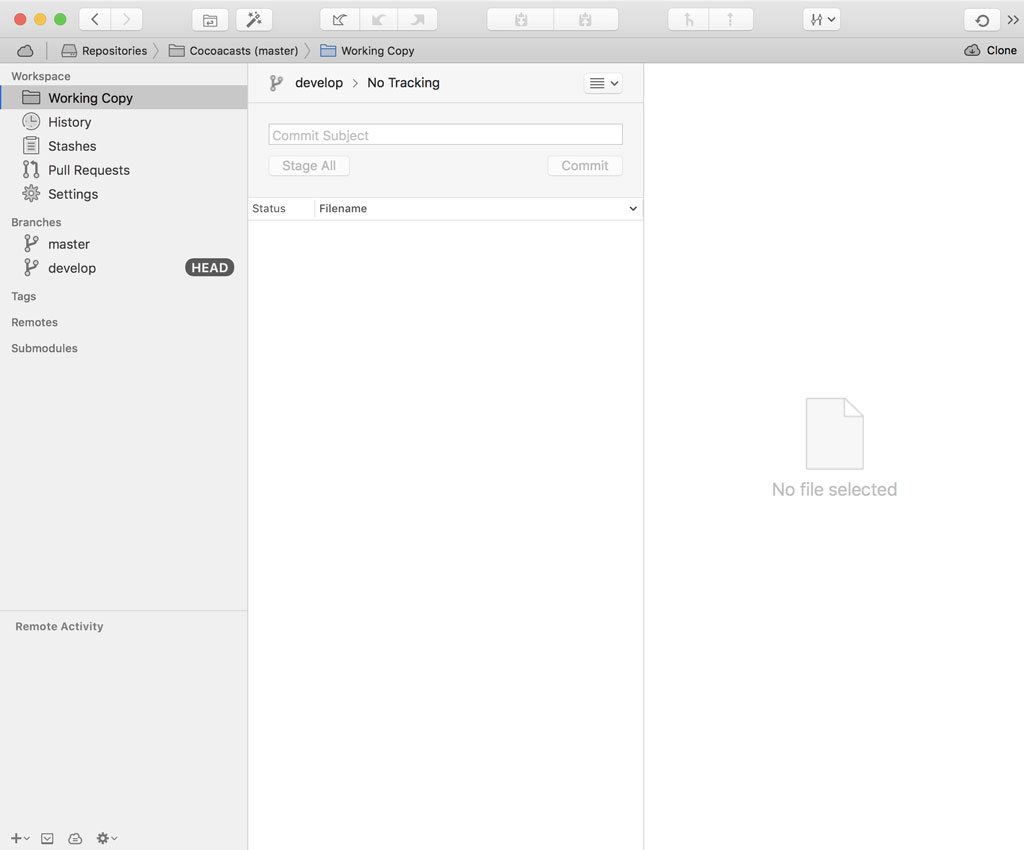
We currently only have a master branch. Let's end this episode by creating a develop branch for development. Return to the terminal and execute the git checkout command. By passing the -b flag, Git automatically creates the develop branch.
git checkout -b develop
What's Next?
Setting up a project is more than creating a new project in Xcode. We added a bit of complexity by using CocoaPods and Bundler, but the advantages outweigh the complexity this adds.
If you work in a team, then I encourage you to spend some time crafting a nice README.md. New and existing team members will thank you for it. Even for teams of one a README.md is convenient. It keeps essential information related to the project in one location.