The CoreDataManager class is in charge of the Core Data stack of the application. It encapsulates the Core Data stack and only exposes the main managed object context to the rest of the application.
In the previous episodes, we improved the Core Data stack by using a private parent managed object context and a child managed object context that operates on the main queue of the application.
We also use dependency injection to pass the managed object context to the objects that need it. That's a good start. We could make a few other improvements, but that's not the focus of this episode. This episode focuses on a brand new addition to the Core Data framework.
Persistent Container
For years, developers have created classes similar to the CoreDataManager class because the framework itself didn't provide a similar solution. That changed very recently, though. In 2016, Apple introduced the NSPersistentContainer class. This brand new member of the Core Data framework is available as of iOS 10 and macOS 10.12. It looks and behaves very similar to the CoreDataManager class we created.
You may be wondering why we didn't use the NSPersistentContainer class from the start. There's a very good reason I only tell you about the NSPersistentContainer class now. It isn't a good idea to use the NSPersistentContainer class without first understanding what it can do for you. In other words, you first need to understand how the framework operates before you should use the NSPersistentContainer class.
In this episode, we replace the CoreDataManager class with the NSPersistentContainer class. The list of changes we need to make is surprisingly small.
Replacing the Core Data Manager
The first change we need to make is replacing the coreDataManager property in the notes view controller. We replace it with the persistentContainer property. This property is of type NSPersistentContainer. The initializer, init(name:), looks very similar to that of the CoreDataManager class.
NotesViewController.swift
private var persistentContainer = NSPersistentContainer(name: "Notes")
The name we pass to the initializer is used by the NSPersistentContainer class to find the data model of the project. The NSPersistentContainer class also defines another initializer that accepts an instance of the NSManagedObjectModel class.
We also need to replace the references to the coreDataManager property in the NotesViewController class. The NSPersistentContainer class also exposes a managed object context that operates on the application's main dispatch queue. This is similar to the mainManagedObjectContext property of the CoreDataManager class.
The only difference with the CoreDataManager class is the name of the property. The main managed object context is accessible through the viewContext property. That's another change we need to make.
Navigate to the fetchedResultsController property and change self.coreDataManager.mainManagedObjectContext to self.persistentContainer.viewContext.
NotesViewController.swift
private lazy var fetchedResultsController: NSFetchedResultsController<Note> = {
    ...

    // Create Fetched Results Controller
    let fetchedResultsController = NSFetchedResultsController(fetchRequest: fetchRequest,
                                                              managedObjectContext: self.persistentContainer.viewContext,
                                                              sectionNameKeyPath: nil,
                                                              cacheName: nil)

    ...
}()
We also need to apply this change in the prepare(for:sender:) method.
NotesViewController.swift
override func prepare(for segue: UIStoryboardSegue, sender: Any?) {
    guard let identifier = segue.identifier else { return }

    switch identifier {
    case Segue.AddNote:
        ...

        // Configure Destination
        destination.managedObjectContext = persistentContainer.viewContext
    case Segue.Note:
        ...
    default:
        break
    }
}
And we repeat this change in the tableView(_:commit:forRowAt:) method of the UITableViewDataSource protocol.
NotesViewController.swift
func tableView(_ tableView: UITableView, commit editingStyle: UITableViewCellEditingStyle, forRowAt indexPath: IndexPath) {
    ...

    // Delete Note
    persistentContainer.viewContext.delete(note)
}
You can ask a persistent container for a private managed object context by invoking the newBackgroundContext() method. But we don't need that in this project.
Adding the Persistent Store
We need to make one more change. In the CoreDataManager class, we add the persistent store in the persistentStoreCoordinator property. But this operation can take some time. For example, if the application needs to perform one or more migrations, it can take a non-trivial amount of time.
If this is done on the main thread, it can block the main thread. And if this is done during the launch of the application, the operating system can even decide the application takes too long to launch and terminate the application.
That's why some applications crash when you open them after an update. The results can be dramatic. For example, the user could lose their data because of a bad migration or a corrupted persistent store.
It's also important that the application accesses the Core Data stack after successfully adding the persistent store to the persistent store coordinator.
The solution to these problems is simple. We need to add the persistent store asynchronously on a background queue. And that's an option the NSPersistentContainer class offers us. But we need to make a few changes to make this work in our project.
Setting Up the User Interface
We first define an outlet for an activity indicator view. We show the activity indicator view as long as the Core Data stack is being initialized, that is, as long as the persistent store hasn't been added to the persistent store coordinator.
NotesViewController.swift
import UIKit
import CoreData

class NotesViewController: UIViewController {

    ...

    // MARK: - Properties

    @IBOutlet var notesView: UIView!
    @IBOutlet var messageLabel: UILabel!
    @IBOutlet var tableView: UITableView!
    @IBOutlet var activityIndicatorView: UIActivityIndicatorView!

    ...

}
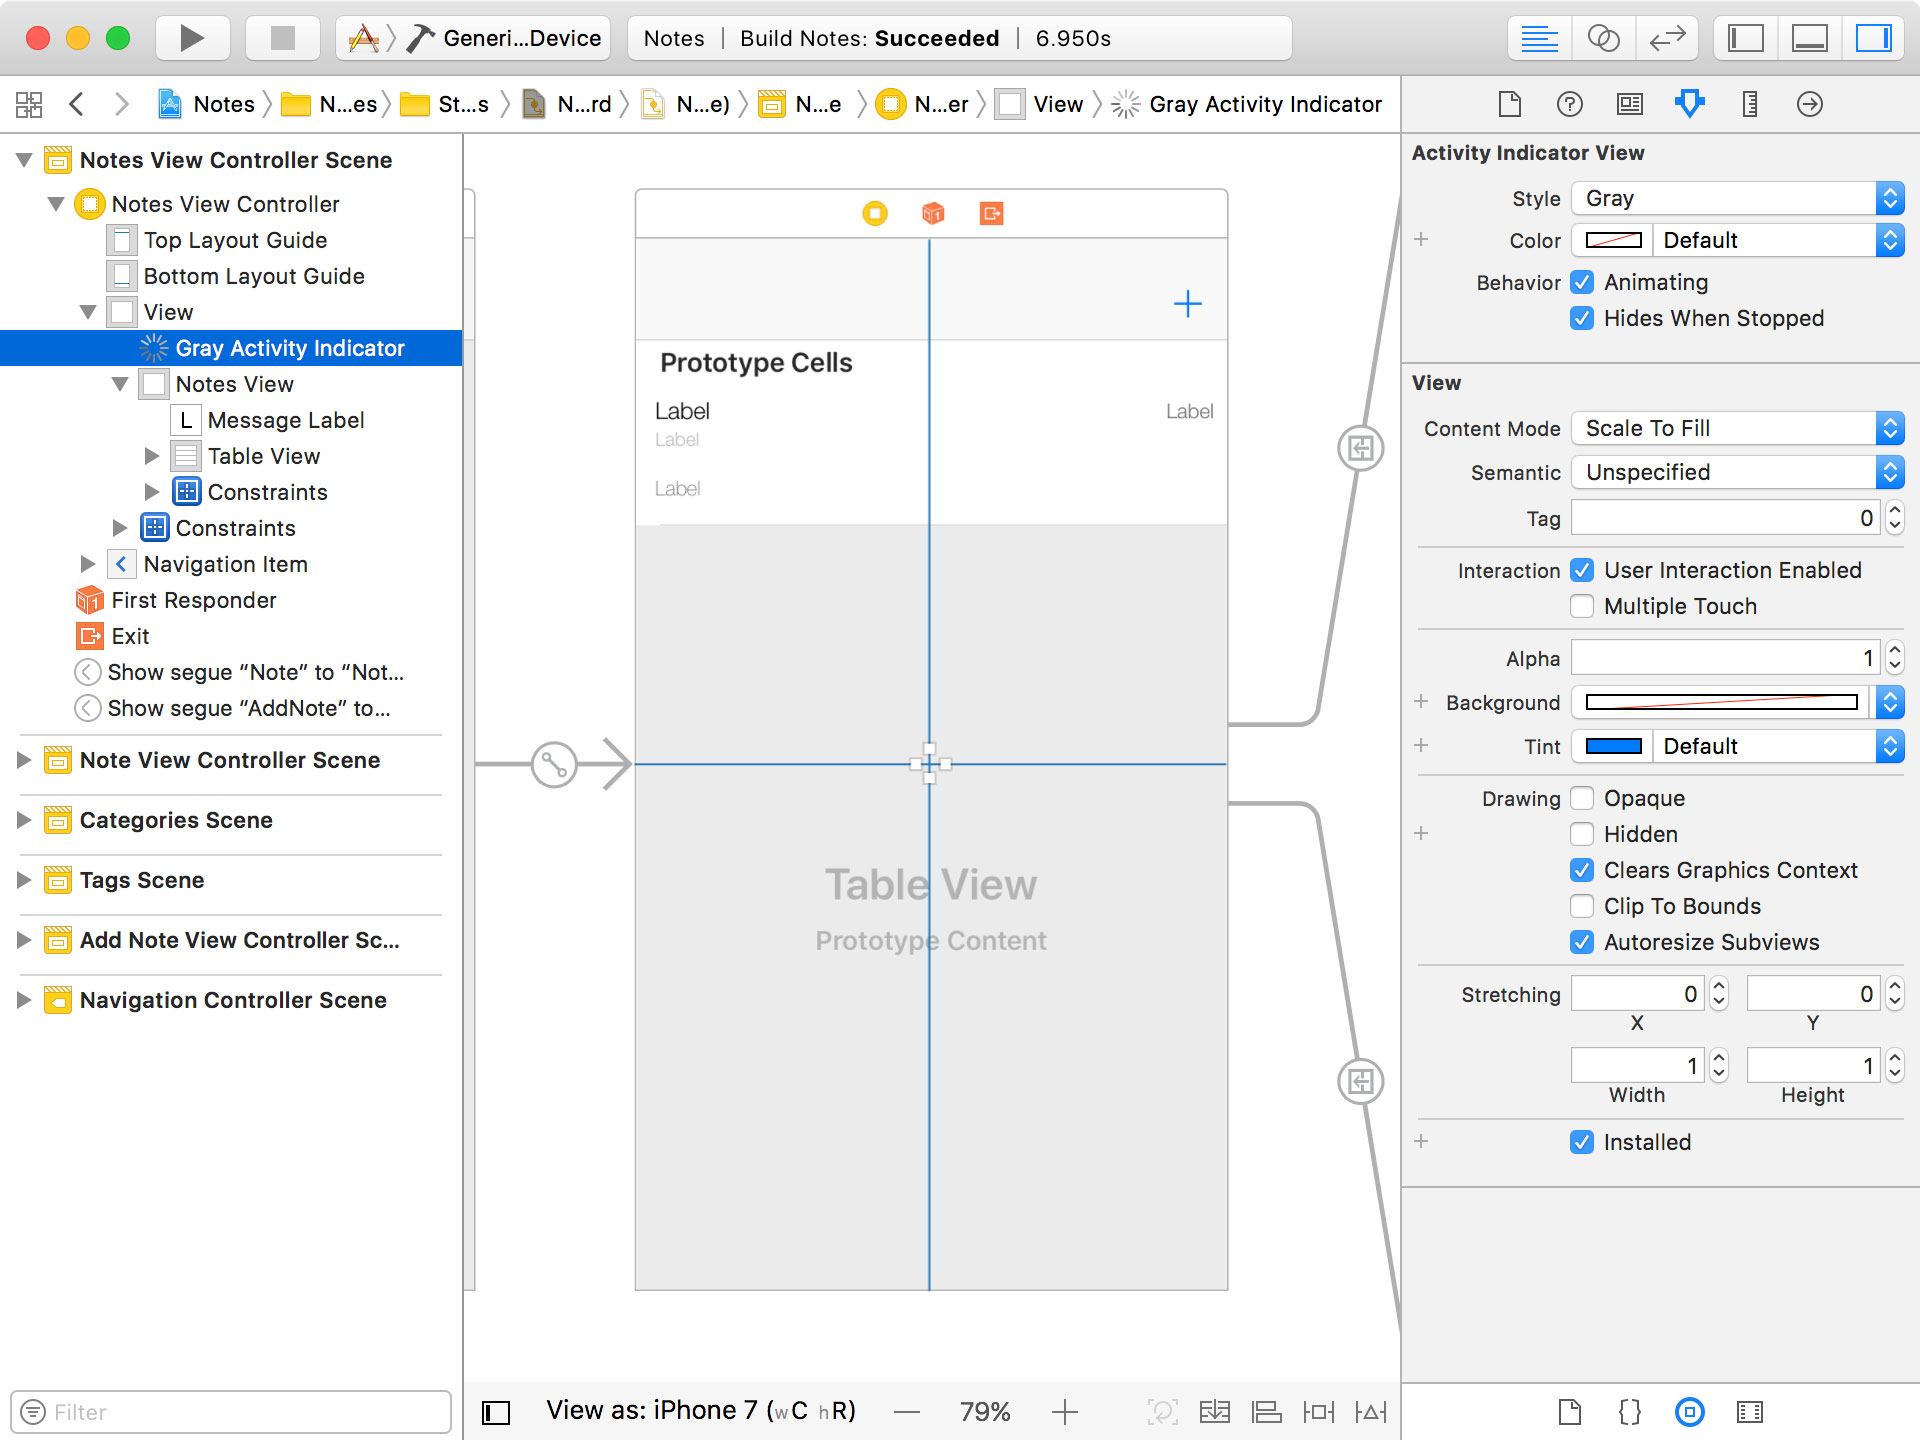
Open Notes.storyboard and add an activity indicator view to the notes view controller scene. Make sure you add it to the view of the view controller, not the notes view. Add the necessary constraints, open the Attributes Inspector on the right, and check Animating and Hides When Stopped. Don't forget to connect the activity indicator view with the outlet we declared in the NotesViewController class.
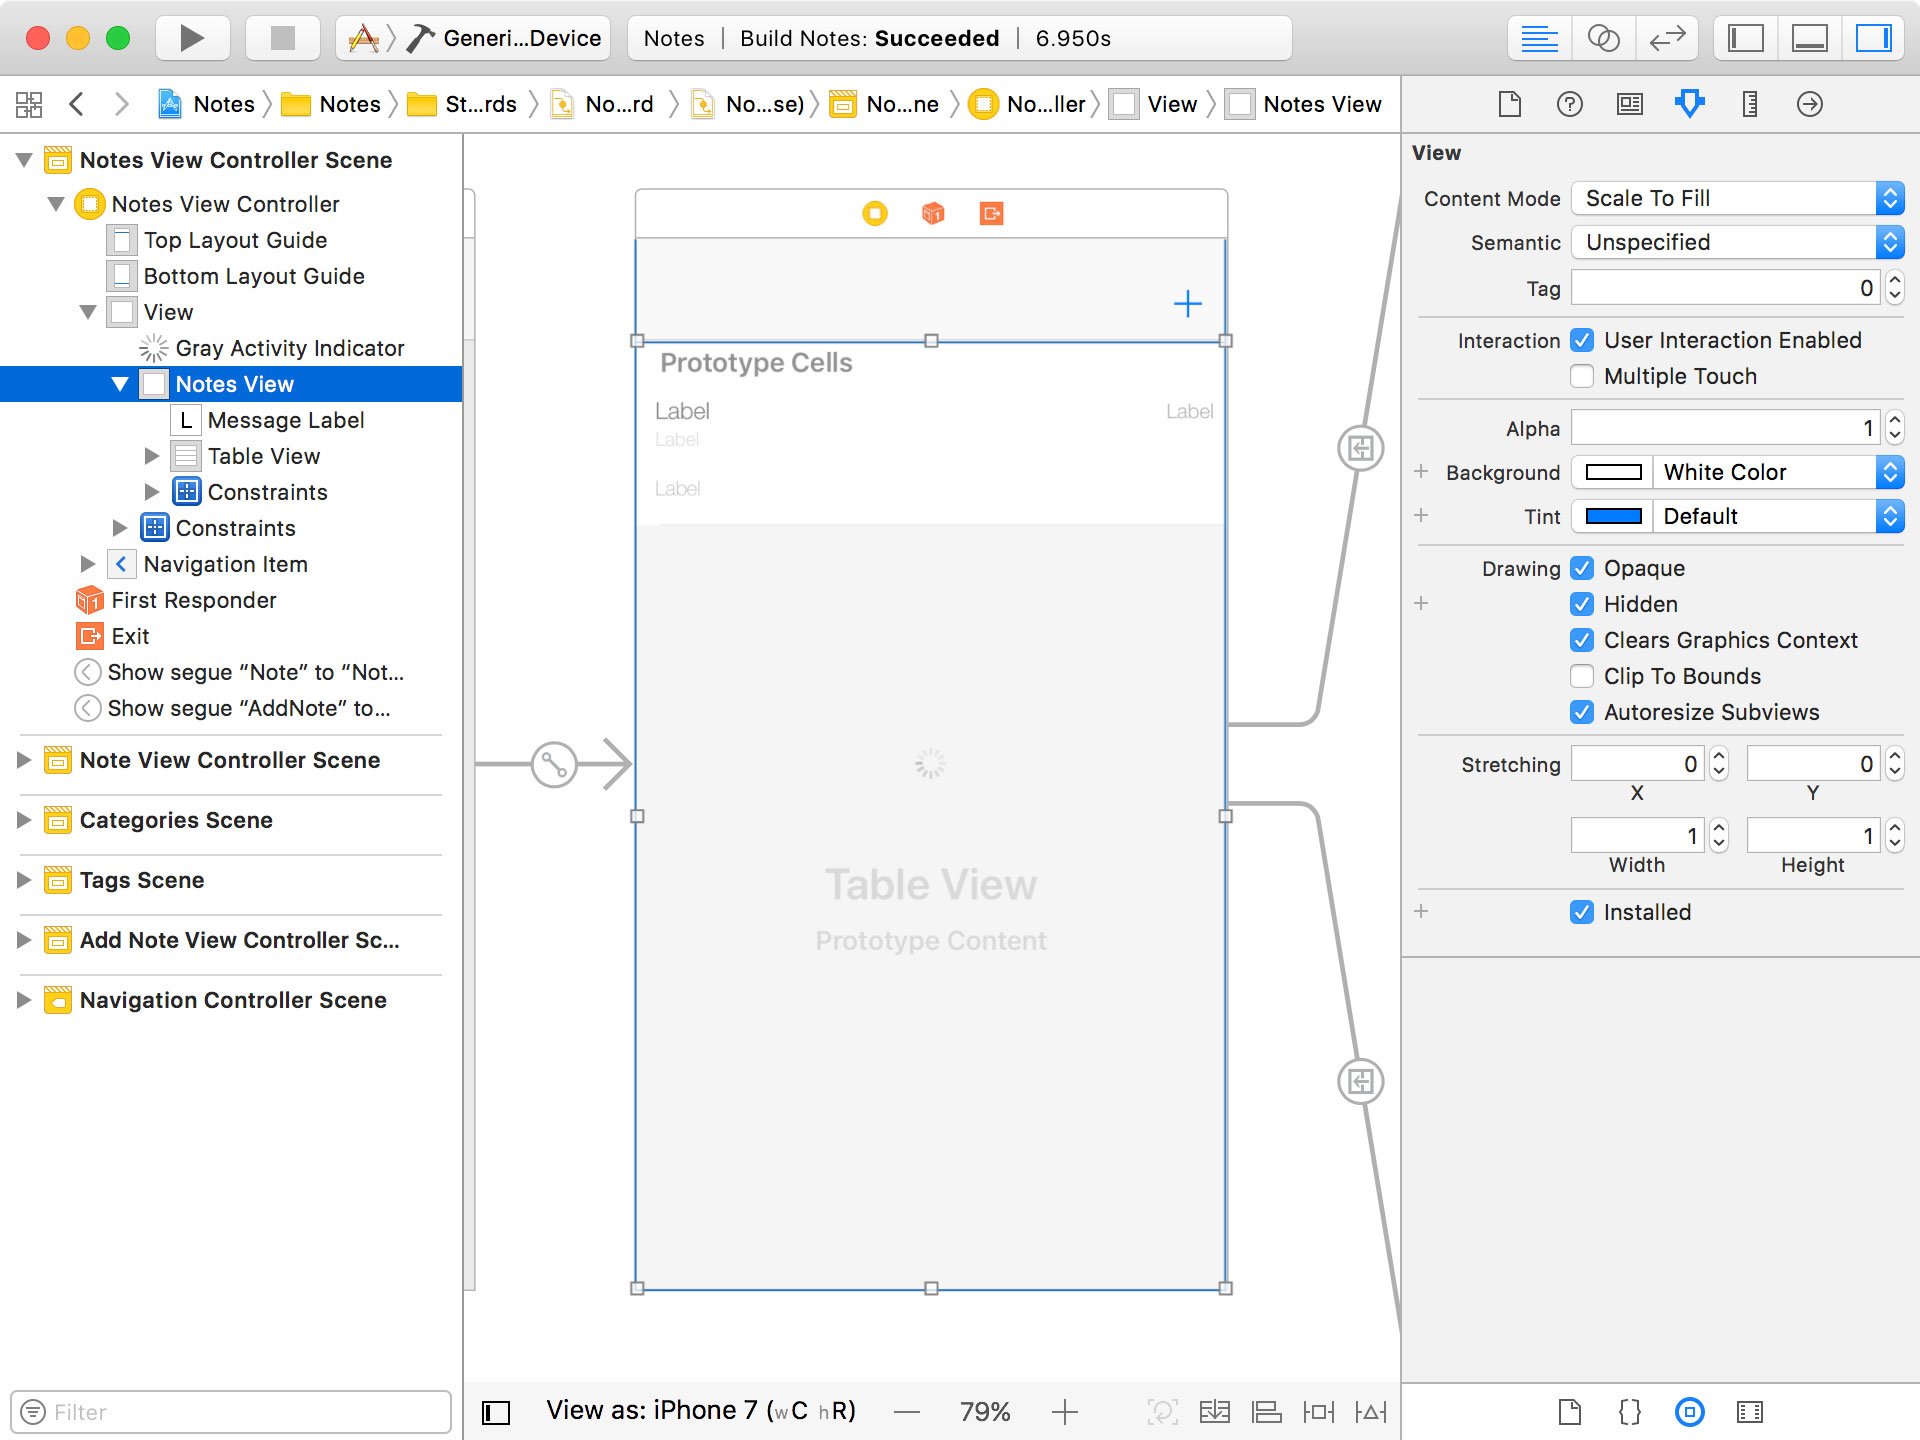
Select the notes view and check Hidden to hide it.
Adding the Persistent Store
Revisit NotesViewController.swift and navigate to viewDidLoad(). In viewDidLoad(), we add the persistent store to the persistent store coordinator by invoking loadPersistentStores(completionHandler:).
NotesViewController.swift
override func viewDidLoad() {
    super.viewDidLoad()

    title = "Notes"

    persistentContainer.loadPersistentStores { (persistentStoreDescription, error) in

    }

    setupView()
    fetchNotes()
    updateView()
}
The method defines one parameter, a completion handler. The completion handler defines two parameters, an NSPersistentStoreDescription instance and an optional error. The completion handler is invoked for every persistent store that's added to the persistent store coordinator.
But how does the persistent container know which persistent stores to add? By setting the persistentStoreDescriptions property of the persistent container you can specify which persistent stores to add. This property is of type [NSPersistentStoreDescription], an array of NSPersistentStoreDescription instances.
An NSPersistentStoreDescription object encapsulates the information needed to create a persistent store. It contains information such as the location of the persistent store, the type, and the migration strategy.
If you don't explicitly set the persistentStoreDescriptions property, the persistent container tries to find or create a persistent store based on the name of the persistent container and a set of sensible defaults. That should work fine for this project. Remember that we initialized the persistent container with a name of Notes.
The completion handler of the loadPersistentStores(completionHandler:) method is invoked for each persistent store that's added. This is a bit unfortunate. It means the developer needs to keep track of the state of the Core Data stack. If multiple persistent stores need to be added, you have to make sure you access the Core Data stack when every persistent store is successfully added to the persistent store coordinator.
For a persistent container with one persistent store, though, the setup is simple. If adding the persistent store is successful, the user interface is shown to the user by invoking setupView(). We also invoke fetchNotes() to fetch the user's notes, and updateView(), to update the user interface. Notice that we don't explicitly dispatch the calls to setupView(), fetchNotes(), and updateView() to the main thread. The documentation states that the completion handler of loadPersistentStores(completionHandler:) is invoked on the calling thread, the main thread in this example.
NotesViewController.swift
override func viewDidLoad() {
    super.viewDidLoad()

    title = "Notes"

    persistentContainer.loadPersistentStores { (persistentStoreDescription, error) in
        if let error = error {
            print("Unable to Add Persistent Store")
            print("\(error), \(error.localizedDescription)")

        } else {
            self.setupView()
            self.fetchNotes()
            self.updateView()
        }
    }
}
We need to make a small change to the setupView() method. We stop animating the activity indicator view and we show the notes view. That's it.
NotesViewController.swift
private func setupView() {
    activityIndicatorView.stopAnimating()
    notesView.isHidden = false

    setupMessageLabel()
    setupTableView()
}
Run the application to see the result. Adding the persistent store usually takes very, very little time. This means that you won't see the activity indicator view when you launch the application because it's already hidden when the application is ready to use.
But there is one thing missing. The notes we created earlier. This is easy to explain. The default location of the persistent store when using the NSPersistentContainer class isn't the same as the location we used for the persistent store in the CoreDataManager class.
By default, the persistent container stores the persistent store in the Application Support directory of the Library directory. We can verify this by inspecting the application's container.

The old persistent store lives in the Documents directory whereas the new persistent store is located in the Application Support directory of the Library directory.
This is fine and we only run into this issue because we replaced the Core Data manager with a NSPersistentContainer instance. If you want to modify the default location of the persistent store, you need to subclass the NSPersistentContainer class and override the defaultDirectoryURL() class method.
Conclusion
It's clear the NSPersistentContainer class is a welcome addition to the Core Data framework. It fulfills the needs of many Core Data applications and it offers a modern, easy-to-use API.
As I mentioned earlier, there's one caveat. The downside is that many developers new to Core Data won't bother learning the ins and outs of the framework. As a result, they will inevitably run into problems at some point. By watching Core Data Fundamentals, you've avoided that mistake. Well done.