In this episode, we populate the week view. We build the user interface and implement the WeekViewModel struct and the WeekViewController class. Let's start with the user interface.
Building the User Interface
Open WeekViewController.swift and declare an outlet for a table view. Remember that the week view controller shows the user a weather forecast of the coming days. Each table view cell of the table view displays the weather forecast for a specific day.
import UIKit

final class WeekViewController: UIViewController {

    // MARK: - Properties

    var viewModel: WeekViewModel? {
        didSet {
            guard let viewModel = viewModel else {
                return
            }

            // Setup View Model
            setupViewModel(with: viewModel)
        }
    }

    // MARK: -

    @IBOutlet var tableView: UITableView!

    ...

}
We configure the table view in a didSet property observer. The table view should be hidden as long as there's no data to display. The view controller acts as the data source of the table view. We set the separator inset to zero to make sure it spans the width of the table view.
The height of the rows of the table view is driven by Auto Layout. For that to work, we assign a sensible value to the estimatedRowHeight property and we set the rowHeight property to UITableViewAutomaticDimension. Auto Layout takes care of the rest.
Because the table view displays a handful of table view cells, there's no need to display a vertical scroll indicator. A scroll indicator only makes sense if the table view spans dozens or hundreds of rows.
@IBOutlet var tableView: UITableView! {
    didSet {
        tableView.isHidden = true
        tableView.dataSource = self
        tableView.separatorInset = .zero
        tableView.estimatedRowHeight = 44.0
        tableView.rowHeight = UITableViewAutomaticDimension
        tableView.showsVerticalScrollIndicator = false
    }
}
We also define an outlet for an activity indicator view. We show the activity indicator view as long as there's no data to display to the user.
import UIKit

final class WeekViewController: UIViewController {

    // MARK: - Properties

    var viewModel: WeekViewModel? {
        didSet {
            guard let viewModel = viewModel else {
                return
            }

            // Setup View Model
            setupViewModel(with: viewModel)
        }
    }

    // MARK: -

    @IBOutlet var tableView: UITableView! {
        didSet {
            tableView.isHidden = true
            tableView.dataSource = self
            tableView.separatorInset = .zero
            tableView.estimatedRowHeight = 44.0
            tableView.rowHeight = UITableViewAutomaticDimension
            tableView.showsVerticalScrollIndicator = false
        }
    }

    // MARK: -

    @IBOutlet var activityIndicatorView: UIActivityIndicatorView!

    ...

}
We configure the activity indicator view in a didSet property observer. It should start animating the moment the application is launched and it should hide itself when we instruct it to stop animating.
@IBOutlet var activityIndicatorView: UIActivityIndicatorView! {
    didSet {
        activityIndicatorView.startAnimating()
        activityIndicatorView.hidesWhenStopped = true
    }
}
To keep the compiler happy, we need to conform the WeekViewController class to the UITableViewDataSource protocol. Before we take care of that task, though, we create a UITableViewCell subclass for displaying the weather conditions for a specific day.
Create a new group, Table View Cells, in the Week View Controller group. Create a UITableViewCell subclass in the Table View Cells group and name it WeekDayTableViewCell. We implement the WeekDayTableViewCell class later in this episode. For now, we define a static computed property, reuseIdentifier, of type String, that returns the reuse identifier of the table view cell.
import UIKit

class WeekDayTableViewCell: UITableViewCell {

    // MARK: - Static Properties

    static var reuseIdentifier: String {
        return String(describing: self)
    }

    // MARK: - Initialization

    override func awakeFromNib() {
        super.awakeFromNib()
    }

}
In the awakeFromNib() method, we set the table view cell's selectionStyle property to none. The user won't be able to select the table view cells of the table view.
import UIKit

class WeekDayTableViewCell: UITableViewCell {

    // MARK: - Static Properties

    static var reuseIdentifier: String {
        return String(describing: self)
    }

    // MARK: - Initialization

    override func awakeFromNib() {
        super.awakeFromNib()

        // Configure Cell
        selectionStyle = .none
    }

}
Revisit WeekViewController.swift and create an extension for the WeekViewController class. We use the extension to conform the WeekViewController class to the UITableViewDataSource protocol.
extension WeekViewController: UITableViewDataSource {

}
We implement two methods of the UITableViewDataSource protocol, tableView(_:numberOfRowsInSection:) and tableView(_:cellForRowAt:). We return 0 from tableView(_:numberOfRowsInSection:) for the time being.
extension WeekViewController: UITableViewDataSource {

    func tableView(_ tableView: UITableView, numberOfRowsInSection section: Int) -> Int {
        return 0
    }

}
In tableView(_:cellForRowAt:), we ask the table view for a table view cell with the reuse identifier of the WeekDayTableViewCell class. We configure the table view cell later in this episode. I always use a guard statement if I need to dequeue a UITableViewCell subclass. If the cast to the subclass is unsuccessful, I throw a fatal error because that should never happen. This is a convenient and elegant pattern to avoid optionals in tableView(_:cellForRowAt:).
extension WeekViewController: UITableViewDataSource {

    func tableView(_ tableView: UITableView, numberOfRowsInSection section: Int) -> Int {
        return 0
    }

    func tableView(_ tableView: UITableView, cellForRowAt indexPath: IndexPath) -> UITableViewCell {
        guard let cell = tableView.dequeueReusableCell(withIdentifier: WeekDayTableViewCell.reuseIdentifier, for: indexPath) as? WeekDayTableViewCell else {
            fatalError("Unable to Dequeue Week Day Table View Cell")
        }

        return cell
    }

}
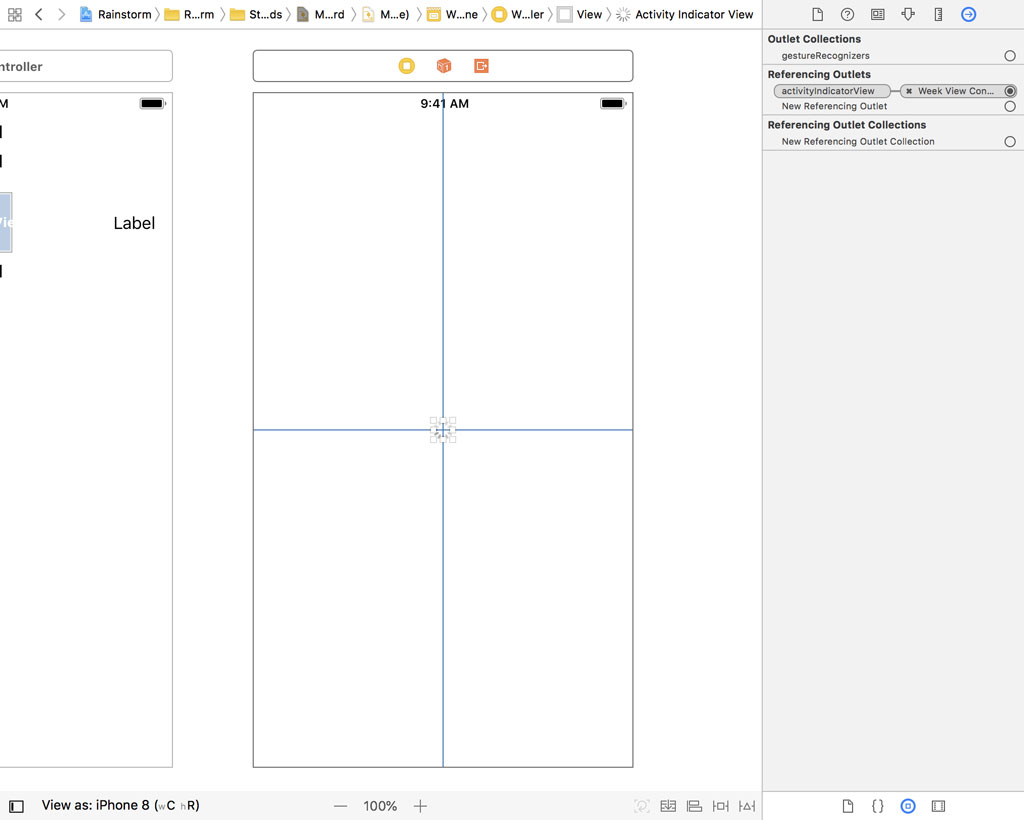
Open Main.storyboard and locate the week view controller. Add an activity indicator view to the view controller's view and center it in its superview. Connect the activity indicator view to the outlet we defined a few minutes ago.
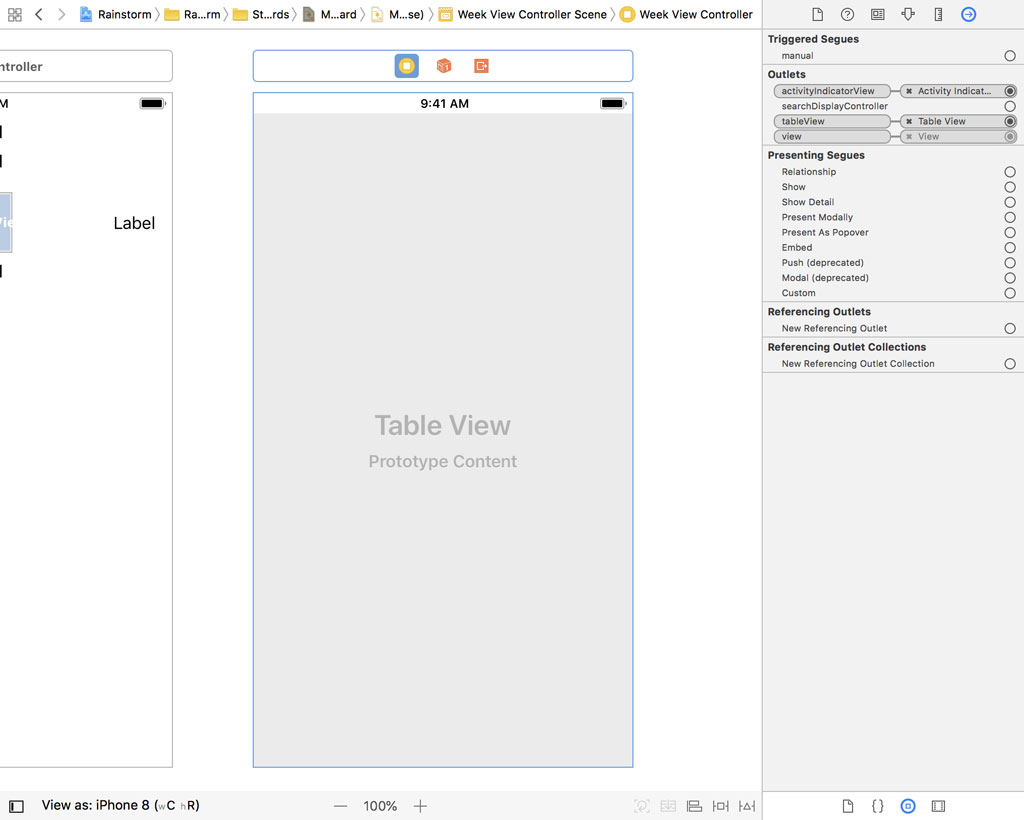
We also need to add a table view to the week view controller. Pin it to the edges of the view controller's view and don't forget to connect the table view to the tableView outlet of the WeekViewController class.
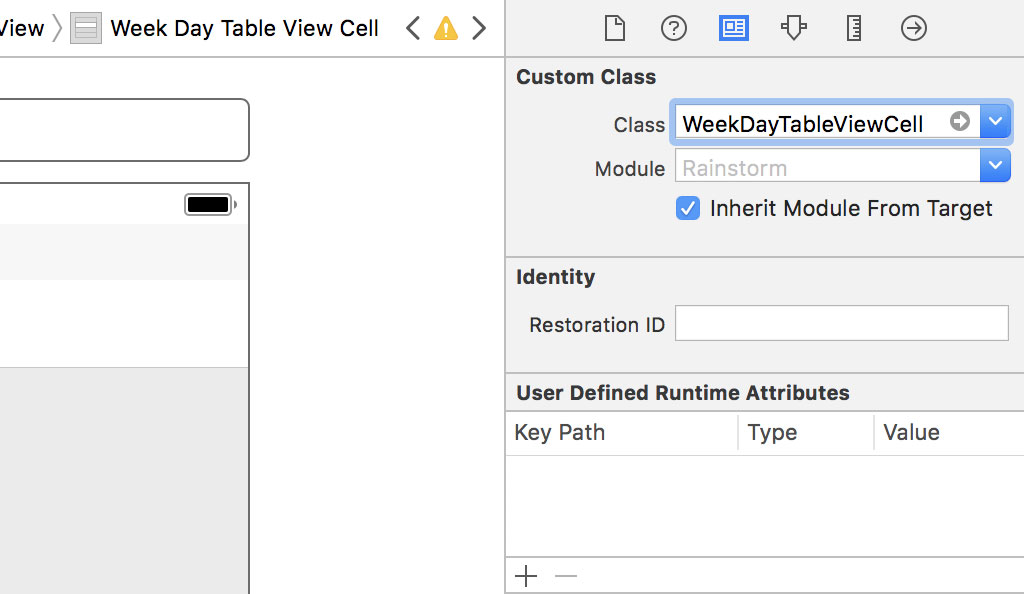
We set the number of prototype cells to 1. Select the prototype cell, open the Identity Inspector on the right, and set Class to WeekDayTableViewCell.
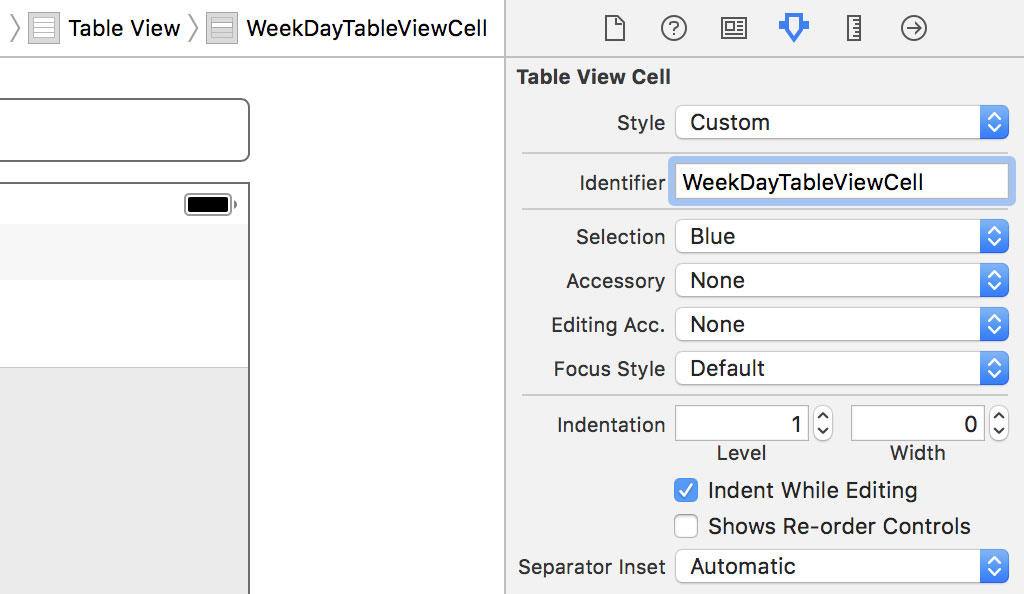
Open the Attributes Inspector and set the reuse identifier of the prototype cell to WeekDayTableViewCell.
Before we run the application, we need to update the setupViewModel(with:) method. Because this helper method is invoked when the week view controller has data to display, we hide the activity indicator view and show the table view. We also invoke reloadData() on the table view to update what it's displaying.
private func setupViewModel(with viewModel: WeekViewModel) {
    // Hide Activity Indicator View
    activityIndicatorView.stopAnimating()

    // Update Table View
    tableView.reloadData()
    tableView.isHidden = false
}
Last but not least, set the background color of the view controller's view to white in setupView().
private func setupView() {
    // Configure View
    view.backgroundColor = .white
}
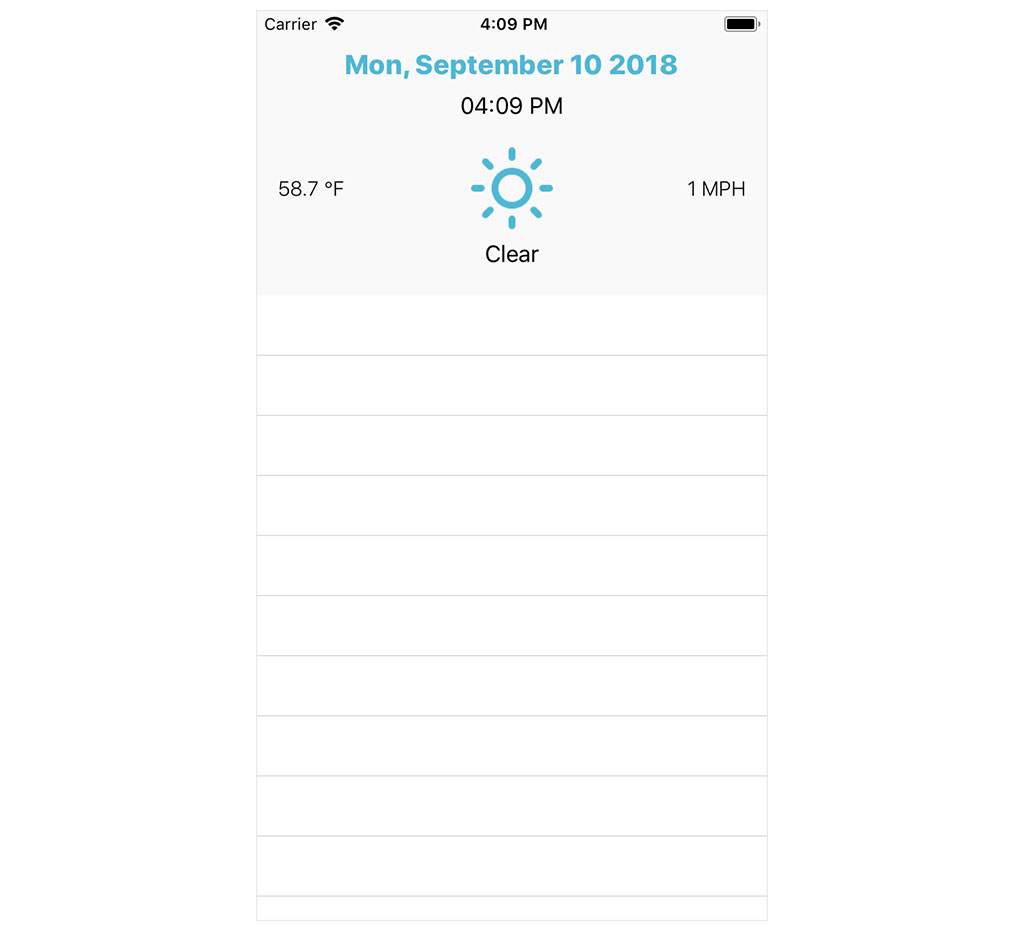
Run the application to see the result. You should see an activity indicator view when the application launches. The moment the application has fetched weather data from the Dark Sky API, the activity indicator view disappears and an empty table view is shown to the user. It's time to populate the table view with weather data.
Populating the Table View
Even though the view controller acts as the data source of the table view, remember that the view model manages the model. This isn't a problem, though. The view model of the week view controller should expose a simple interface that provides the view controller with the information it needs to populate its table view. Let's start with the number of rows in each section.
Open WeekViewModel.swift. We won't be returning the number of rows in each section. We keep it simple and return the number of days for which the week view model has weather data. The numberOfDays computed property is of type Int and it returns the number of items in the weatherData array.
import Foundation

struct WeekViewModel {

    // MARK: - Properties

    let weatherData: [ForecastWeatherConditions]

    // MARK: -

    var numberOfDays: Int {
        return weatherData.count
    }

}
With the numberOfDays computed property in place, we can update the implementation of the UITableViewDataSource protocol in WeekViewController.swift. If the viewModel property doesn't have a value, we return 0.
extension WeekViewController: UITableViewDataSource {

    func tableView(_ tableView: UITableView, numberOfRowsInSection section: Int) -> Int {
        return viewModel?.numberOfDays ?? 0
    }

    func tableView(_ tableView: UITableView, cellForRowAt indexPath: IndexPath) -> UITableViewCell {
        guard let cell = tableView.dequeueReusableCell(withIdentifier: WeekDayTableViewCell.reuseIdentifier, for: indexPath) as? WeekDayTableViewCell else {
            fatalError("Unable to Dequeue Week Day Table View Cell")
        }

        return cell
    }

}
Let's switch gears and focus on the user interface of the WeekDayTableViewCell class. Open WeekDayTableViewCell.swift. A WeekDayTableViewCell instance should display the day of the week, the date, the minimum and maximum temperature, the wind speed, and an icon that visualizes the weather conditions for that day.
We start by creating an outlet for each user interface element. We use didSet property observers to configure the labels and the image view. The styles we defined earlier in this series help us to keep the user interface consistent and they also avoid the need for object literals.
import UIKit

class WeekDayTableViewCell: UITableViewCell {

    // MARK: - Static Properties

    static var reuseIdentifier: String {
        return String(describing: self)
    }

    // MARK: - Properties

    @IBOutlet var dayLabel: UILabel! {
        didSet {
            dayLabel.textColor = UIColor.Rainstorm.baseTextColor
            dayLabel.font = UIFont.Rainstorm.heavyLarge
        }
    }

    @IBOutlet var dateLabel: UILabel! {
        didSet {
            dateLabel.textColor = .black
            dateLabel.font = UIFont.Rainstorm.lightRegular
        }
    }

    @IBOutlet var windSpeedLabel: UILabel! {
        didSet {
            windSpeedLabel.textColor = .black
            windSpeedLabel.font = UIFont.Rainstorm.lightSmall
        }
    }

    @IBOutlet var temperatureLabel: UILabel! {
        didSet {
            temperatureLabel.textColor = .black
            temperatureLabel.font = UIFont.Rainstorm.lightSmall
        }
    }

    @IBOutlet var iconImageView: UIImageView! {
        didSet {
            iconImageView.contentMode = .scaleAspectFit
            iconImageView.tintColor = UIColor.Rainstorm.baseTintColor
        }
    }

    // MARK: - Initialization

    override func awakeFromNib() {
        super.awakeFromNib()

        // Configure Cell
        selectionStyle = .none
    }

}
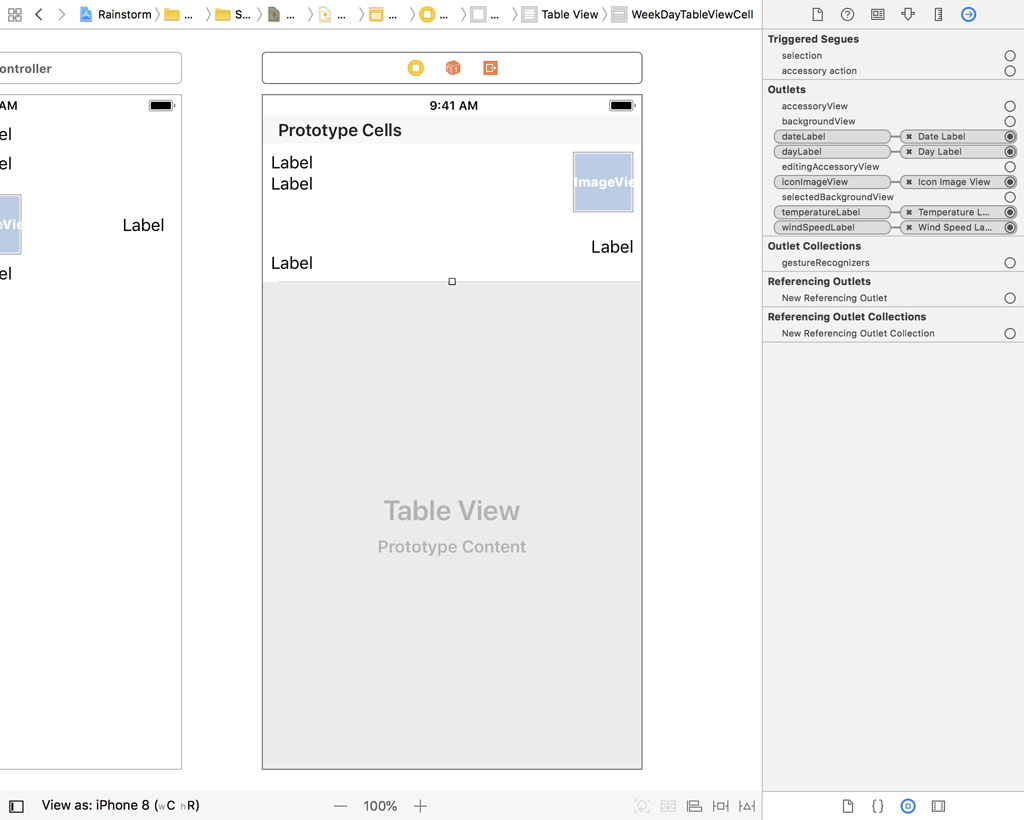
Open Main.storyboard and add four labels and an image view to the content view of the prototype cell. We add constraints to each of the user interface elements to define their size and position.
Select the prototype cell in the Document Outline on the left and connect each user interface element to its corresponding outlet in the Connections Inspector on the right.
To make it straightforward to populate a WeekDayTableViewCell instance, we create a view model for the WeekDayTableViewCell class. Add a Swift file to the View Models group and name it WeekDayViewModel.swift. Replace the import statement for Foundation with an import statement for UIKit and define a struct with name WeekDayViewModel.
import UIKit

struct WeekDayViewModel {

}
The WeekDayViewModel struct manages an object that conforms to the ForecastWeatherConditions protocol. Define a property, weatherData, of type ForecastWeatherConditions.
import UIKit

struct WeekDayViewModel {

    // MARK: - Properties

    let weatherData: ForecastWeatherConditions

}
The implementation looks similar to that of DayViewModel. We define a private, constant property, dateFormatter, of type DateFormatter.
import UIKit

struct WeekDayViewModel {

    // MARK: - Properties

    let weatherData: ForecastWeatherConditions

    // MARK: -

    private let dateFormatter = DateFormatter()

}
The interface of the WeekDayTableViewCell class shows us what the interface of the WeekDayViewModel struct should look like. We start by implementing a computed property, day, of type String to populate the day label. We set the dateFormat property of the date formatter and ask it to convert the time property of the weather data to a string.
var day: String {
    // Configure Date Formatter
    dateFormatter.dateFormat = "EEEE"

    return dateFormatter.string(from: weatherData.time)
}
Populating the date label is almost identical. The only difference is the date format of the date formatter.
var date: String {
    // Configure Date Formatter
    dateFormatter.dateFormat = "MMMM d"

    return dateFormatter.string(from: weatherData.time)
}
To populate the temperature label, we ask the weather data for the minimum and the maximum temperature. We format the values and combine the strings using string interpolation.
var temperature: String {
    let min = String(format: "%.1f °F", weatherData.temperatureMin)
    let max = String(format: "%.1f °F", weatherData.temperatureMax)

    return "\(min) - \(max)"
}
The implementations of windSpeed and image are identical to those of the DayViewModel struct.
var windSpeed: String {
    return String(format: "%.f MPH", weatherData.windSpeed)
}

var image: UIImage? {
    return UIImage.imageForIcon(with: weatherData.icon)
}
We can now use the WeekDayViewModel struct to populate a WeekDayTableViewCell instance. Open WeekDayTableViewCell.swift and define an internal method, configure(with:). It accepts an instance of the WeekDayViewModel struct as its only argument. In the body of the configure(with:) method, we use the view model to populate the table view cell.
// MARK: - Public API

func configure(with viewModel: WeekDayViewModel) {
    dayLabel.text = viewModel.day
    dateLabel.text = viewModel.date
    iconImageView.image = viewModel.image
    windSpeedLabel.text = viewModel.windSpeed
    temperatureLabel.text = viewModel.temperature
}
The WeekViewModel struct manages the array of ForecastWeatherConditions objects and it makes sense to put the WeekViewModel struct in charge of creating a WeekDayViewModel instance for each table view cell. Open WeekViewModel.swift and define a method, viewModel(for:), that accepts one argument of type Int. The method returns a WeekDayViewModel instance. The implementation is short and straightforward.
func viewModel(for index: Int) -> WeekDayViewModel {
    return WeekDayViewModel(weatherData: weatherData[index])
}
To implement the last piece of the puzzle, we need to revisit WeekViewController.swift. We need to update tableView(_:cellForRowAt:). We unwrap the value of the viewModel property using a guard statement. Because the viewModel property should never be equal to nil in tableView(_:cellForRowAt:), we throw a fatal error if it doesn't have a value.
func tableView(_ tableView: UITableView, cellForRowAt indexPath: IndexPath) -> UITableViewCell {
    guard let cell = tableView.dequeueReusableCell(withIdentifier: WeekDayTableViewCell.reuseIdentifier, for: indexPath) as? WeekDayTableViewCell else {
        fatalError("Unable to Dequeue Week Day Table View Cell")
    }

    guard let viewModel = viewModel else {
        fatalError("No View Model Present")
    }

    return cell
}
We ask the view model for a view model for the table view cell and use it to configure the table view cell.
func tableView(_ tableView: UITableView, cellForRowAt indexPath: IndexPath) -> UITableViewCell {
    guard let cell = tableView.dequeueReusableCell(withIdentifier: WeekDayTableViewCell.reuseIdentifier, for: indexPath) as? WeekDayTableViewCell else {
        fatalError("Unable to Dequeue Week Day Table View Cell")
    }

    guard let viewModel = viewModel else {
        fatalError("No View Model Present")
    }

    // Configure Cell
    cell.configure(with: viewModel.viewModel(for: indexPath.row))

    return cell
}
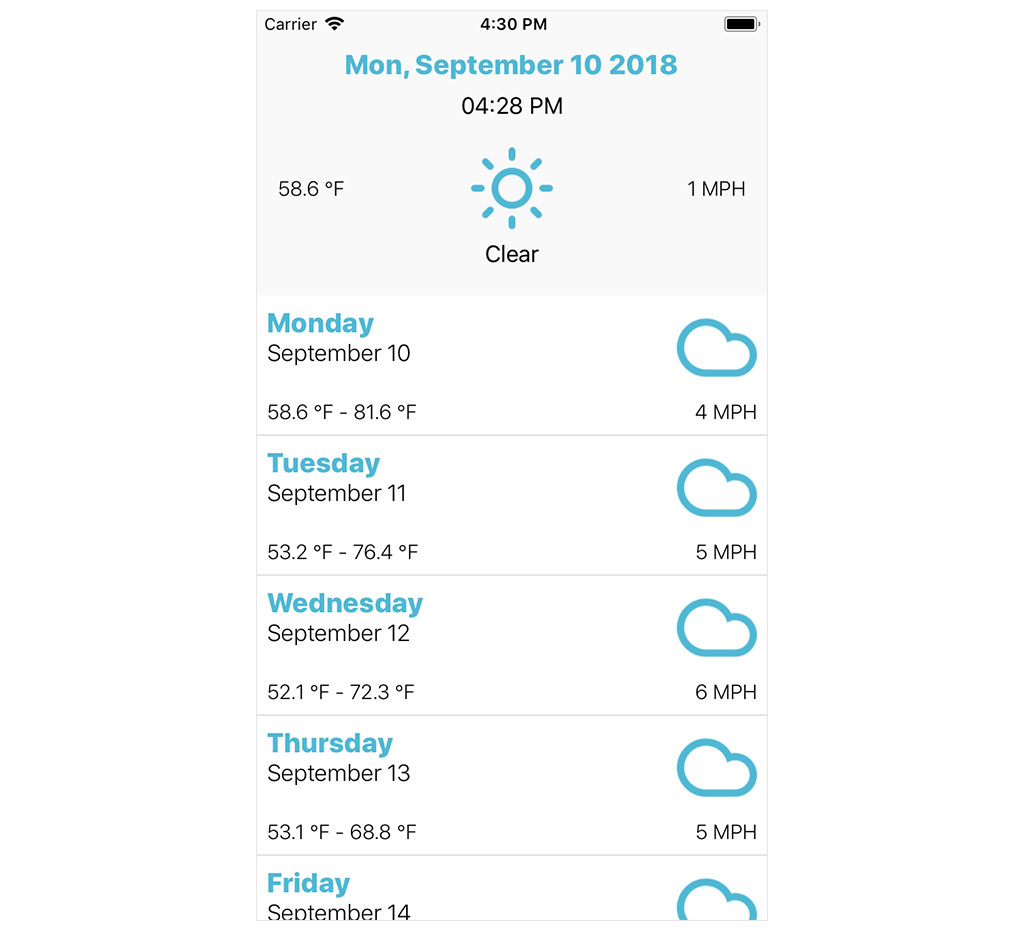
Run the application to see the result. The table view of the week view controller should be populated with weather data.
Protocol-Oriented Programming
We can make a small improvement to the implementation of the WeekDayTableViewCell class. There's no need for the WeekDayTableViewCell class to know about the WeekDayViewModel struct. It only needs an object that exposes an interface that allows it to populate its user interface. A protocol is a perfect fit in this scenario.
Create a new group, Protocols, in Week View Controller and add a Swift file. Name the file WeekDayRepresentable.swift. Add an import statement for UIKit and define a protocol with name WeekDayRepresentable.
import UIKit

protocol WeekDayRepresentable {

}
The interface of the WeekDayRepresentable protocol mimics that of the WeekDayViewModel struct.
import UIKit

protocol WeekDayRepresentable {

    var day: String { get }
    var date: String { get }
    var temperature: String { get }
    var windSpeed: String { get }
    var image: UIImage? { get }

}
To put the protocol to use, we need two more ingredients. First, we need to conform the WeekDayViewModel struct to the WeekDayRepresentable protocol. This is simple. We create an extension for the WeekDayViewModel struct in WeekDayViewModel.swift and use it to conform it to the WeekDayRepresentable protocol. We can leave the extension empty because WeekDayViewModel already conforms to the WeekDayRepresentable protocol.
import UIKit

struct WeekDayViewModel {

    ...

}

extension WeekDayViewModel: WeekDayRepresentable {

}
Second, we need to update the configure(with:) method of the WeekDayTableViewCell class. It no longer accepts an instance of the WeekDayViewModel struct. Instead, it accepts an object that conforms to the WeekDayRepresentable protocol.
func configure(with representable: WeekDayRepresentable) {
    dayLabel.text = representable.day
    dateLabel.text = representable.date
    iconImageView.image = representable.image
    windSpeedLabel.text = representable.windSpeed
    temperatureLabel.text = representable.temperature
}
That's it. The WeekDayTableViewCell class no longer knows about the WeekDayViewModel struct. The only requirement of the configure(with:) method is that the object passed to the method conforms to the WeekDayRepresentable protocol. Run the application to make sure we didn't break anything.
What's Next?
With the WeekViewModel and WeekDayViewModel structs implemented, it's time to write a few more unit tests. That's the focus of the next episode.